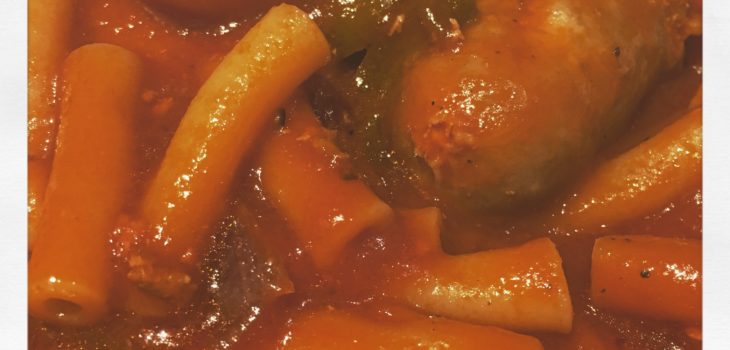
Skip to content
The Food Wife logo
  • Home
  • About
  • Blog
  • Contact
Site Search

Chinese Beef with Ginger

  • 21st April 20186th August 2018
  • by thefoodwife

Serves 2-3

One of the first things I learned to cook as a child was Sweet and Sour Chicken. Granted, it was initially a jar of Uncle Ben’s, but I soon progressed to making my own sauce from scratch with the help of my mum’s cookbooks. My mum really encouraged my cooking (after all it meant I was happy to prepare and cook for my brothers and sister!) although she wasn’t so keen on the mess I’d leave behind. Nowadays I’m a much tidier cook, helped of course by the fact I’m the one who has to clean up!

Fast forward 25 years and I appreciate something with a bit more flavour; don’t get me wrong, I still love sweet and sour, but this is punchier and sticky from the cornflour and scant sauce. I always make this with beef skirt, it’s a cheaper cut but flavoursome, and suits being cut into thin strips, but you could use a steak of your choice. I include a chilli as I like the heat, but it’s not essential, and you’ll still get a bit of fire from the ginger. I prefer dark soy sauce in this dish, for both colour and flavour, and it also helps contribute to the stickiness. The garnishes are by no means obligatory, by all means use just one or two, or even none.

Now, this beef dish is so quick to cook – once you start it in the wok it’ll be ready to serve in about five minutes, so the key is preparation. Have everything ready to go (it should only take about 10 minutes to prepare) and then follow my steps in quick succession and hey presto, dinner is ready!

  • Ingredients:
  • 2 inch piece of ginger, peeled and finely diced
  • 2 cloves of garlic, peeled and finely diced
  • 1 chilli (optional), finely diced
  • 2 medium carrots or 1 large carrot, peeled and sliced thinly on the diagonal
  • 3 spring onions sliced diagonally
  • 250g beef skirt cut into thin strips
  • 2 tbsp dark soy sauce
  • 1 tbsp rice wine vinegar
  • 1 tsp sugar
  • 1 tsp sesame oil
  • 2 tbsp oil
  • 1 heaped tbsp corn flour
  • To garnish (optional):
  • Coriander leaves
  • Sesame seeds
  • Crispy onions (I buy ones ready fried)

Step 1: Prepare all of the ingredients so you are ready to cook. Once you start it’ll be ready in about five minutes!

Step 2: Heat 2 tbsp of oil on a high heat in a wok.

Step 3: Add the meat and quickly stir to avoid it from sticking.

Step 4: Add the cornflour and stir to coat the oily beef.

Step 5: Add the garlic, ginger and chilli (if using) and stir.

Step 6: Add the spring onion and carrot and then stir.

Step 7: Add the sugar, dark soy sauce, rice wine vinegar and sesame oil, then stir so everything is coated.

Step 8: Stir fry for 2-3 minutes, by which time the meat should be cooked through and the vegetables al dente.

Serve with rice (I like to use sticky sushi rice) and add the garnishes, if you are using. I would also recommmend a few prawn crackers on the side.

Homemade Fajita Spice Mix

  • 19th April 201819th April 2018
  • by thefoodwife

Makes 1 portion

Whilst shop-bought spice mixes are convenient it is sometimes nice to make your own to create a blend to your desired taste. I like a fairly spicy fajita mix and have put this blend together, however if you like it less hot, tone down the chilli; if you like it hotter, add a bit more!

The quantities here can be scaled up as necessary, and if you make a larger batch, it can be stored in an air tight container for a few weeks.

  • Ingredients:
  • 1 tsp (chipotle) chilli flakes/chilli powder
  • 1 tsp smoked paprika
  • 1 tsp ground cumin
  • 1 tsp dried oregano
  • 1 tsp garlic powder
  • 1/4 tsp ground cinnamon
  • Pinch of ground white pepper
  • 1 tsp sugar
  • 1/2 tsp salt

Combine all the ingredients and mix thoroughly.

Korean pork belly

Asian Pork Belly and the Instant Pot

  • 7th April 20187th April 2018
  • by thefoodwife

The Instant Pot; the current culinary craze which I succumbed to in the summer. Six months later and I have only recently braved using it! I’m so pleased I have. I’ve been experimenting and have come up with two mouth-watering Asian pork belly dishes – the sort that would take at least a good hour and a half with regular interference from the cook, but I’m able to prep in five minutes, let the Instant Pot do its work for 20 minutes or so, and we’re having meltingly soft (I could cut it with a spoon!) juicy pork belly.

So, here are my two dishes; one Chinese, the other Korean. Both require pork belly cut into one-inch cubes (or thereabouts). As much as you would like although bear in mind that this fatty meat is rich. I went for about 300g for two people. Both recipes require high pressure for 20-25 minutes. I was eager to eat so did quick release however you could let it depress naturally.

The Korean recipe requires 1 tbsp gochujang paste added to the pot, then using the Instant Pot cup measure (160ml) fill it to 1/4 with half dark soy sauce and half rice wine vinegar. Add 4 tsp caster sugar and a tsp of sesame oil. Fill the rest of the cup with water and add to the pot. Add another half cup of water. Add the cubed pork belly and set the pressure to high and cook for 20-25 minutes. Once it is cooked and the pressure released, remove the lid and switch to sauté mode. Add 2 tsp of slackened cornflour and stir until pleasingly thickened.

Serve with rice and steamed greens.

The Chinese version is based on the favourite dish of Chairman Mao, red braised pork belly. For this you will need to add 3 tbsp dark soy sauce to the Instant Pot cup and top up with water. Add this to the Instant Pot along with an inch of diced root ginger, 3 star anise, 1 cinnamon stick or piece of cassia bark, 2 tsp of chilli flakes and 2 tbsp of caster sugar. Add the cubed pork belly and set the pressure to high and cook for 20-25 minutes. Once it is cooked and the pressure released, remove the lid and switch to sauté mode. Add 2 tsp of slackened cornflour and stir until thickened.

Serve with rice and steamed greens.

gochujang

Korean Chicken Wings

  • 7th April 20188th April 2018
  • by thefoodwife

Serves 4

For the last decade I have been a frequenter of the various Asian shops and supermarkets of Bristol, and a few years ago the lady who runs the Oriental Market on Gloucester Road introduced me to gochujang, the spicy pungent Korean fermented chilli paste. It quickly became a firm favourite. I would happily eat it in various forms for days on end, although a simple stir fry would be my go-to, especially when I was on a weight loss drive and wanted something with lots of flavour that would satiate my chilli cravings.

I decided to try something a little different from my stir fry and came up with this dish, which is definitely not for a diet day! The wings are rich and sticky and hot from the gochujang, extremely pleasing, enjoy!

  • Ingredients:
  • 1 kg chicken wings
  • For the marinade:
  • 3 tbsp gochujang paste
  • 1 tbsp dark soy sauce
  • 1 tbsp rice wine vinegar
  • 1 tbsp sesame seeds
  • 2 tbsp honey

Step 1: Combine the five marinade ingredients and place in a ziplock bag with the wings and squish them together to ensure all surfaces are coated – leave to marinate for up to 24 hours in the fridge.

Step 2: Spread the wings in their marinade on a baking sheet and bake at 190c for 45-50 minutes.

Step 3: Serve with a salad (try my sweet and crunchy slaw) and I like it with rice or sweet potato fries.

Thai squash soup

Sweet Potato and Butternut Squash Thai Coconut Soup

  • 7th April 201817th April 2018
  • by thefoodwife

Serves 6

When it’s cold outside you want something warm and nourishing and my Thai red curry spiced soup is the perfect remedy. Now, this does have a good kick and if you would rather omit the Thai element then by all means leave out the curry paste; it will still be luxuriously silky and delicious. Serve with warm bread. Lovely.

  • Ingredients:
  • 1/2 butternut squash cut into one-inch cubes
  • 1 large sweet potato cut into one-inch cubes
  • 1 tsp Thai red curry paste
  • 1 small tin of coconut milk
  • 3 lime leaves
  • 1.5 litres of vegetable stock
  • Salt and pepper to taste

Step 1: It really is as simple as putting all the ingredients in a large saucepan and bringing it to a simmer until the vegetables are tender (you can test this by piercing them with a sharp knife – if it goes in easily they are ready).

Step 2: Once cooked remove from the heat and blend (I use a stick blender – just be careful not to splash the contents, it will be extremely hot!) I blend the lime leaves too although you can always remove them beforehand if you’d rather not.

This soup freezes well and is excellent for lunch or as a starter. It’s vegan and gluten free (as long as your stock and curry paste are gluten free) to boot!

Posts navigation

1 … 24 25 26

Newsletter

Follow The Food Wife

Facebook
Twitter
Instagram

Blog Search

Blog Categories

  • Alcohol 7
  • Baby Weaning 24
  • Baking 43
  • Beef 14
  • Cake 25
  • Chicken 24
  • Christmas 1
  • Cocktails 4
  • Dairy-Free 130
  • Dessert 10
  • Fish 4
  • Gluten-Free 136
  • Instant Pot 10
  • Lamb 4
  • Ostrich 1
  • Pescatarian 5
  • Pork 19
  • Rabbit 1
  • Shellfish 6
  • Turkey 4
  • Uncategorised 4
  • Vegan 80
  • Vegetarian 141
Theme by Colorlib Powered by WordPress