Skip to content
The Food Wife logo
  • Home
  • About
  • Blog
  • Contact

Author: thefoodwife

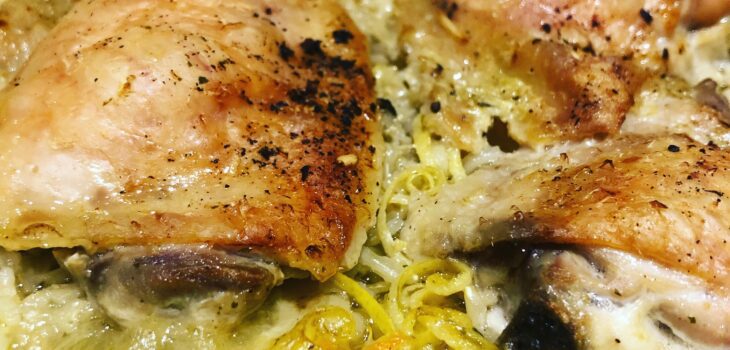
Baked Rice and Chicken with Lemon

  • 1st February 20221st February 2022
  • by thefoodwife

Serves 2

It’s always satisfying when very little prep results in a flavoursome dish that’s essentially cooked itself. This is definitely one for lemon lovers. The rice and chicken is perfumed from the zest, and the slices are soft and a bit jammy, so if you really like lemon eat these with the chicken. If this doesn’t appeal, remove before serving.

I like this with fine green beans, but any green veg you like will work.

Ingredients:

150g brown basmati rice

2 lemons (zest of both, one sliced into 4-5 rounds, pips removed)

4-5 skin on, bone-in chicken thighs

600ml hot stock (vegetable or chicken, gluten/dairy-free as required)

Salt and Pepper

Step 1: Preheat the oven to 180c (fan).

Step 2: Spread the rice on the base of a deep baking dish, add the lemon zest and then the slices of lemon. Top the lemon slices with the chicken thighs. Season the skin with salt and pepper. Carefully pour the hot stock over the dish avoiding the top of the chicken.

Step 3: Bake in the oven for an hour. Remove when the stock is absorbed and the skin is crisp. Serve with green vegetables.
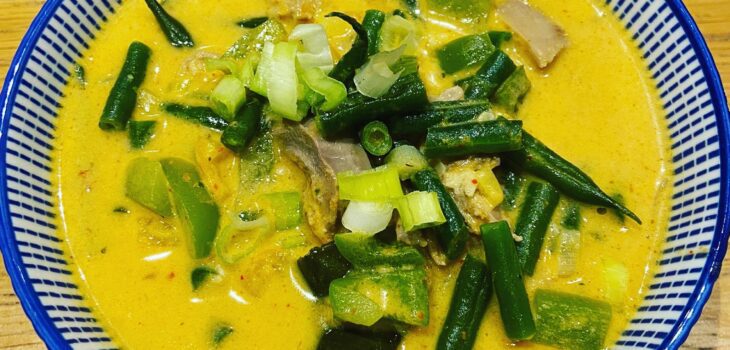
Leftover Turkey Laksa

  • 29th December 202129th December 2021
  • by thefoodwife

Serves 2-3

On Christmas day I strip the remaining meat from the Turkey and separate it out into roughly 250g portions and freeze. The idea of Turkey for days doesn’t appeal so I’d much rather spread it out over a few weeks.

Last night I was sent a message by a friend to say that they’d made my Turkey Tagine to use up their bird and it had gone down a treat with their family. I replied to say that we had had a leftover Turkey laksa. It’s rich, creamy and has heat from the Thai red curry paste. A real bonus is how quick it is to make; ready in under half an hour.

So here is the recipe. Let me know if you give it a go!

Ingredients:

1 tsp (coconut) oil

2 Cloves of garlic, finely diced or crushed

1-2 peppers, deseeded and diced

3 spring onions, sliced (separate the white and green parts)

Any other veg you fancy (I cut some fine green beans into 1cm pieces)

1 heaped tbsp Thai red curry paste (or less if you don’t like much heat)

3 lime leaves (optional – use the zest of a lime otherwise)

2 heaped tbsp smooth peanut butter (use one with no added salt or sugar ideally)

400ml coconut milk

500ml stock (Turkey/chicken/vegetable)

Sugar

Fish sauce (optional)

150g noodles, cooked according to the packet instructions, drained and reserved (Works great with egg noodles but I use glass noodles to keep it gluten-free)

250g cooked turkey, torn or cut into small pieces

1 lime (juice)

Step 1: Place a large sauce pan or work over a medium high heat. Add the oil, and when hot add the garlic, peppers and the white part of the spring onion and any other veg you’re adding. Stir frequently for a couple of minutes, then add the Thai red curry paste and lime leaves and stir allowing it all to become fragrant for a minute.

Step 2: Add the peanut butter, coconut milk and stock and bring to a simmer. Stir to break up the peanut butter and ensure the curry paste is now amalgamated and the soup sauce is smooth. Simmer for 10 minutes until it has thickened slightly. Add a pinch of sugar and season with fish sauce (if using alternatively use a pinch of salt) and check the taste. Add more sugar/fish sauce/salt as needed.

Step 3: Add the cooked Turkey meat to warm through and the juice of half the lime. And cook for a further three or four minutes.

Step 4: Meanwhile arrange the cooked noodles at the bottom of your soup bowls, and then ladle the laksa over the top, evenly distribute the turkey and vegetables. Sprinkle over the green spring onion slices and use the remaining lime to give a little squeeze of fresh juice over each bowl and serve.

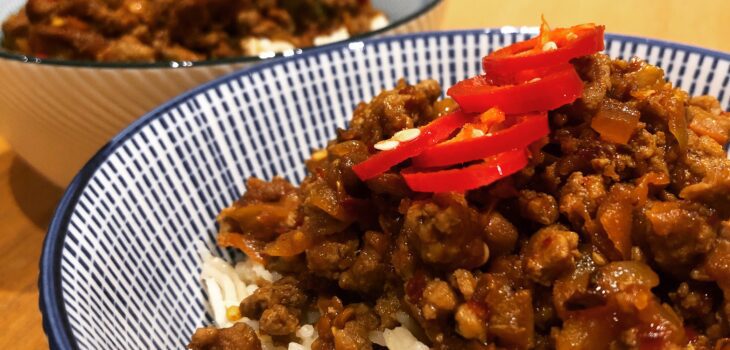
Mince with Crispy Chilli Oil

  • 15th December 202115th December 2021
  • by thefoodwife

Serves 4

This will work with any mince you like, meat or veggie. You are bulking it out with three types of vegetables that are all made to be the same size as the mince, so it’s a great way to smuggle veg into a meal.

The crispy chilli oil is a magical ingredient. Talk about addictive!! Two heaped tablespoons might sound a lot, but I figure you’re not going to be making this if you don’t like chilli, and although it’s spicy, it’s not that spicy really. I also garnish mine with slices of fresh red chilli for a pop of colour and a spike of extra heat.

Ingredients:

1 tsp coconut oil

1 onion, finely diced

1 large carrot, grated

1 pepper, finely diced

300g mince (turkey, pork, beef, chicken, soya, quorn)

1-2 tbsp soy sauce (gluten-free if required)

1 tbsp oyster sauce (leave out if vegetarian/vegan) (gluten-free if required)

2 heaped tbsp crispy chilli oil (gluten-free/vegan/vegetarian if required)

Step 1: In a wok, or large frying pan, melt the coconut oil over a medium-high, then add the diced onion, cook for a few minutes, stirring often, before adding the carrot and pepper. Continue to stir and cook for a couple more minutes, then add the mince.

Step 2: Cook the mince until it is browned and dry (any water should be cooked until evaporated) then add the seasoning of soya sauce, oyster sauce (if using) and crispy chilli oil. Continue to cook for about five-ten minutes, stirring often until everything is coated, glossy and tastes delicious.

Serve with rice or noodles. I also like it with a crunchy cucumber salad dressed with lime juice and salt.

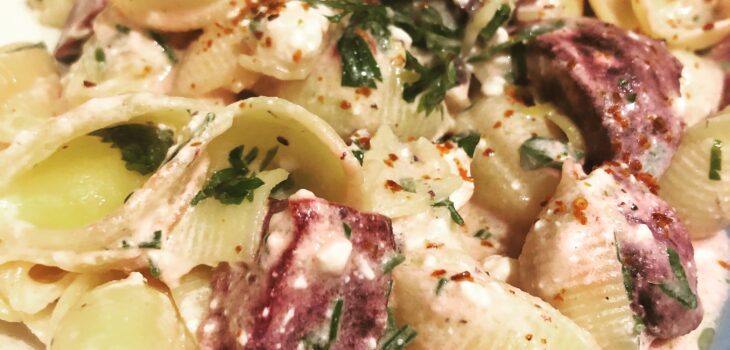
Roasted Beetroot and Feta Pasta with Olives, Lemon and…

  • 11th December 202111th December 2021
  • by thefoodwife

Serves 2

This was a total experiment and although there is something slightly uneasy about eating pink food, it tasted great, so felt I had to share. It’s easily scaled up, and the feta quantity can be altered too depending on the creaminess/richness factor. I did 100g but wish I’d done the whole 200g block!

Ingredients:

150g pasta (gluten-free if required) cooked according to the packet instructions (reserve a little of the cooking water)

300g ready cooked beetroot (approx 4)

100-200g feta block

Olive oil

Dried oregano

Chilli flakes (optional)

8 kalamata olives, quartered

1 unwaxed Lemon, zest only

Small bunch of parsley, chopped

Aleppo pepper flakes (optional)

Step 1: Pre-heat the oven to 200c (fan).

Step 2: Cut each beetroot in half, and then each half into quarters. In a baking dish place the feta in the middle (200g for extra creamy pasta, 100g if you’re watching the calories!) and arrange the chunks of beetroot around the outside of the feta. Drizzle everything with some olive oil, then sprinkle a pinch each of dried oregano and chilli flakes on top of the feta. Roast in the oven for 15-20 minutes. While this is cooking get your pasta on.

Step 3: Once the feta and beetroot is out of the oven and the pasta is drained (with a little water reserved), tip the pasta, olives , lemon zest and parsley into the baking dish, along with a splash of the water, and stir to combine everything so it is coated in the feta-y sauce.

Step 4: Divide between two plates and sprinkle a pinch of Aleppo pepper (if using) on to each before serving.

Sourdough Starter

  • 3rd December 20213rd December 2021
  • by thefoodwife

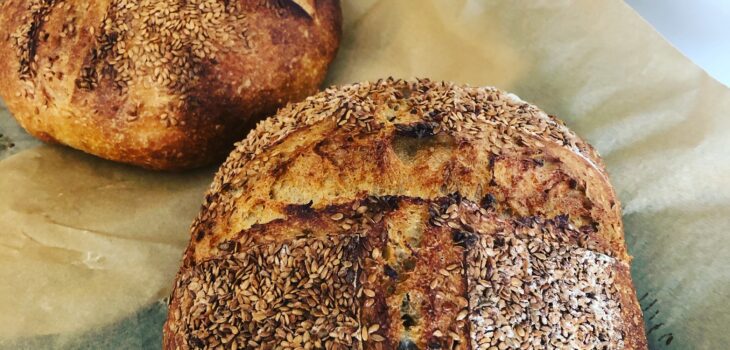
To make a sourdough starter, all you need is a largish jar, flour, water and a little time. Soon you’ll have a bubbly little friend that will help you to make the most delicious creations.

You can use normal white flour, but in my experience, the best, most active results, come from dark rye flour. It makes a thick paste that expands to make a very active mousse-like starter.

Use an elastic band on the outside of jar to mark the starting point of your mix and then you’ll easily be able to see how much it’s grown.

Leaving the jar on the side of your kitchen, should be enough to get it going. Too much heat and you’ll have an explosive disaster; too little and very little will happen. Once you’ve got it going, keep your starter in the fridge between bakes and bring it out to feed and refresh as needed.

So, here’s how to make it!

Start with your clean jar, 50g of flour and 50g of lukewarm water. Mix thoroughly (you don’t want any patches of dry flour) then pop the lid on and leave on the side. The next day you’re going to feed it again. We don’t want too much in the jar, so discard half of the mix, then add another 50g each of the flour and water. Mix, cover and leave. Repeat each day, taking 50g of the starter, 50g fresh flour and the same of water, until your starter starts to grow! Once it’s nice and active (you should see it double in height from your elastic band) it’s good to start baking with!

N.b. This is a 1:1:1 ratio of feeding, if you are struggling with a sluggish starter later on, try a 1:3:3 ratio for instance, 20g of starter, 60g or flour and 60g of water.

Posts pagination

Previous page 1 … 22 23 24 25 26 … 68 Next page

Newsletter

Blog Search

Blog Categories

  • Air fryer 2
  • Alcohol 12
  • Baby Weaning 24
  • Baking 74
  • Beef 18
  • Bread 1
  • Brunch 7
  • Cake 47
  • Chicken 48
  • Christmas 14
  • Cocktails 9
  • Dairy-Free 228
  • Dessert 37
  • Duck 1
  • Fish 12
  • Gluten-Free 254
  • Instant Pot 19
  • Lamb 6
  • Lunch box fillers 2
  • Ostrich 1
  • Pasta 4
  • Pescatarian 13
  • Pork 38
  • Rabbit 1
  • Salad 9
  • Shellfish 10
  • Soup 1
  • Turkey 10
  • Uncategorised 6
  • Vegan 136
  • Vegetarian 243

Socials

  • Facebook
  • Twitter
  • Google
  • Linkedin
  • Instagram
  • Pinterest
  • Youtube
Theme by Colorlib Powered by WordPress
Back to top