Skip to content
The Food Wife logo
  • Home
  • About
  • Blog
  • Contact

Author: thefoodwife

BLW Tuna and Sweetcorn Cheesy Quesadillas

  • 21st November 201821st November 2018
  • by thefoodwife

Makes 1

This has become a favourite lunch for the Food Baby in our house. He likes to carefully pick out the sweetcorn and eat them and then munches his way through the rest of it. I use a tuna in spring water as brine is too salty and those in oil make it far too greasy. You can make this with any good melty cheese, we’ve tried it with cheddar, Red Leicester and most recently the Spanish cheese, Tetilla.

  • Ingredients:
  • Spray oil
  • 2 mini tortilla wraps
  • 50g (melty) cheese (grated or sliced)
  • 1/3 tin of tuna in spring water, drained
  • 1 tbsp tinned sweetcorn, drained

Step 1: Heat a non-stick frying pan on a medium heat and spritz on some oil.

Step 2: Place one tortilla flat on the pan and add half the cheese. Top with the tuna and sweetcorn, sprinkled evenly, and finish with the remaining half of the cheese. Add the second tortilla and spray the top with a little more oil.

Step 3: Use a spatula to press the quesadilla and when the underside is toasted and firmed up, use the spatula to carefully turn the quesadilla over. Cook for another couple of minutes until the underside is browned.

I cut this into six pieces so it can be easily held by little hands and just make sure that before you serve the cheese isn’t too hot to eat!

Vanilla (and Raspberry) Cupcakes with a White Chocolate Buttercream

  • 19th November 201819th November 2018
  • by thefoodwife

Makes 12

When the Food Baby turned one last month I decided on a rainbow theme for his celebration. On the healthy side of things my sister expertly created some rainbow fruit kebabs, whilst on the more treat side I created some rainbow decorated cupcakes to complement the main rainbow cake.

These had a vanilla and raspberry sponge (although the raspberry is optional), topped with a wickedly rich white chocolate buttercream. I chose to add a sweet decoration on top because at a children’s party the more sugar the better. But otherwise I would either have left them as the plain buttercream or added a fresh raspberry on top.

  • Ingredients:
  • For the sponge:
  • 150g softened butter or baking margarine
  • 150g golden caster sugar
  • 3 large eggs
  • 150g self raising flour, sifted
  • 3/4 tsp baking powder
  • Pinch of salt
  • 1 tsp vanilla extract
  • 1 1/2 tbsp milk
  • 12 frozen raspberries (optional)
  • For the buttercream:
  • 125g softened butter
  • 250g icing sugar, sifted
  • 100g white chocolate
  • 1 tsp vanilla extract
  • 1 tbsp milk

Step 1: Line a 12-hole muffin tray with cases and preheat your oven to 180c.

Step 2: Beat together the butter and sugar until combined and then add the eggs, one at a time, beating as you go.

Step 3: Add the flour, and beat in along with the baking powder, salt, vanilla and milk until you have a smooth batter.

Step 4: Spoon the batter into the cases so that they are about 2/3 full and then, if you are using the raspberries, place one raspberry in the centre of each.

Step 5: Bake for 20 minutes until the cakes are risen and golden and spring back when pressed lightly.

Step 6: Leave in the tray for 10 minutes and then remove to a wire rack to cool completely.

Step 7: Melt the white chocolate in a microwave-proof bowl in 30 second bursts, stirring after each time. It’ll take about two minutes in total. Leave to cool for five minutes.

Step 8: Whisk the butter and icing sugar together until light and smooth.

Step 9: Add the vanilla, milk and cooled chocolate and continue to whisk until fully combined.

Step 10: Once the cakes are completely cool, spread or pipe the buttercream over the tops. Add any extra decorations you desire (a whole fresh raspberry would work well).

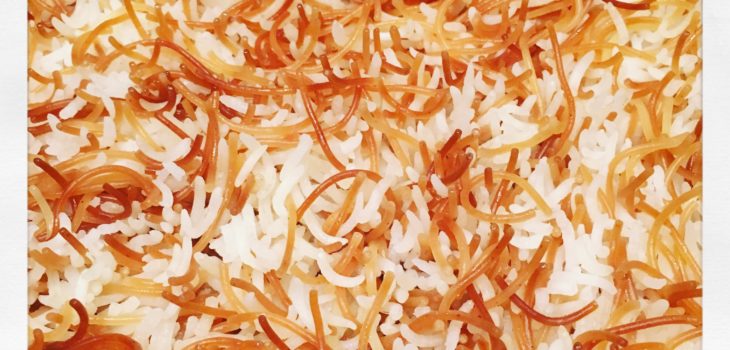
Lebanese Vermicelli Rice

  • 14th November 201814th November 2018
  • by thefoodwife

Serves 2-3

I have a friend who will regularly order double carbs when out for dinner. He does love a side of chips. This isn’t something I do, but if I see vermicelli rice on a menu then this combination of double carbs is a winner. I suppose it’s not really double carbs in the same way, as you’re not actually eating more carbohydrate, the quantities in the recipe have been adjusted to give a normal portion, just containing the rice and pasta.

If you haven’t tried vermicelli rice then next time you are having something middle-eastern, I would urge you to give it a go.

I love how the little strands of vermicelli stand to attention as they cook, and by toasting them first in olive oil, a lovely flavour is imparted on the dish.

I used a vermicelli that was already in one inch pieces, but you could always buy long strands and break it into smaller bits yourself.

I find it best to cook this in a lidded frying pan. Also, if you are increasing quantities I think you could get away with not increasing the oil at the same ratio (unless you wanted to). Perhaps add half for every double portion.

  • Ingredients:
  • 100g basmati rice
  • 50g vermicelli pasta (broken into small pieces)
  • 1 tbsp olive oil
  • 300ml boiling water
  • Salt

Step 1: Soak the rice in cold water for 20 minutes and then drain.

Step 2: Heat the oil in a pan over a medium heat and then add the vermicelli. Move it around while it browns, then add the drained rice and lightly stir so it too is coated in the oil.

Step 3: Pour over the boiling water and a pinch of salt.

Step 4: Cover the pan with a lid and bring to the boil. Lower the heat to a gentle simmer and cook undisturbed for 10 minutes, until the rice and pasta is cooked and the water has been absorbed. Switch the heat off and leave the lid on for 10 minutes before serving.

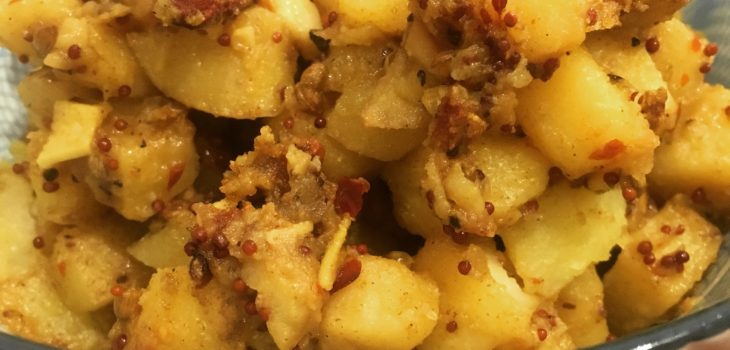
Spiced Potatoes

  • 12th November 201812th November 2018
  • by thefoodwife

Serves 2

Having a busy day planned doesn’t mean you can’t enjoy a home-cooked flavourful meal come the evening. Before heading out for the day I set some chicken legs marinating in a mixture of plain (Greek) yogurt and tandoori spices along with a dash of vinegar. I knew that I could transfer these to the oven in the evening (180c for about 45-60 minutes) and I could make accompaniments whilst they were cooking.

I decided a spiced potato dish would make a suitable pairing and I could freshen everything up with some minted yogurt and a crunchy mango salad, both of which could be made whilst the potatoes were cooking (see notes at the end for details).

  • Ingredients:
  • 1 heaped tsp coconut oil
  • 300g white potatoes, cut into 1cm cubes
  • 2 cloves garlic, finely sliced
  • 2 small pieces of cassia bark
  • 2 cardamom
  • 2 cloves
  • 1/2 tsp crushed chilli flakes (optional, leave out if you don’t want the heat)
  • 1 tsp cumin seeds (whole or ground)
  • 1 tsp coriander seeds (whole or ground)
  • 1 tsp ground turmeric
  • 2 tsp brown mustard seeds
  • Large pinch each of salt and pepper

Step 1: Heat the oil in a (preferably non-stick) frying pan, over a medium heat. Add the potatoes and stir for a minute or two.

Step 2: Cover with a lid and lower the heat, allowing the potatoes to gently soften in the natural steam. If needed add a dash of water from time to time to create a little steam. Cook for about 15 minutes.

Step 3: Add the garlic and spices, along with the salt and pepper and continue to cook for a few minutes (lid on). Serve when the potatoes are tender, the garlic is softened and the spices have warmed.

If you want to recreate this meal but don’t have a tandoori spice mix, just using some garam masala mixed with the yogurt will suffice. To make the crunchy mango salad I diced up half a ripe mango, finely sliced half a head of little gem lettuce and a handful of finely sliced red cabbage and tossed it all in the juice of a lime. The minted yogurt is simply Greek yogurt with fresh mint chopped up and stirred through.

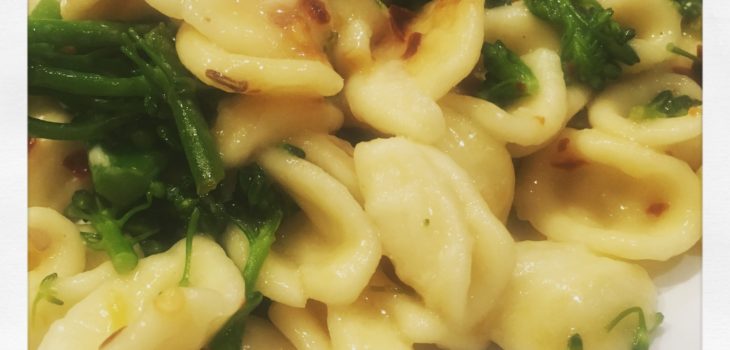
Broccoli Pasta with Lemon and Chilli

  • 10th November 201810th November 2018
  • by thefoodwife

Serves 4

This is a 15 minute meal which is bursting with fresh flavours. A word of warning on the chilli though, do make sure you put in the right amount for your (and your guests’) tastes. I used 2 teaspoons which, whilst fine for me, was too hot for some of the other eaters. Oops.

I used orecchiette as the shape is perfect for this sauce and it is so pretty, but use one of your choice, spaghetti or linguine would both work well and are easy to get your hands on.

If you are making this as a vegan or dairy-free meal then omit the parmesan and if you are making this gluten-free then use a suitable pasta.

  • Ingredients:
  • 300g pasta
  • 2 tbsp olive oil
  • 4 cloves of garlic, finely sliced
  • 1-2 tsp chilli flakes
  • 250g tenderstem broccoli, roughly chopped into 1 inch pieces
  • 1 lemon (zest and juice)
  • 50g Parmesan, grated

Step 1: Start by cooking the pasta according to the packet instructions.

Step 2: Heat the oil in a frying pan over a low heat and gently soften the garlic slices, ensuring they do not colour.

Step 3: Add the zest of the lemon along with the chilli flakes (remember to do this to taste).

Step 4: Two minutes before the pasta is ready, add the broccoli to the pasta water.

Step 5: Drain the pasta and broccoli (reserving a little of the cooking water) and add to the frying pan, along with half of the parmesan and the lemon juice. Add a little of the reserved cooking water and stir or toss together to create a light silky sauce that coats the pasta.

Serve with a green salad and the remaining parmesan to sprinkle on top.

Posts pagination

Previous page 1 … 47 48 49 50 51 … 68 Next page

Newsletter

Blog Search

Blog Categories

  • Air fryer 2
  • Alcohol 12
  • Baby Weaning 24
  • Baking 74
  • Beef 18
  • Bread 1
  • Brunch 7
  • Cake 47
  • Chicken 48
  • Christmas 14
  • Cocktails 9
  • Dairy-Free 228
  • Dessert 37
  • Duck 1
  • Fish 12
  • Gluten-Free 254
  • Instant Pot 19
  • Lamb 6
  • Lunch box fillers 2
  • Ostrich 1
  • Pasta 4
  • Pescatarian 13
  • Pork 38
  • Rabbit 1
  • Salad 9
  • Shellfish 10
  • Soup 1
  • Turkey 10
  • Uncategorised 6
  • Vegan 136
  • Vegetarian 243

Socials

  • Facebook
  • Twitter
  • Google
  • Linkedin
  • Instagram
  • Pinterest
  • Youtube
Theme by Colorlib Powered by WordPress
Back to top