Skip to content
The Food Wife logo
  • Home
  • About
  • Blog
  • Contact

Category: Baking

Sausage and Gnocchi Bake

  • 3rd April 2025
  • by thefoodwife

Serves 2-4

This is so easy and can be served with your choice of veg and, if you like, a sauce or gravy. I served ours with green beans and a creamy wholegrain mustard sauce. Delicious!

Ingredients:

480g good quality sausages 

500g gnocchi

Olive oil

Salt and pepper

Step 1: Preheat the oven to 190c (fan) and drizzle some olive oil into a deep baking dish.

Step 2: Toss the gnocchi into the oil and coat, spread the gnocchi across the dish. Sprinkle with salt and pepper.

Step 3: Nestle the sausages amongst the gnocchi so they are in contact with the baking dish.

Step 4: Bake for 20 minutes and then give everything a good shake (use a span or spatula of the gnocchi is sticking). Return to the oven for about 15-20 minutes until the sausages are cooked through and the gnocchi is crisp and golden.

Serve with your choice of sides.

Snicker-dates

  • 18th February 2025
  • by thefoodwife

Makes 16

These aren’t new, we’ve probably all seen some version of them, but they are delicious. Chewy dates, crunchy peanut and salty dark chocolate. A winning combo, especially for anyone who loves a sweet treat but wants to cut down on refined sugars. 

Plus they’re so rich you’ll probably only want one or two…

Ingredients:

16 Stoned dates 

Crunchy peanut butter (ideally one made with only peanuts)

100g dark chocolate (I used 74% cocoa), melted

Flaky sea salt

Step 1: Line a tray or tin with grease proof paper, and ensure you have space in the freezer for it to fit.

Step 2: Fill each date with about 1/2 a teaspoon of crunchy peanut butter, bringing the ends of the date back together as best you can (sometimes they won’t meet but make it as neat as possible). 

Step 3: Carefully submerge each filed date into the molten chocolate, using a spoon to turn and coat it. Then transfer each coated date, with a spoon, to the lined tray. Sprinkle a little of the flaky salt on top.

Step 4: Repeat with the remaining dates. Try to make sure they aren’t touching each other on the tray (you can always break them apart after they’ve set if they do touch but their edges will be messier).

Step 5: Transfer the tray carefully to the freezer until the chocolate has set (10 minutes should do it) and then move them carefully to a tub or freezer bag and keep them in the freezer until you eat them to keep them extra chewy!

Spooky “Mummy” Sausage Rolls

  • 12th January 2025
  • by thefoodwife

Makes 12

A fun twist on sausage rolls for the Halloween season! Using chipolatas and shop-bought ready-rolled puff pastry makes these a super easy activity to make with the kids.

Ingredients:

12 chipolatas

1 sheet of ready-rolled puff pastry

American Mustard

1 egg, beaten

Step 1: Pre-heat the oven to 180c (fan) and line a baking tray with grease-proof paper.

Step 2: Un-roll the puff pastry and brush with a thin layer of the American mustard. Then using a sharp knife cut 24 strips roughly 5mm wide (you will probably have a little bit of pastry left…cheese straws anyone??).

Step 3: For each chipolata you will need two strips. Press one end of each strip together to create one continuous strip of pastry. Begin winding it (mustard side in contact with the sausage) around the chipolata. Place them on the lined baking tray. Repeat until all sausages are wrapped.

Step 4: Brush the tops with the beaten egg and bake in the oven for 30-35 minutes until golden. 

Allow to cool slightly (or completely) before serving. You can also use some more mustard to dot on some little eyes onto one end of the sausage before serving!

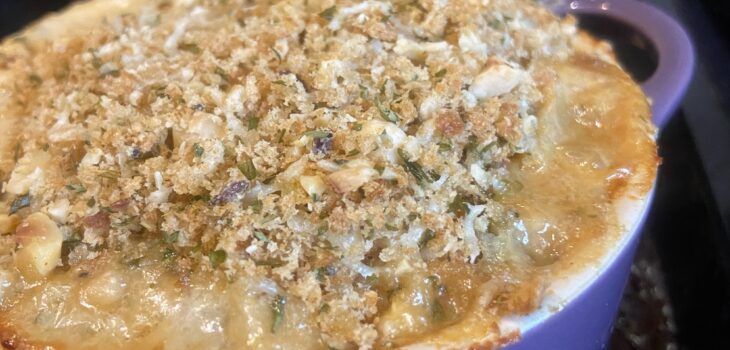
Savoury Leek and Squash Crumble

  • 12th January 202526th January 2025
  • by thefoodwife

Serves 2

These little pots of a savoury crumble are great as the centre part of a vegetarian (or vegan) meal. I made these gluten free too so they’re good for a variety of dietary requirements.

You can serve these in individual 250ml ramekins or in a baking dish to share.

Ingredients:

Oil

1 leek, trimmed, washed and sliced

1/2 a squash, peeled and diced into 1cm cubes

1 clove of garlic, peeled and finely chopped

200ml cream (dairy or non-dairy. I used oat single-style cream)

50g cheese, grated (I used a goat cheddar) (optional) if making this vegan you could replace this with a spoonful of nutritional yeast to taste

1 tsp Dijon mustard

Salt and Pepper

2 tbsp Breadcrumbs (gluten-free if required)

1 tbsp roasted, chopped hazelnuts

25g grated cheese (optional)

1 tbsp finely chopped parsley (or 1 tsp dried parsley)

Step 1: Pre-heat the oven to 180c (fan). Prepare a baking tray. Toss the squash, garlic and a little oil together and spread on the baking tray. Bake for 20 minutes. Check the pieces are soft and cook for a few more minutes if needed. Remove from the oven.

Step 2: In the meantime, heat a frying pan over a medium heat, add a little oil and the leeks. Sweat down until soft. Add the cream, the Dijon mustard, salt and pepper to taste and the cheese of using. Reduce the heat and stir occasionally.

Step 3: Add the cooked squash and taste to check the seasoning. Transfer into the serving dishes.

Step 4: Mix together the breadcrumbs, nuts, parsley and cheese (if using). Sprinkle over the crumble filling and put in the oven. Bake for 15-20 minutes and serve, with vegetables and potatoes of your liking.

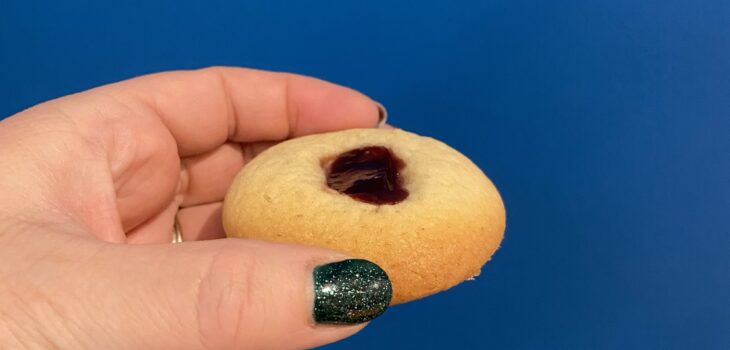
Soft Sugar Thumb Cookies with a Jam Filling

  • 9th October 2024
  • by thefoodwife

Makes approx 20 cookies

Easily made dairy-free, these cookies are soft, sweet and jammy! Perfect! 

You want a chilled, firm dough so start making these a few hours before you need them so the dough can chill in the fridge until ready to bake. Even better, make the dough the day before for a quick bake!

We made a batch of these and they made the perfect afterschool snack for the rest of the week. 

Ingredients:

170g unsalted butter (dairy-free if required)

150g granulated sugar

1 egg

1 tsp vanilla extract

280g plain flour

1/2 tsp baking powder 

1/4 tsp salt

Jam (smooth/seedless)

Step 1: Cream together the butter and sugar until fluffy. Next add the egg and vanilla extract and beat again until combined.

Step 2: Add the flour, baking powder and salt and beat again until you have  a smooth dough. This should not take long but you may need to scrape down the sides of the bow to incorporate everything.

Step 3: Take a large sheet of grease-proof paper and tip the dough out into the centre. Roll the dough into a thick sausage shape, about 20cm long and twist the ends tight. Store in the fridge to chill until firm.

Step 4: When ready to bake, prepare a large baking sheet with grease-proof paper and preheat the oven to 180c fan.

Step 5: Cut the chilled log into 20 pieces, and roll each into a ball, slightly smaller than a ping pong ball. Next place each onto the prepared baking sheets about 5cm apart. Use your thumb to press down into the centre of each ball. This will create a hollow (make sure it’s central with a raised edge all around to avoid jam leakage!)

Step 6: Fill each indent with half a teaspoon of jam (I love using seedless raspberry jam).  Bake for 12 minutes.

Step 7: Remove from the oven and allow to cool.

Store in an airtight container.

Posts pagination

Previous page 1 2 3 4 … 15 Next page

Newsletter

Blog Search

Blog Categories

  • Air fryer 2
  • Alcohol 12
  • Baby Weaning 24
  • Baking 74
  • Beef 18
  • Bread 1
  • Brunch 7
  • Cake 47
  • Chicken 48
  • Christmas 14
  • Cocktails 9
  • Dairy-Free 228
  • Dessert 37
  • Duck 1
  • Fish 12
  • Gluten-Free 254
  • Instant Pot 19
  • Lamb 6
  • Lunch box fillers 2
  • Ostrich 1
  • Pasta 4
  • Pescatarian 13
  • Pork 38
  • Rabbit 1
  • Salad 9
  • Shellfish 10
  • Soup 1
  • Turkey 10
  • Uncategorised 6
  • Vegan 136
  • Vegetarian 243

Socials

  • Facebook
  • Twitter
  • Google
  • Linkedin
  • Instagram
  • Pinterest
  • Youtube
Theme by Colorlib Powered by WordPress
Back to top