Skip to content
The Food Wife logo
  • Home
  • About
  • Blog
  • Contact

Category: Baking

Jewelled Crown Biscuits

  • 3rd April 20233rd April 2023
  • by thefoodwife

These crowns are in honour of the coronation, but also just fun to make with kids! The brown sugar and golden syrup give them their golden lustre and I love using jelly tots for the jewels. I’ve flavoured these with lemon because Charles III is a fan and white chocolate because it’s such a good combo!

These are easily made gluten free and/or vegan. Just use the appropriate swaps in the ingredients (detailed below).

Ingredients:

125g of (vegan if required) butter

100g light soft brown sugar

65g golden syrup

300g (gluten-free if required) plain flour

1 tsp (gluten-free if required) bicarbonate of soda

2 tsp lemon extract

To decorate:

150g white chocolate, melted (vegan/gluten-free if required)

Jelly tots (these are now vegan friendly)

Step 1: Preheat oven to 180c (fan). Line baking trays with parchment.

Step 2: Melt the butter with the light soft brown sugar and golden syrup. Set to one side.

Step 3: In a bowl mix the flour and bicarbonate of soda. Add the molten fat and sugar combination along with the lemon extract and stir until you have a smooth dough.

Step 4: Allow to cool for a few minutes and then tip out on to a large piece of grease proof paper. Top with another piece and then use a rolling pan on top of the paper to spread the dough out until a few mm thick.

Step 5: Use your chosen cutters (crowns!) to press out shapes and carefully transfer to your lined baking sheets (you will need to be delicate as the dough tears easily at this stage) and then into the oven for 10 minutes.

Step 6: Remove and allow to cool (wait about 15 minutes before transferring them to a wire rack to cool fully).

Step 7: Decorate by dipping the bases into the melted white chocolate and then adorn with jelly for jewels! Allow the white chocolate to set fully before storing.

Keep in an air tight container for up to a few days.

Easy Chocolate Truffles

  • 29th March 202329th March 2023
  • by thefoodwife

Makes approximately 30 truffles

This is a fun recipe to try out with kids. Whilst it’s a bit of a workout constantly mixing, rolling the truffles in bright sprinkles is just the thing to get everyone involved, whatever the age.

Great for a party treat!

Ingredients:

397g Condensed Milk

1 tsp finely ground instant coffee (or dissolve 1 tsp in a tablespoon of hot water) this is optional but will help intensify the chocolate and you won’t really taste coffee in the finished product.

150g cocoa powder

Sprinkles/cocoa powder for coating

Step 1: Set a heavy bottomed sauce pan over a low heat. Add the coffee and stir, then constantly stirring, add 1 tablespoon of cocoa powder at a time until each spoonful has blended into the gently warming condensed milk. As the mixture gently heats it will thicken and become smooth, very dark, and glossy. You will need to keep the heat very low to avoid burning and you will need to keep stirring to avoid it sticking. Once all combined, pour onto a lined baking tray or wrap in a sheet of cling film, and store in the fridge until cooled (about half an hour).

Step 2: use a teaspoon to take scoops of the mixture and roll in your hands into a ball. Toss in colourful sprinkles, or for an extra hit of intense chocolate, more cocoa powder.

Step 3: Store in a sealed container in the fridge until ready to serve.

Sourdough Starter

  • 3rd December 20213rd December 2021
  • by thefoodwife

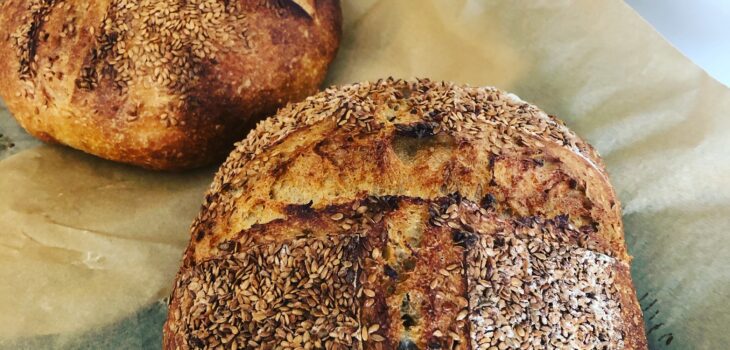
To make a sourdough starter, all you need is a largish jar, flour, water and a little time. Soon you’ll have a bubbly little friend that will help you to make the most delicious creations.

You can use normal white flour, but in my experience, the best, most active results, come from dark rye flour. It makes a thick paste that expands to make a very active mousse-like starter.

Use an elastic band on the outside of jar to mark the starting point of your mix and then you’ll easily be able to see how much it’s grown.

Leaving the jar on the side of your kitchen, should be enough to get it going. Too much heat and you’ll have an explosive disaster; too little and very little will happen. Once you’ve got it going, keep your starter in the fridge between bakes and bring it out to feed and refresh as needed.

So, here’s how to make it!

Start with your clean jar, 50g of flour and 50g of lukewarm water. Mix thoroughly (you don’t want any patches of dry flour) then pop the lid on and leave on the side. The next day you’re going to feed it again. We don’t want too much in the jar, so discard half of the mix, then add another 50g each of the flour and water. Mix, cover and leave. Repeat each day, taking 50g of the starter, 50g fresh flour and the same of water, until your starter starts to grow! Once it’s nice and active (you should see it double in height from your elastic band) it’s good to start baking with!

N.b. This is a 1:1:1 ratio of feeding, if you are struggling with a sluggish starter later on, try a 1:3:3 ratio for instance, 20g of starter, 60g or flour and 60g of water.

Dark Chocolate and Tahini Banana muffins

  • 11th October 202111th October 2021
  • by thefoodwife

Makes 12

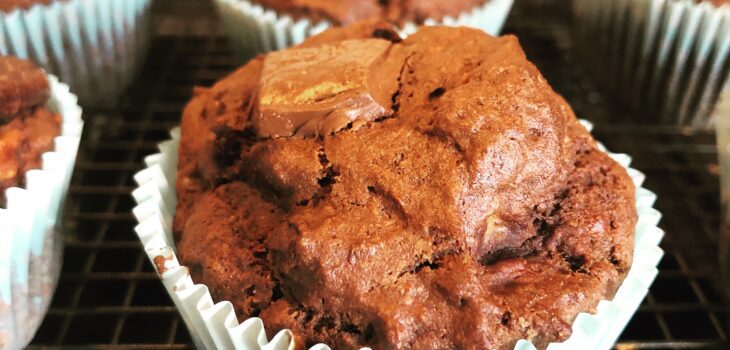
This ticks so many boxes, a stunning flavour combination, dairy-free, vegan and gluten-free (if needed) so lots of dietary requirements are catered for, so hopefully everyone is happy with the result.

Best eaten fresh but still gorgeous eaten over a few days, just refresh them by giving them a short zap in the microwave (10-15 seconds should do it).

Ingredients:

3 large/4 medium very ripe bananas, mashed

70g vegetable oil

120g dark soft brown sugar

100g tahini

270g (gluten-free if required) plain flour (add 1/3 tsp xanthan gum if using gluten-free flour)

30g cocoa powder

2 tsp baking powder (gluten-free if required)

1 tsp bicarbonate of soda (gluten-free if required)

100g dark chocolate (gluten-free & vegan as required) broken into 24 pieces

Step 1: Preheat oven to 190c (fan) and line a 12 hole muffin tin with paper cases.

Step 2: Lightly combine the banana, oil, tahini, sugar, cocoa, flour (plus xanthan gum if gluten-free), baking powder and bicarbonate of soda in a bowl. For a light muffin minimal mixing is required.

Step 3: Fill each muffin case with a heaped tablespoon of the batter. Top each with a piece of chocolate and then cover with the remaining muffin batter. Top each with another piece of chocolate.

Step 4: Bake for 25 minutes and then remove from the oven and allow to cool slightly on a wire rack. Serve warm.

You could also sprinkle a few sesame seeds on the top of each before baking.

Burnt Basque Cheesecake (gluten-free)

  • 11th June 202111th June 2021
  • by thefoodwife

Serves 12

Everything here needs to be at room temperature before you start. This will give you a beautifully smooth cheesecake, so make sure you take your cream cheese and cream out of the fridge half an hour before you start. There is no crust or biscuit base to this, there is also no water bath, it is incredibly easy and the result is a striking dessert that it is oh-so delicious.

The good news is that you can make this ahead of time. Ideally, make it the day before, although it’ll be ok for a good few days in the fridge. And even better, as long as securely wrapped, it freezes so well.

The dramatic burnt top of the cheesecake gives this its signature look, but there should be no real burnt taste. Just yummy, creamy cheesecake.

  • Ingredients:
  • 800g full fat cream cheese
  • 200g caster sugar
  • 360ml double cream
  • 5 large/6 medium free range eggs
  • Large pinch of salt
  • 1 tsp vanilla extract
  • 40g (gluten-free if required) plain flour

Step 1: Pre-heat the oven to 200c (fan) and line a 9 inch spring release cake tin with baking paper.

Step 2: Using an electric mixer beat the cream cheese, sugar, salt and vanilla together until smooth. Add each egg, beating after each addition followed by the cream. Finally add the flour. The mixture should be completely smooth with no lumps.

Step 3: Pour carefully into the lined cake tin and bake for 45 minutes then push the temperate up to 220c for a final
15 minutes to achieve your burnt top.

Step 4: Remove and allow to fully cool
Before refrigerating overnight.

I like to serve slices with a raspberry coulis poured over the top.

Posts pagination

Previous page 1 … 4 5 6 7 8 … 15 Next page

Newsletter

Blog Search

Blog Categories

  • Air fryer 2
  • Alcohol 12
  • Baby Weaning 24
  • Baking 74
  • Beef 18
  • Bread 1
  • Brunch 7
  • Cake 47
  • Chicken 48
  • Christmas 14
  • Cocktails 9
  • Dairy-Free 228
  • Dessert 37
  • Duck 1
  • Fish 12
  • Gluten-Free 254
  • Instant Pot 19
  • Lamb 6
  • Lunch box fillers 2
  • Ostrich 1
  • Pasta 4
  • Pescatarian 13
  • Pork 38
  • Rabbit 1
  • Salad 9
  • Shellfish 10
  • Soup 1
  • Turkey 10
  • Uncategorised 6
  • Vegan 136
  • Vegetarian 243

Socials

  • Facebook
  • Twitter
  • Google
  • Linkedin
  • Instagram
  • Pinterest
  • Youtube
Theme by Colorlib Powered by WordPress
Back to top