Skip to content
The Food Wife logo
  • Home
  • About
  • Blog
  • Contact

Category: Beef

Ox Cheek Ragù

  • 31st August 201831st August 2018
  • by thefoodwife

Serves 14

This is such a simple dish with few ingredients that really makes an impact. It is excellent for batch cooking and the good news is that a little goes a long way so this feeds a lot of people. My recipe here is for the Instant Pot but it can be slow cooked on the hob or in the oven (see my notes at the end).

I am a huge fan of ox cheek. It is relatively cheap but has the most wonderful flavour and texture. It has to be cooked for a long time but using the pressure cooker means it is done in a fraction of the time.

You want a good Italian red wine for this dish and I absolutely adore Montepulciano D’Abruzzo. Lidl do one that’s exceptional value for the quality at £3.99. This recipe uses half a bottle which means there’s enough for a glass or two for the cook!

This has become a favourite dish in our household and is often on the menu, most recently as part of an Italian-themed dinner party.

Serve with a pasta of your choice and some freshly grated Parmesan or Pecorino.

  • Ingredients:
  • 3 tbsp olive oil
  • 3-4 celery stalks, finely diced
  • 1 onion, finely diced
  • 2 cloves of garlic, finely diced
  • 2 sprigs of rosemary, leaves removed and finely chopped
  • 2 ox cheeks, cut in to large pieces (about 2 inches)
  • 500g passata
  • 375ml Montepulciano D’Abruzzo (Italian red wine)
  • Salt and pepper

Step 1: Set the Instant Pot to sauté mode. When hot, add the oil, celery and onion, and stir frequently for five minutes.

Step 2: Add the garlic and ox cheek pieces. Stir frequently for a couple of minutes until the cheeks are browned slightly.

Step 3: Add the rosemary, passata, wine and a large pinch of salt and pepper. Stir.

Step 4: Switch sauté mode off and replace the lid. Ensure the vent is set to sealing.

Step 5: Select manual, high pressure and set for 35 minutes. Allow it to depress naturally.

Step 6: Remove the lid and take out the cheek pieces and shred with a fork.

Step 7: Return the shredded meat to the pot, leave the lid off and set back on sauté and allow to simmer for 10 minutes, and season to taste.

This is wonderfully rich and a little goes a long way. An Instant Pot ladleful per person (or three or four tablespoons of the sauce) stirred into freshly cooked pasta should do it. I portion this up and freeze for a quick and very satisfying meal.

If you are not using the Instant Pot, it is possible to achieve the same results in the oven or on the hob. Steps 1-3 should be done in a casserole dish on the hob, replace steps 4 and 5 with cooking on a low heat (lid on) either on the hob or oven (150c) for three to four hours. Step 6 remains as is whilst step 7 should be done on the hob, with the lid off.

Thai Red Ox Cheek Curry

  • 15th August 201818th August 2018
  • by thefoodwife

Serves 6-8

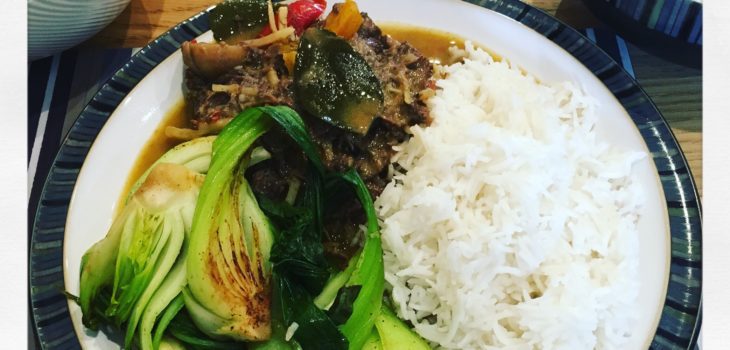
This week it was our wedding anniversary and I asked The Food Husband what he would like to eat to celebrate at home (after treating ourselves to a fabulous meal at Menu Gordon Jones in Bath at the weekend). We decided that a Thai curry using ox cheek was the winner. It’s definitely a favourite and is an excellent way of using the cut of meat.

If you’ve never tried cheek you must. It requires a lot of cooking but when it is treated in this way you are left with the most succulent, melt in the mouth, flavoursome meat. And the good news is it’s cheap. It’s only about seven or eight pounds a kilo and this will feed eight people, so very economical for something so delicious.

I usually make this with a shop-bought paste in which case I would use maybe half the quantity cited in the ingredients as it is a lot spicier than my homemade version. But this time I’ve made my own (gentler) paste which can be found here. You are looking for 500ml of liquid – I have used a tin of coconut milk and then topped it up with water as I was making a more calorie friendly version. For a richer, more traditional curry, use all coconut milk. You can add whichever vegetables you would like to the curry. I chose mushrooms, peppers and bamboo shoots. Aubergine, courgette and green beans would also work well.

This can be cooked low and slow in the oven or, as I’ve done it this time, in the Instant Pot in a fraction of the time. If cooking in the oven do steps one and two on the hob on a medium high heat and then transfer to the oven with the lid on for step three and cook at 150c for four hours (do check every so often if it needs more liquid though). Return to the hob for stage four onwards.

Once cooked, if serving fewer people, portion up and freeze. Once defrosted it’ll only take a few minutes to heat back through on the hob.

  • Ingredients:
  • 1 tbsp coconut oil
  • 8 shallots, peeled and quartered
  • 3 heaped tbsp Thai red curry paste
  • 2 ox cheeks (total between 800g-1kg in weight), cut in to 2 inch square dice
  • 500ml coconut milk (or mix of water and coconut milk)
  • 6 lime leaves
  • 2 peppers, cut into large dice
  • 1 tin of bamboo shoots, drained
  • 300g Mushrooms, halved (I used Chinese straw mushrooms)
  • 2 tbsp sugar
  • 2 tbsp fish sauce
  • Salt

Stage 1: Set the Instant Pot to sauté mode and add the coconut oil and shallots. Stir frequently for a few minutes until the start to brown, then add the ox cheek and seal on all sides.

Step 2: Once the meat is browned, add the curry paste and stir so that it starts to cook out and has a good covering over the meat. Then add your liquid and the lime leaves and stir.

Step 3: Turn sauté mode off and replace the lid, ensuring the valve is set to sealing. Manually set it to cook on high pressure for 35 minutes. Allow it to depress naturally.

Step 4: Remove the lid and remove the meat, use two forks to shred the flesh, and then return to the pot.

Step 5: Switch back on to sauté mode and add your vegetables, sugar, fish sauce and salt (to taste). Cook for 10-15 minutes until the vegetables are cooked.

Try serving this with steamed rice, a green vegetable (we had pak choi) and a simple cucumber salad; simply slice cucumber, sprinkle over a pinch of salt and some lime juice and add a little mint (if you like). We also had a few cheeky prawn crackers.

Enchiladas

  • 7th August 20188th August 2018
  • by thefoodwife

Makes 8 (serves 4 adults)

Last week we had friends round for a midweek meal. I wanted something that I could cook fairly easily once The Food Baby was in bed that could then be put in the middle of the table and everyone help themselves. We went Mexican. I marinated the chicken earlier in the day but everything else was done in about 45 minutes. And half an hour of that was it cooking in the oven.

Whilst I have opted for chicken (in my case I go for thigh meat as it stays so moist), but it would also be good with thinly sliced pork or beef. If you wanted to go meat-free then butternut squash would be delicious. Use the same spice mix but roast it in the oven once coated in the marinade (step 1) for 25-30 minutes and then mix with your cooked peppers and onions (step 3).

  • Ingredients:
  • 2x my fajita spice mix (with 2 tsp set to one side)
  • 2 tbsp oil
  • 500g chicken fillets (thighs or breast) cut into thin strips (or a meat or vegetable of your choice)
  • 1 onion, peeled, halved and thinly sliced
  • 1 – 2 peppers, halved, deseeded and thinly sliced
  • 8 corn & wheat tortillas
  • 500g passata
  • 125g mozzarella

Step 1: Combine the spice mix (making sure you’ve taken out two teaspoons’ worth to save for the sauce), one tablespoon of the oil and the chicken (or meat/vegetable of your choice) in a bowl, cover and leave to marinate.

Step 2: Separately combine the reserved spice mix with the passata and leave to one side.

Step 3: Heat a frying pan over a medium high heat and add your remaining tablespoon of oil. Fry the peppers and onions for a few minutes and then add the marinated chicken. Stir frequently until the chicken is just cooked through (if you have cut it thinly this will not take long and you don’t want to over cook it as it is going in the oven too).

Step 4: Lay out your tortillas and spoon equal amounts of the cooked filling down the centre of each tortilla.

Step 5: Carefully tuck in the two ends and then roll each tortilla so it is enclosed.

Step 6: Place the tortillas carefully in a baking dish. You want to pack them in next to each other, but don’t over lap them.

Step 7: Pour your spicy passata over the top and make sure they are all covered.

Step 8: Tear your mozzarella (or sprinkle if you are using pre-grated) over the top and place in a preheated oven (180c) for 25-30 minutes until bubbling and the cheese is golden.

This is good served with a salad (why not try my Mexican-style salad) and some crunchy, cheesy nachos. I layered up a dish with salted tortilla chips, a sprinkling of Mexicana cheese, dollops of salsa, sour cream and guacamole and finely chopped jalapeños (repeated until the bag of tortilla chips ran out) and cooked these for 20 minutes in the same oven as the enchiladas.

Bolognese Sauce

  • 6th July 20186th July 2018
  • by thefoodwife

Serves 8

Many families will have their preferred bolognese sauce and I am a big fan of adding lots of vegetables to mine, but I do it in a sneaky way. So sneaky that my husband, who cannot stand mushrooms or courgettes, doesn’t mind me jam-packing them into my bolognese as even he admits he can’t taste whatever he finds so offensive normally!

I find the addition of lots of finely minced vegetables (I do mine in a food processor) makes a better sauce than one simply using tomato and onion. I have used red wine, but you could use white. I used dried oregano but a little rosemary would also work well (I actually used an oil that had been infused with rosemary). Basil added at the end of cooking would also make a good addition.

And a note on the chicken livers; this is optional but I’d urge you to give it a go – it makes a richer, more flavourful sauce. It may be that you just don’t mention they’re in there, much like my mum used to when we were growing up!

  • Ingredients:
  • Olive oil
  • 2 celery sticks
  • 2 red onions
  • 1 large or 2 medium carrots
  • 1 courgette
  • 1 red pepper
  • 4 fat cloves of garlic
  • 250g chestnut mushrooms
  • 500g lean beef mince
  • 200g chicken livers
  • 1kg passata
  • 1 glass red wine
  • 2 bay leaves
  • 1 tsp dried oregano
  • 1 tbsp Worcestershire Sauce (gluten-free if required)
  • 1 tbsp balsamic vinegar
  • Salt and pepper
  • 1 tsp caster sugar

Step 1: Begin by finely chopping all of your vegetables (I used a food processor).

Step 2: Heat some oil in a large pan (about 2 tbsp), on a medium heat. Add the celery, onion and carrot and soften for about eight to 10 minutes, stirring occasionally.

Step 3: Next add the red pepper, courgette and mushrooms along with the garlic and cook for another 10 minutes, stirring occasionally.

Step 4: Remove the softened vegetables and set to one side.

Step 5: Add some more olive oil to the pan (about 1 tbsp) and then add the beef mince, and cook until browned, about five or 10 minutes, then add your chicken livers (if using) and stir now and again for a couple of minutes.

Step 6: Reintroduce your vegetables along with the passata, herbs, bay leaves, wine, Worcestershire sauce and balsamic vinegar. Bring to a simmer and then lower the heat and cover with a lid and allow to cook for 45 minutes.

Step 7: Now season to taste and check if it needs a little caster sugar; a teaspoon should be enough.

Serve with pasta or you could use this as the meat layer of a lasagne.

Spicy Korean Beef

  • 15th June 201818th June 2018
  • by thefoodwife

Serves 2-3

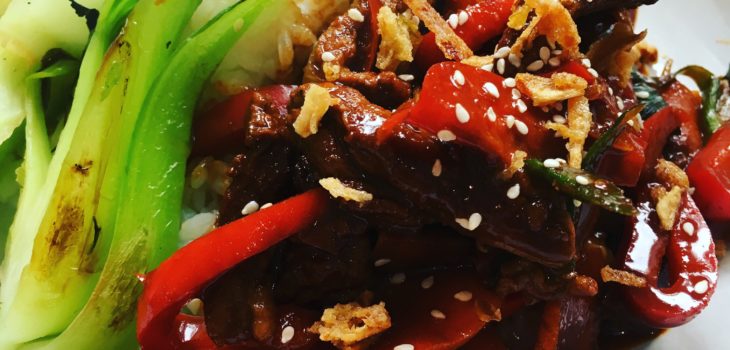
I have sung the praises of beef skirt previously in my Chinese Ginger Beef recipe and I use it here again, this time with a Korean vibe. The star of the show today however is the spicy fermented Korean paste, gochujang, which has featured in my Korean Chicken Wings and one of my Asian Pork Belly and the Instant Pot recipes.

I love the stuff and keep a tub of it in my fridge at all times (and a spare in the cupboard!). A friend recently noticed it and asked what it was, musing that the contents of my fridge were intriguing. The thing is, she hadn’t looked in my cupboards! I have friends who make a point of rummaging through them whenever they come over, as they know I’ll have weird and wonderful things inside them.

If you are in the vicinity of an Asian supermarket or food shop I’d recommend picking up a tub. It’ll keep a long while in the fridge but that won’t be an issue anyway as you’re sure to become addicted to its intense heat and be using it at every opportunity.

  • Ingredients:
  • Oil for stir-frying
  • 300g beef skirt steak (or steak of your choice), cut in to thin strips
  • 1 heaped tbsp gochujang
  • 1 1/2 tbsp dark soy sauce
  • 1 1/2 tbsp rice wine vinegar
  • 1 tbsp sugar
  • A couple of drops of sesame oil
  • 1 carrot, peeled and cut diagonally in to thin pieces
  • 1/2 red pepper, cut into strips
  • 2 spring onion, cut on the diagonal

Step 1: Combine the gochujang, soy sauce, vinegar, sugar and sesame oil in a cup or bowl to make a sauce (don’t worry if it’s lumpy at this stage, this will sort itself out in the wok).

Step 2: Heat the oil in a wok on a high heat and add the beef; cook for two minutes, stirring all the time.

Step 3: Add the vegetables and stir fry for another minute.

Step 4: Add the sauce and stir for a couple of minutes and then serve.

Serve with rice and pak choi. I also like to sprinkle the dish with a few sesame seeds and some ready-fried crispy onions, but this is by no means obligatory.

Posts pagination

Previous page 1 2 3 4 Next page

Newsletter

Blog Search

Blog Categories

  • Air fryer 2
  • Alcohol 12
  • Baby Weaning 24
  • Baking 74
  • Beef 18
  • Bread 1
  • Brunch 7
  • Cake 47
  • Chicken 48
  • Christmas 14
  • Cocktails 9
  • Dairy-Free 228
  • Dessert 37
  • Duck 1
  • Fish 12
  • Gluten-Free 254
  • Instant Pot 19
  • Lamb 6
  • Lunch box fillers 2
  • Ostrich 1
  • Pasta 4
  • Pescatarian 13
  • Pork 38
  • Rabbit 1
  • Salad 9
  • Shellfish 10
  • Soup 1
  • Turkey 10
  • Uncategorised 6
  • Vegan 136
  • Vegetarian 243

Socials

  • Facebook
  • Twitter
  • Google
  • Linkedin
  • Instagram
  • Pinterest
  • Youtube
Theme by Colorlib Powered by WordPress
Back to top