Skip to content
The Food Wife logo
  • Home
  • About
  • Blog
  • Contact

Category: Christmas

Panettone Family Breakfast Stack

  • 13th November 202313th November 2023
  • by thefoodwife

Serves 2-4

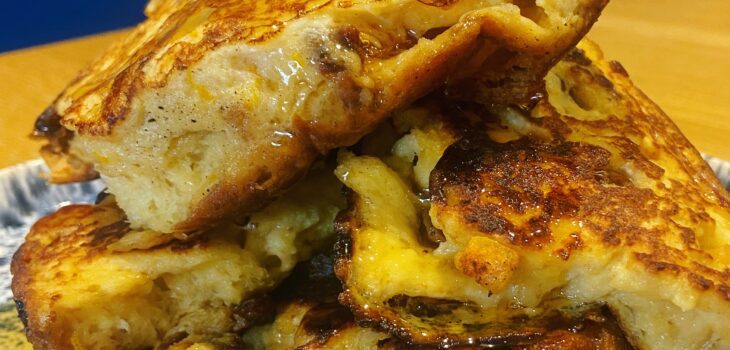
This is an excellent way to use up any leftover panettone. For my family breakfast stack I used a quarter of a 700g panettone that needed using up. Obviously you can increase (or decrease!) these quantities. We had this between four of us – each having a thick slice. Bigger appetites may manage two (or more!) slices. We served ours with maple syrup but you could bulk it up with fresh berries and Greek yogurt.

Ingredients:

1/4 wedge of a large panettone cut from base to top into four even slices.

2 large eggs

Splash of milk

Zest of one orange (optional)

Nob of butter

Vegetable oil

Topping ideas:

Maple syrup (optional)

Fresh berries (optional)

Greek yogurt (optional)

Chocolate sauce (optional)

Step 1: Beat together the eggs, a decent splash of milk and the zest of an orange in a wide dish. It needs to be wide enough to hold the panettone slices without damaging them. You can do these one or two at a time. Nestle them in the dish and allow them to soak up the eggy mixture for a minute until careful turning over for another 30 seconds or so.

Step 2: Heat a non stick pan over a medium high heat with a small amount of vegetable oil and the nob of butter. Once the butter is melted and bubbling it’s ready for the panettone.

Step 3: Add the slices of panettone not crowding them and allow them to cook, lowering the heat as necessary. Cook each side for a few minutes until golden and slightly crispy.

Step 4: Stack the cooked panettone on a serving plate and either dress with your choice of toppings and give everyone a plate and let them dig in, or divide between plates and top as desired before devouring. Enjoy!

Red Velvet Cupcakes with a Milk Chocolate Rudolf Topping

  • 11th November 202311th November 2023
  • by thefoodwife

Makes 14

These are so fun! And a perfect bake for Christmas with the kids. The recipe here has notes for how to make it a gluten-free recipe. Curly Wurlys pieces are perfect to use to decorate these but by all means use an alternative or leave out.

Ingredients:

For the cakes:

160g plain flour (gluten-free if required)

35g corn flour

1/2 tsp (gluten-free if required) baking powder

1/4 tsp xanthan gum (only needed if using gluten-free flour)

1/4 tsp fine salt

4 heaped tsp cocoa powder

60g softened butter

120ml vegetable oil

200g caster sugar

2 large eggs, separated

2 tsp vanilla extract

120ml butter milk (or full fat milk with 1 tsp of lemon juice or white wine/cider vinegar mixed and left for five minutes)

1/2 tsp white wine or cider vinegar

Red gel food colouring

For the decorations:

100g milk chocolate, melted

200g softened butter

400g icing sugar (sieved)

5 tbsp cocoa powder

Pinch of fine salt

Milk to loosen (if necessary)

Curly Wurly Squirlies

Edible eyes/mini smarties

Red dragees for the nose or use some red edible glitter

Step 1: Preheat your oven to 180c (fan) and line your muffin trays with 14 cases.

Step 2: Sift the two flours together along with the cocoa, salt and baking powder (and xanthan gum if needed). Set to one side.

Step 3: Whisk the egg whites until they reach soft peaks. Set to one side.

Step 4: Using the paddle attachment on your mixer, beat the butter and sugar together until smooth, then add the oil. Mix again until combined, then add the egg yolks, vinegar and vanilla extract. Beat until smooth (it may look grainy don’t panic!). Then add your desired amount of red colouring.

Step 5: On a low speed, gradually add the buttermilk and flour mix, alternating a third at a time until fully combined.

Step 6: Remove your bowl from the mixer and then carefully fold in the whisked egg whites until you have a smooth and airy batter. Divide between your cupcake cases. Bake for 18-20 minutes until risen and spring back to the touch (you could also check that a skewer comes out clean).

Step 7: Remove from the oven and allow to cool in the tins for a few minutes before transferring to a wire rack to cool completely before decorating.

Step 8: To make the chocolate butter icing, melt the milk chocolate in a heatproof bowl, you can microwave it in 30 second bursts until melted. Set to one side to cool for a few minutes.

Step 9: Beat the soft butter and the icing sugar together, add the cocoa, a pinch of salt and the cooled melted chocolate and continue to beat, until smooth. If necessary add a tablespoon or two of milk and mix until completely smooth.

Step 10: Top the cooled cakes with the icing. You can use a knife or piping bag to do this. Then use the curly wurly squirlies to create the antlers and the smarties, or similar for the nose and eyes.

Winter Crunch

  • 1st November 20231st November 2023
  • by thefoodwife

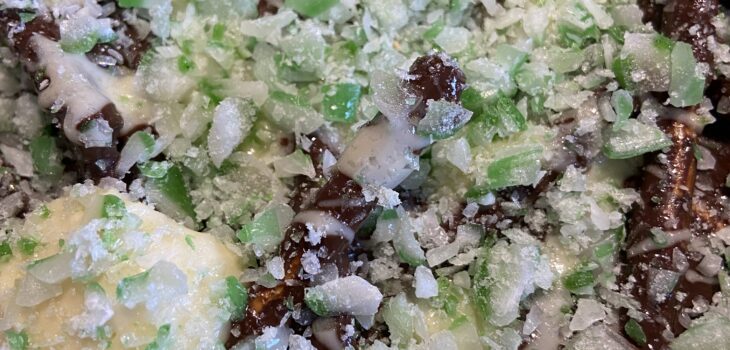
A fun seasonal treat to make with the kids, this Winter Crunch uses only four ingredients and is very moreish. Proceed with caution!!

Ingredients:

200g dark chocolate

70g salted pretzels

50g white chocolate

3 mint candy canes, crushed into small pieces (placing in a zip lock bag and bashing with a rolling pin works well!)

Step 1: Melt the dark chocolate. I do this by breaking the chocolate into small pieces in a bowl and microwaving it in 30 second bursts, stirring each time, until melted.

Step 2: Line an 8×8 inch baking tray (a brownie pan is perfect) with grease proof paper. Spread the pretzels over the lined tray. Pour over the melted dark chocolate. If necessary, use a spoon to ensure the chocolate is spread evenly and the pretzels are coated. It should be a fairly even layer. Sprinkle over 2/3 of the crushed candy canes. Place in the fridge for 10 minutes to set.

Step 3: Meanwhile, melt the white chocolate and set to one side until the 10 minutes are up. Drizzle the white chocolate over the set dark chocolate and then top with the remaining candy cane crush. Allow to set fully in the fridge before breaking or cutting into pieces.

Step 4: Try not to eat it all at once.

Easy Chocolate Truffles

  • 29th March 202329th March 2023
  • by thefoodwife

Makes approximately 30 truffles

This is a fun recipe to try out with kids. Whilst it’s a bit of a workout constantly mixing, rolling the truffles in bright sprinkles is just the thing to get everyone involved, whatever the age.

Great for a party treat!

Ingredients:

397g Condensed Milk

1 tsp finely ground instant coffee (or dissolve 1 tsp in a tablespoon of hot water) this is optional but will help intensify the chocolate and you won’t really taste coffee in the finished product.

150g cocoa powder

Sprinkles/cocoa powder for coating

Step 1: Set a heavy bottomed sauce pan over a low heat. Add the coffee and stir, then constantly stirring, add 1 tablespoon of cocoa powder at a time until each spoonful has blended into the gently warming condensed milk. As the mixture gently heats it will thicken and become smooth, very dark, and glossy. You will need to keep the heat very low to avoid burning and you will need to keep stirring to avoid it sticking. Once all combined, pour onto a lined baking tray or wrap in a sheet of cling film, and store in the fridge until cooled (about half an hour).

Step 2: use a teaspoon to take scoops of the mixture and roll in your hands into a ball. Toss in colourful sprinkles, or for an extra hit of intense chocolate, more cocoa powder.

Step 3: Store in a sealed container in the fridge until ready to serve.

Broccoli and Cheese Pasta

  • 7th January 20237th January 2023
  • by thefoodwife

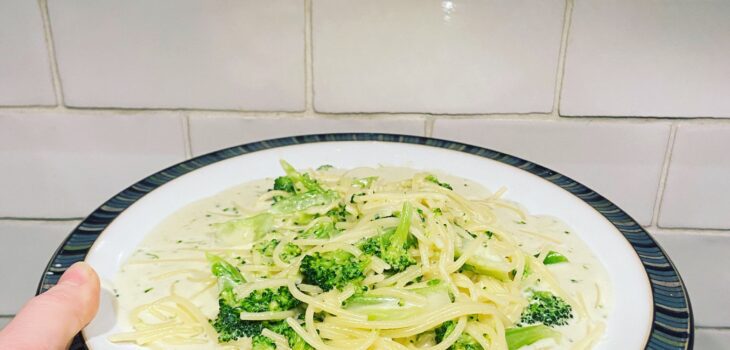
A post-Christmas fridge clear out ended up with this creation. Half a head of broccoli, double cream and stilton. Spaghetti from the cupboard. A super simple supper.

Ingredients:

Double cream (about 50-100 ml a person)

Stilton (or any other cheese, as much as you have to use up!)

Broccoli (cut up into small florets)

Pasta (75g a person, gluten-free if required)

Step 1: on a medium-low heat, in a heavy bottomed pan, gently heat the double cream, along with the cheese crumbled in. Stir regularly until melted and smooth. Keep on a low heat.

Step 2: Meanwhile, cook your pasta in salted water according to the packet instructions. Four minutes before the end add your broccoli florets.

Step 3: Drain the pasta and broccoli reserving a little of the cooking water, add this all to the creamy cheesy sauce, and stir until everything is coated. Serve immediately.

Posts pagination

Previous page 1 2 3 Next page

Newsletter

Blog Search

Blog Categories

  • Air fryer 2
  • Alcohol 12
  • Baby Weaning 24
  • Baking 74
  • Beef 18
  • Bread 1
  • Brunch 7
  • Cake 47
  • Chicken 48
  • Christmas 14
  • Cocktails 9
  • Dairy-Free 228
  • Dessert 37
  • Duck 1
  • Fish 12
  • Gluten-Free 254
  • Instant Pot 19
  • Lamb 6
  • Lunch box fillers 2
  • Ostrich 1
  • Pasta 4
  • Pescatarian 13
  • Pork 38
  • Rabbit 1
  • Salad 9
  • Shellfish 10
  • Soup 1
  • Turkey 10
  • Uncategorised 6
  • Vegan 136
  • Vegetarian 243

Socials

  • Facebook
  • Twitter
  • Google
  • Linkedin
  • Instagram
  • Pinterest
  • Youtube
Theme by Colorlib Powered by WordPress
Back to top