Skip to content
The Food Wife logo
  • Home
  • About
  • Blog
  • Contact

Category: Dairy-Free

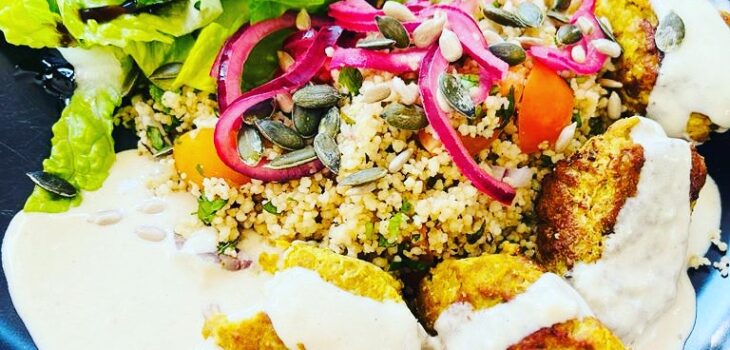
Turkey Koftas

  • 28th May 202328th May 2023
  • by thefoodwife

Makes approx 25 (serves 5+)

These little morsels are great as part of a mezze or as the protein with a salad for lunch or dinner.

Frying the onion before adding to the mince helps give a sweeter flavour to the koftas and the turmeric gives them a golden hue.

I’d suggest using a non stick pan. I also like to use two frying pans as I’m cooking them. Once I have filled both pans it’s ready to start flipping them over and the whole process is done quickly.

I used turkey mince but you could use beef, lamb or pork if you prefer.

Ingredients:

1 large onion, finely chopped

750g Turkey (thigh) mince

2 eggs, beaten

1 tsp salt

1 tsp ground pepper

1 tsp ground cinnamon

2 tsp ground turmeric

3 tsp ground cumin

Oil

Step 1: Over a medium heat, fry the onion in a little oil, until golden but not browned. (I used a garlic oil for extra flavour).

Step 2: In a large bowl, mix the spices, salt and pepper, eggs, mince and slightly cooled onion together, with your hands. Make sure you really squish it so it’s thoroughly combined.

Step 3: Heat some vegetable oil in a non stick frying pan, over a medium-high heat. Use a dessert spoon to scoop a heaped amount of the mixture and use another spoon to round the top. Transfer into the hot oil and cook for a few minutes on each side, not turning until each side is browned. Repeat until all the mixture is used up.

Step 4: Remove the koftas from the pan, once cooked, and keep warm until all are ready and then serve.
Tahini Noodle Salad

  • 11th May 202311th May 2023
  • by thefoodwife

Serves 2-4

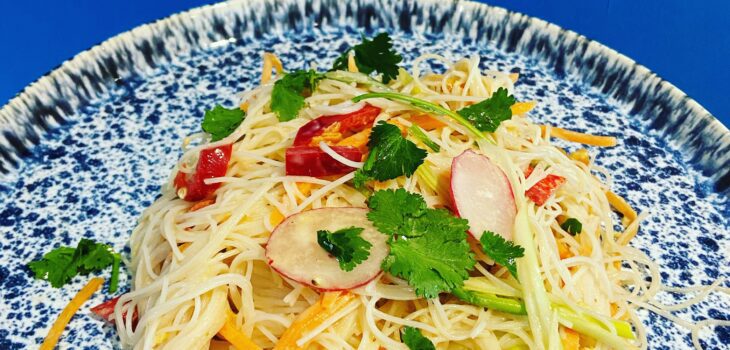
This salad can be a meal in itself or pair it with some protein, such as tofu, prawns or chicken.

You can use any noodles you fancy but vermicelli rice noodles are a good carrier. Cook these according to the packet instructions (usually soaking in just-boiled water for five minutes) and then drain carefully and run cold water through them to make them ready for the dressing and stop them sticking together.

This dressing is enough to coat the noodles here but it is a light dressing. If you want a stronger punch, double the quantities.

Ingredients:

200g rice noodles, cooked according to the packet instructions and then run under cold water to cool.

1 shredded carrot

1 red pepper cut into strips

2 spring onions, sliced

Plus any extra vegetables you fancy, sliced

For the dressing:

3 tbsp Tahini

1 tbsp Soy sauce (gluten-free if required)

1 tbsp Honey/maple syrup

1 tbsp Rice wine vinegar

1 tbsp (sweet) chilli sauce

Thumb size piece of ginger, grated

Step 1: Mix all the dressing ingredients together to a smooth paste.

Step 2: In a large bowl combine all the noodles and vegetables together. Pour over the dressing and using clean hands, toss together until everything is coated. Serve.

Courgette and Tomato Salad with Pomegranate Molasses and Mint

  • 7th May 20237th May 2023
  • by thefoodwife

Serves 6 as a side dish

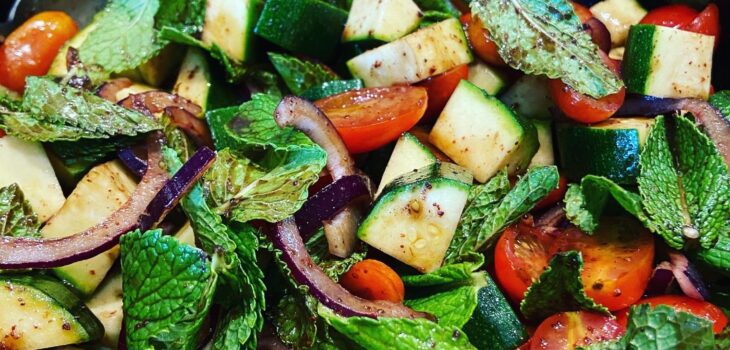
As summer approaches, anyone growing courgettes will probably be wondering what to do with them all. Here is a Middle-Eastern-inspired salad that uses them raw. They provide more of a texture than flavour, but the dressing sings!

Make sure to use room temperature tomatoes to increase their sweet flavour (straight from the fridge and they won’t taste of much!)

Ingredients:

250g baby tomatoes, halved

2 courgette, cut length ways into quarters and then into 1cm chunks

1/2 red onion cut in to thin half moons

30g mint, leaves only

4 tbsp pomegranate molasses

1 tbsp extra virgin olive oil

2 tsp sumac

Pinch of salt

Step 1: Assemble the prepared tomatoes, courgette, onion and mint leaves in a large bowl.

Step 2: Mix the pomegranate molasses, olive oil, sumac and salt together (I shake all the ingredients together in a sealed jar).

Step 3: Toss the salad and dressing together(can be done up to an hour before serving). Serve.

Jewelled Crown Biscuits

  • 3rd April 20233rd April 2023
  • by thefoodwife

These crowns are in honour of the coronation, but also just fun to make with kids! The brown sugar and golden syrup give them their golden lustre and I love using jelly tots for the jewels. I’ve flavoured these with lemon because Charles III is a fan and white chocolate because it’s such a good combo!

These are easily made gluten free and/or vegan. Just use the appropriate swaps in the ingredients (detailed below).

Ingredients:

125g of (vegan if required) butter

100g light soft brown sugar

65g golden syrup

300g (gluten-free if required) plain flour

1 tsp (gluten-free if required) bicarbonate of soda

2 tsp lemon extract

To decorate:

150g white chocolate, melted (vegan/gluten-free if required)

Jelly tots (these are now vegan friendly)

Step 1: Preheat oven to 180c (fan). Line baking trays with parchment.

Step 2: Melt the butter with the light soft brown sugar and golden syrup. Set to one side.

Step 3: In a bowl mix the flour and bicarbonate of soda. Add the molten fat and sugar combination along with the lemon extract and stir until you have a smooth dough.

Step 4: Allow to cool for a few minutes and then tip out on to a large piece of grease proof paper. Top with another piece and then use a rolling pan on top of the paper to spread the dough out until a few mm thick.

Step 5: Use your chosen cutters (crowns!) to press out shapes and carefully transfer to your lined baking sheets (you will need to be delicate as the dough tears easily at this stage) and then into the oven for 10 minutes.

Step 6: Remove and allow to cool (wait about 15 minutes before transferring them to a wire rack to cool fully).

Step 7: Decorate by dipping the bases into the melted white chocolate and then adorn with jelly for jewels! Allow the white chocolate to set fully before storing.

Keep in an air tight container for up to a few days.

Coronation Chicken

  • 30th March 202330th March 2023
  • by thefoodwife

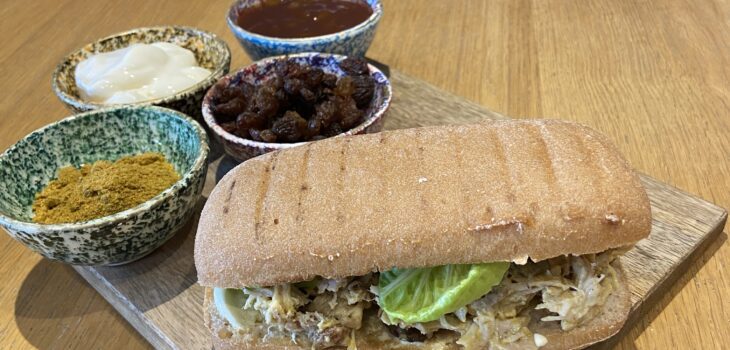
I couldn’t NOT do this as we approach Charles’ big day. It’s an absolute favourite sandwich filling in our house. By all means use some ready cooked chicken (or leftovers from a roast!) but here is how to make a large amount using a whole chicken in the Instant Pot. You can then serve this as a platter as part of a buffet (street party, anyone?) or use it as a filling in sandwiches, wraps, baked potatoes etc.

Ingredients:

1 whole chicken

7 heaped tbsp mayonnaise

3 tbsp mango chutney

1 heaped tbsp medium curry powder

Two handfuls of sultanas

Step 1: Cook the chicken. Place the chicken in the Instant Pot and top with enough water to reach the max line. You can also add some extra flavour at this point too (a couple of celery sticks, a carrot, a few peppercorns and a bay leaf or two). Set the Instant Pot to high pressure for 50 minutes.

Step 2: Depressurise the Instant Pot and carefully remove the chicken. Allow the chicken to cool enough so that you can shred the meat from the bones. You could put the bones back into the liquid and complete making a delicious stock by switching to sauté mode and reducing it down to about a litre.

Step 3: Mix the mayonnaise, mango chutney, curry powder and sultanas in a bowl.

Step 4: Stir through the shredded chicken and it’s ready to use or store for up to three days in the fridge.

Posts pagination

Previous page 1 … 9 10 11 12 13 … 46 Next page

Newsletter

Blog Search

Blog Categories

  • Air fryer 2
  • Alcohol 12
  • Baby Weaning 24
  • Baking 74
  • Beef 18
  • Bread 1
  • Brunch 7
  • Cake 47
  • Chicken 48
  • Christmas 14
  • Cocktails 9
  • Dairy-Free 228
  • Dessert 37
  • Duck 1
  • Fish 12
  • Gluten-Free 254
  • Instant Pot 19
  • Lamb 6
  • Lunch box fillers 2
  • Ostrich 1
  • Pasta 4
  • Pescatarian 13
  • Pork 38
  • Rabbit 1
  • Salad 9
  • Shellfish 10
  • Soup 1
  • Turkey 10
  • Uncategorised 6
  • Vegan 136
  • Vegetarian 243

Socials

  • Facebook
  • Twitter
  • Google
  • Linkedin
  • Instagram
  • Pinterest
  • Youtube
Theme by Colorlib Powered by WordPress
Back to top