Skip to content
The Food Wife logo
  • Home
  • About
  • Blog
  • Contact

Category: Dairy-Free

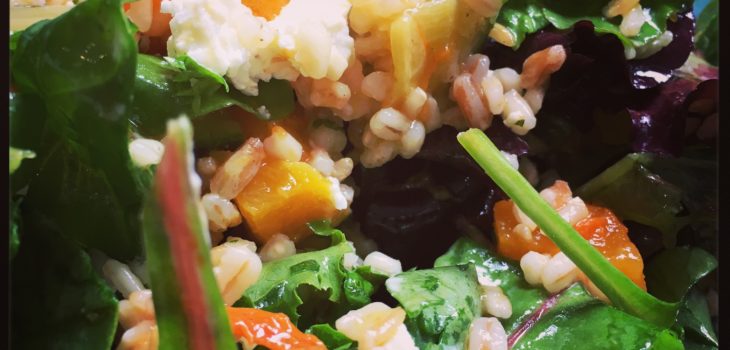
Roasted Vegetable and Grain Salad

  • 7th September 20188th September 2018
  • by thefoodwife

Serves 2-4

I found a packet of five Italian grains in the supermarket and was keen to give them a go in a salad. The mix contained spelt, barley, durum wheat, rice and oats, but you could use a combination of your choosing, or just use one grain.

I’m also a bit obsessed with tarragon at the moment. I love its aniseedy perfume and find it incredibly moreish. I’ve been keen to grow some but I struggled to find any of the French variety to grow this summer. Instead I’ve had to make do with packets of fresh herbs from the supermarket.

The dressing quantity is more than you will need for this dish, but it will store for a few days in the fridge. I used it to dress some warm green beans to accompany an evening meal the same day. It was good!

  • Ingredients:
  • For the roasted vegetables:
  • 1 courgette, cut into 1cm dice
  • 1 pepper, cut into 1cm dice
  • 1/2 butternut squash, cut into 1cm dice
  • 1/2 fennel, cut into 1cm dice
  • 1 tbsp olive oil
  • A pinch each of salt and pepper
  • For the salad:
  • 100g (Italian) grains
  • 50g salad leaves
  • 25g soft goats cheese (optional – leave out if making this vegan or dairy-free)
  • For the dressing:
  • 6 tbsp olive or cold-pressed rapeseed oil
  • 2 tbsp red wine vinegar
  • 1 tsp caster sugar
  • 1 tsp Dijon mustard
  • 1 tbsp freshly chopped French tarragon
  • 1 tbsp freshly chopped parsley

Step 1: Mix the ingredients for the roasted vegetables and spread on a baking sheet. Cook at 200c for 35-40 minutes. Remove and allow to cool.

Step 2: Cook the grains according to the packet instructions. Once cooked, drain and run under cold water until cool.

Step 3: Combine the salad dressing ingredients, and either shake in a lidded jar or whisk in a bowl until amalgamated.

Step 4: In a large salad bowl, toss together the cooled vegetables, grains, salad leaves and about a third of the salad dressing. If you are using goats cheese, crumble over the salad just before serving.

I served this at lunch time with my Tarragon and Mustard Chicken. Wonderful.
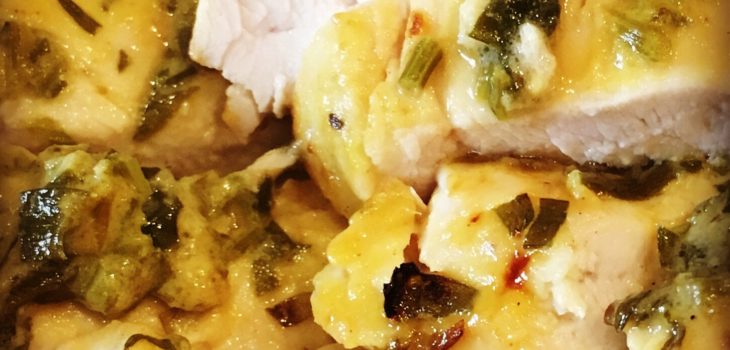
Tarragon and Mustard Chicken

  • 4th September 20184th September 2018
  • by thefoodwife

Serves 2-3

Tarragon is such a beautiful herb and is a classic with chicken. Here it is paired with Dijon mustard and lemon to make a marinade that can be easily scaled up, but the quantities here are perfect for two or three chicken breasts.

  • Ingredients:
  • 2-3 chicken breasts, butterflied
  • For the marinade:
  • 2 tsp rapeseed or olive oil
  • 2 tsp Dijon mustard
  • 1 tsp light brown sugar
  • 4 tsp tarragon, chopped
  • A pinch each of salt and pepper
  • Juice of 1/2 a lemon

Step 1: Combine all of the marinade ingredients in a dish or sealable bag and mix.

Step 2: Add the chicken and massage so the meat is coated in the marinade.

Step 3: Either cover the dish in clingfilm or seal the bag and leave to marinate for an hour or two in the fridge.

Step 4: Remove from the fridge 20 minutes before you are ready to cook.

Step 5: Grill under a high heat for about four minutes on each side until cooked through.

I sliced this into thin strips and served it with a roasted vegetable and grain salad at lunchtime. It would be good as a more substantial meal, left whole, serving a breast per person with a warm potato salad (why not use tarragon in the dressing) and a large green salad on the side.

Ox Cheek Ragù

  • 31st August 201831st August 2018
  • by thefoodwife

Serves 14

This is such a simple dish with few ingredients that really makes an impact. It is excellent for batch cooking and the good news is that a little goes a long way so this feeds a lot of people. My recipe here is for the Instant Pot but it can be slow cooked on the hob or in the oven (see my notes at the end).

I am a huge fan of ox cheek. It is relatively cheap but has the most wonderful flavour and texture. It has to be cooked for a long time but using the pressure cooker means it is done in a fraction of the time.

You want a good Italian red wine for this dish and I absolutely adore Montepulciano D’Abruzzo. Lidl do one that’s exceptional value for the quality at £3.99. This recipe uses half a bottle which means there’s enough for a glass or two for the cook!

This has become a favourite dish in our household and is often on the menu, most recently as part of an Italian-themed dinner party.

Serve with a pasta of your choice and some freshly grated Parmesan or Pecorino.

  • Ingredients:
  • 3 tbsp olive oil
  • 3-4 celery stalks, finely diced
  • 1 onion, finely diced
  • 2 cloves of garlic, finely diced
  • 2 sprigs of rosemary, leaves removed and finely chopped
  • 2 ox cheeks, cut in to large pieces (about 2 inches)
  • 500g passata
  • 375ml Montepulciano D’Abruzzo (Italian red wine)
  • Salt and pepper

Step 1: Set the Instant Pot to sauté mode. When hot, add the oil, celery and onion, and stir frequently for five minutes.

Step 2: Add the garlic and ox cheek pieces. Stir frequently for a couple of minutes until the cheeks are browned slightly.

Step 3: Add the rosemary, passata, wine and a large pinch of salt and pepper. Stir.

Step 4: Switch sauté mode off and replace the lid. Ensure the vent is set to sealing.

Step 5: Select manual, high pressure and set for 35 minutes. Allow it to depress naturally.

Step 6: Remove the lid and take out the cheek pieces and shred with a fork.

Step 7: Return the shredded meat to the pot, leave the lid off and set back on sauté and allow to simmer for 10 minutes, and season to taste.

This is wonderfully rich and a little goes a long way. An Instant Pot ladleful per person (or three or four tablespoons of the sauce) stirred into freshly cooked pasta should do it. I portion this up and freeze for a quick and very satisfying meal.

If you are not using the Instant Pot, it is possible to achieve the same results in the oven or on the hob. Steps 1-3 should be done in a casserole dish on the hob, replace steps 4 and 5 with cooking on a low heat (lid on) either on the hob or oven (150c) for three to four hours. Step 6 remains as is whilst step 7 should be done on the hob, with the lid off.

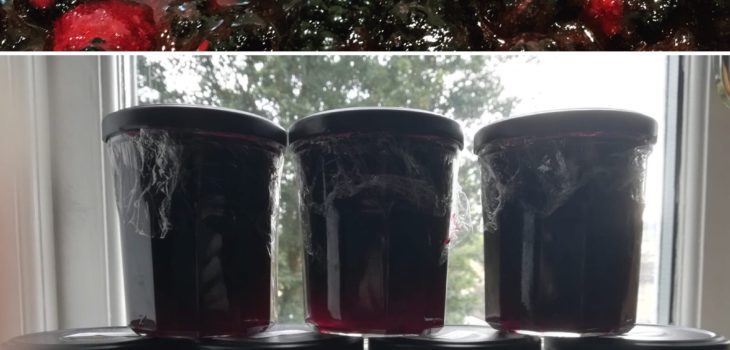
Blackberry Jam

  • 27th August 201827th August 2018
  • by thefoodwife

Makes 8 Jars

There is something very satisfying about picking fruit for free and making something delicious from it. I’m sure it makes it more tasty.

This weekend we went blackberry picking along the canal by our home and managed to collect a hefty haul and I knew exactly what I wanted to do with them.

Several passers by stopped to ask what they’d be turned in to; a pie, crumble, jam? That was the winner.

My normal weekday breakfast at the moment is homemade bread topped with jam. Even better if I can pair it with a homemade preserve!

I made this naturally gluten-free and I also ensured it was vegan and dairy free (see the note in step 4).

You will need a large heavy-bottomed pan, eight jam jars and lids (plus wax circles or other sealants), and a sugar thermometer is useful, but not necessary.

  • Ingredients:
  • 1.75kg blackberries, washed
  • 1.5kg jam sugar
  • Juice of 1 lemon

Step 1: Place the blackberries, sugar and lemon juice in a large, heavy-bottomed saucepan. Place a saucer in the freezer.

Step 2: Heat the pan gently (I used a medium heat) so that the sugar dissolves into the natural juices of the blackberries.

Step 3: Bring to the boil and allow to simmer for 5-10 minutes (or, if using a sugar thermometer, when it reaches 102c).

Step 4: Remove from the heat whilst you test the consistency. Take the saucer from the freezer and put a teaspoon of the liquid on to it. Leave it to cool (30 seconds or so) and then push you finger in to it. If it wrinkles, it has reached the right consistency. If not, return the pan to the heat and boil again for another couple of minutes before testing again (make sure you’ve put the saucer back in the freezer). Keep repeating this until you have reached the right consistency, at which point remove from the heat completely and skim off any scum collected on the top. N.b. If you are not keeping this vegan/dairy-free you could add a small knob of butter at this point to help dissolve any remaining scum.

Step 5: Allow the jam to settle for 10 minutes before ladling into sterilised jars.

Step 6: Seal appropriately (wax seals, lids etc.) and store in a cool dark place (they should keep like this for several months). Refrigerate after opening.

Baby Weaning Sugar-Free Blueberry Compote

  • 17th August 201820th August 2018
  • by thefoodwife

This is a versatile recipe to make for your little one and the whole family. Use it stirred through full fat Greek yogurt (as beautifully demonstrated by The Food Baby in the picture), dolloped on top of porridge, rice pudding or baked semolina, or drizzle it over fluffy pancakes or ice cream. It’s a fun way to get fruit into their diet and it’s got no added sugar, relying on the natural sweetness of the fruit.

  • Ingredients:
  • 1 punnet of blueberries
  • 1 tsp lemon juice
  • 1 tsp cornflour, slackened in a little cold water

Step 1: Wash the blueberries and place them in a pan on a medium heat; any excess water will help speed up the process of breaking them down.

Step 2: After a few minutes the blueberries will start to burst from the heat and release their natural juices. Stir frequently and add your lemon juice. Continue to cook until the pan is full of gloriously dark and shiny liquid and gently bubbling.

Step 3: Use a potato masher to squish the berries so no whole berries remain. If you wanted to you could also strain through a sieve, but I did not feel that it was necessary as The Food Baby is fine with some texture.

Step 4: Add your slackened cornflour and stir, lower the heat, but so that it is still gently simmering and allow to thicken for a few minutes. Remove from the heat and allow to cool.

You can portion this up and keep it in the fridge for a few days or freeze them. If you find the mixture is too tart then you could add a little maple syrup to sweeten it, or of course you could use sugar, or honey (but only use honey if your child is over 12 months).

Posts pagination

Previous page 1 … 35 36 37 38 39 … 46 Next page

Newsletter

Blog Search

Blog Categories

  • Air fryer 2
  • Alcohol 12
  • Baby Weaning 24
  • Baking 74
  • Beef 18
  • Bread 1
  • Brunch 7
  • Cake 47
  • Chicken 48
  • Christmas 14
  • Cocktails 9
  • Dairy-Free 228
  • Dessert 37
  • Duck 1
  • Fish 12
  • Gluten-Free 254
  • Instant Pot 19
  • Lamb 6
  • Lunch box fillers 2
  • Ostrich 1
  • Pasta 4
  • Pescatarian 13
  • Pork 38
  • Rabbit 1
  • Salad 9
  • Shellfish 10
  • Soup 1
  • Turkey 10
  • Uncategorised 6
  • Vegan 136
  • Vegetarian 243

Socials

  • Facebook
  • Twitter
  • Google
  • Linkedin
  • Instagram
  • Pinterest
  • Youtube
Theme by Colorlib Powered by WordPress
Back to top