Skip to content
The Food Wife logo
  • Home
  • About
  • Blog
  • Contact

Category: Dessert

No-Churn Clotted Cream Ice Cream

  • 8th March 20248th March 2024
  • by thefoodwife

The easiest, richest ice cream which takes five minutes to make before popping it in the freezer to do its thing.

As we’re approaching Easter I decided to add some bashed up mini eggs to mine, but by all means you can leave these out.

This hardly seems like a recipe, but here we go anyway!

Ingredients:

453g clotted cream

397g condensed milk

80g mini eggs, bashed into small pieces (optional)

Step 1: Whisk the clotted cream and condensed milk together until just thick and evenly combined – this will only take a minute or two so keep watch!

Step 2: If using, fold through the crushed mini eggs, then transfer the mixture to a tub and seal with a lid. Pop the tub in the freezer, for a few hours, or ideally overnight. Scoop and eat!!

Rich and delicious!

Cheeky Biscoff Twists

  • 21st December 202321st December 2023
  • by thefoodwife

Makes 10 twists

These couldn’t be easier and only need 2 ingredients and 20 minutes.

Ingredients:

1 sheet of ready rolled puff pastry

2 heaped tbsp of smooth biscoff spread (I heated it for 30 seconds in the microwave to make it runny)

Optional: Icing sugar to serve

Step 1: Preheat the oven to 200c (fan) and line a large baking tray.

Step 2: Take the sheet of ready rolled puff pastry, spread half of it with the biscoff spread then fold the other half on top.

Step 3: Cut into 10 equal strips, and twist!

Step 4: Spread on the lined baking tray and bake for 18 mins.

Step 5: Dust with icing sugar and serve!

Chocolate Bourbon Tiffin

  • 21st November 202321st November 2023
  • by thefoodwife

Makes 16 squares

I love tiffin. It’s also known as refrigerator cake, as there’s no baking required. Setting the cake in the fridge results in a rich biscuity chocolate concoction, studded with other sweet treats. Adaptations are listed below to make these vegan and/or gluten-free.

Ingredients:

150g butter/vegan baking block

75g caster sugar

75g golden syrup

30g cocoa powder

150g chocolate bourbon biscuits (gluten-free/vegan if required), crushed to a mix of powder and chunks

2 handfuls of sultanas

2 handfuls of mini marshmallows (gluten-free/vegan if required)

100-200g dark and/or milk chocolate (gluten-free/vegan if required), melted.

Optional: I’ve made mine extra special with two tubes of Rolos (these should be gluten-free but unfortunately are not vegan)

Step 1: Line an 8×8 inch baking pan with grease proof paper.

Step 2: Over a medium low heat, melt the butter, sugar, syrup and cocoa together until smooth, remove from the heat and allow to cool slightly.

Step 3: In a bowl combine the crushed bourbon biscuits, sultanas, marshmallows and rolos (if using) and then stir through the cooled molten cocoa mix until fully combined.

Step 4: Tip into the lined pan and press out until it is in one smooth and level layer. Place in a fridge to set for half an hour.

Step 5: Smooth over the molten chocolate (100g will give a thin layer, 200g a thicker) and cover and place in the fridge to set for a couple of hours until everything is firm. Once fully set, cut into 16 squares using a hot knife.

Store in a sealed container in the fridge for up to a week.

Winter Crunch

  • 1st November 20231st November 2023
  • by thefoodwife

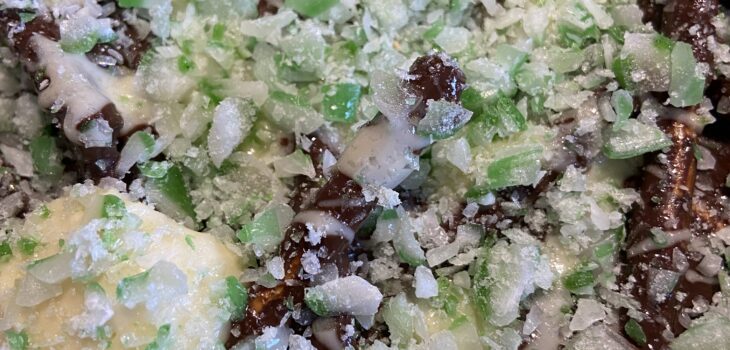
A fun seasonal treat to make with the kids, this Winter Crunch uses only four ingredients and is very moreish. Proceed with caution!!

Ingredients:

200g dark chocolate

70g salted pretzels

50g white chocolate

3 mint candy canes, crushed into small pieces (placing in a zip lock bag and bashing with a rolling pin works well!)

Step 1: Melt the dark chocolate. I do this by breaking the chocolate into small pieces in a bowl and microwaving it in 30 second bursts, stirring each time, until melted.

Step 2: Line an 8×8 inch baking tray (a brownie pan is perfect) with grease proof paper. Spread the pretzels over the lined tray. Pour over the melted dark chocolate. If necessary, use a spoon to ensure the chocolate is spread evenly and the pretzels are coated. It should be a fairly even layer. Sprinkle over 2/3 of the crushed candy canes. Place in the fridge for 10 minutes to set.

Step 3: Meanwhile, melt the white chocolate and set to one side until the 10 minutes are up. Drizzle the white chocolate over the set dark chocolate and then top with the remaining candy cane crush. Allow to set fully in the fridge before breaking or cutting into pieces.

Step 4: Try not to eat it all at once.

Jewelled Crown Biscuits

  • 3rd April 20233rd April 2023
  • by thefoodwife

These crowns are in honour of the coronation, but also just fun to make with kids! The brown sugar and golden syrup give them their golden lustre and I love using jelly tots for the jewels. I’ve flavoured these with lemon because Charles III is a fan and white chocolate because it’s such a good combo!

These are easily made gluten free and/or vegan. Just use the appropriate swaps in the ingredients (detailed below).

Ingredients:

125g of (vegan if required) butter

100g light soft brown sugar

65g golden syrup

300g (gluten-free if required) plain flour

1 tsp (gluten-free if required) bicarbonate of soda

2 tsp lemon extract

To decorate:

150g white chocolate, melted (vegan/gluten-free if required)

Jelly tots (these are now vegan friendly)

Step 1: Preheat oven to 180c (fan). Line baking trays with parchment.

Step 2: Melt the butter with the light soft brown sugar and golden syrup. Set to one side.

Step 3: In a bowl mix the flour and bicarbonate of soda. Add the molten fat and sugar combination along with the lemon extract and stir until you have a smooth dough.

Step 4: Allow to cool for a few minutes and then tip out on to a large piece of grease proof paper. Top with another piece and then use a rolling pan on top of the paper to spread the dough out until a few mm thick.

Step 5: Use your chosen cutters (crowns!) to press out shapes and carefully transfer to your lined baking sheets (you will need to be delicate as the dough tears easily at this stage) and then into the oven for 10 minutes.

Step 6: Remove and allow to cool (wait about 15 minutes before transferring them to a wire rack to cool fully).

Step 7: Decorate by dipping the bases into the melted white chocolate and then adorn with jelly for jewels! Allow the white chocolate to set fully before storing.

Keep in an air tight container for up to a few days.

Posts pagination

Previous page 1 2 3 4 5 6 … 8 Next page

Newsletter

Blog Search

Blog Categories

  • Air fryer 2
  • Alcohol 12
  • Baby Weaning 24
  • Baking 74
  • Beef 18
  • Bread 1
  • Brunch 7
  • Cake 47
  • Chicken 48
  • Christmas 14
  • Cocktails 9
  • Dairy-Free 228
  • Dessert 37
  • Duck 1
  • Fish 12
  • Gluten-Free 254
  • Instant Pot 19
  • Lamb 6
  • Lunch box fillers 2
  • Ostrich 1
  • Pasta 4
  • Pescatarian 13
  • Pork 38
  • Rabbit 1
  • Salad 9
  • Shellfish 10
  • Soup 1
  • Turkey 10
  • Uncategorised 6
  • Vegan 136
  • Vegetarian 243

Socials

  • Facebook
  • Twitter
  • Google
  • Linkedin
  • Instagram
  • Pinterest
  • Youtube
Theme by Colorlib Powered by WordPress
Back to top