Skip to content
The Food Wife logo
  • Home
  • About
  • Blog
  • Contact

Category: Vegan

The Jennifer Aniston Salad, Tweaked

  • 7th June 20227th June 2022
  • by thefoodwife

Serves 6-8

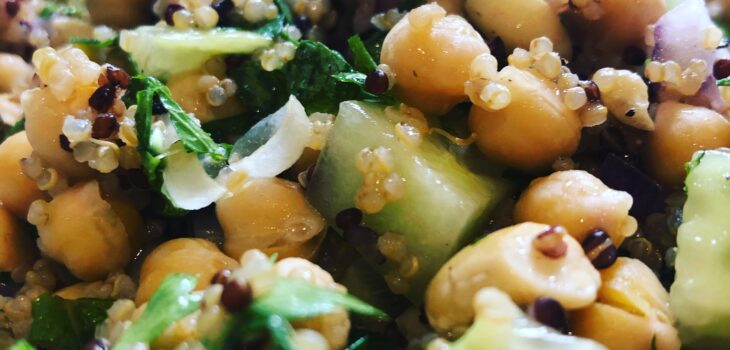
I’ve jumped on the band wagon. Albeit a tweaked version. Mine is gluten free, dairy free and vegan. Although I included the feta element as a side dish which I’ll also detail so dairy eaters can include it in their salad. Anyway, it is delicious and can totally see why it was a staple on the set.

Ingredients:

2 tins of chickpeas

1 large cucumber, diced

1 red onion, finely diced

100g nuts (Jennifer Aniston uses Pistachios, I used chopped cashews)

500g (cooked weight) quinoa

30g parsley, chopped

15g mint, chopped

2 lemons, juiced

Olive oil

Salt

Pepper

Optional whipped feta:

200g feta

2 heaped tbsp Greek yogurt

Step 1: N.b. this is optional, but I like to do it as it makes the chickpeas softer and nicer to eat. Pour the contents of both tins into a sauce pan (including their water) and bring to the boil for 20 minutes to make them soft to eat. Then drain and allow to cool. If skipping this step simply drain your tins of chickpeas.

Step 2: Combine the cooled chickpeas, the quinoa, cucumber, red onion and nuts in a large bowl. Only add the herbs just before serving as the mint will go black after it’s been chopped.

Step 3: Mix together the lemon juice, a pinch each of salt and pepper and about double the quantity of olive oil to lemon juice. Just before serving mix the dressing and herbs through the salad and serve.

Optional extra – whipped feta.

In a food processor blitz together the feta and Greek yogurt to create a thick dip. Serve on the side for non-vegans.


Chocolate Dipped Stawberries

  • 7th May 20227th May 2022
  • by thefoodwife

I’ve been thinking about homemade edible gifts, full marks if they are homegrown too! The strawberry plants on my allotment are in flower and I’m eagerly anticipating the arrival of the berries (I’m also anticipating the slugs will get to some of them before I do too).

So at the moment I’m relying on punnets of shop bought strawberries but it won’t be long before I can harvest my own or indeed you can visit a PYO.

These are super easy to make. Make and eat them fresh (within a day or two). Use them as a garnish on a dessert or as the dessert if you are hosting a dinner party or bring a box of them if you’re the guest.

Ingredients:

Approx. 100g chocolate (white, milk or dark) per 300g strawberries

Step 1: Carefully wash the strawberries and dry them (gently!) using a clean tea towel.

Step 2: Melt your chosen chocolate (if making these gluten-free and/or dairy-free use an appropriate chocolate) either in a heat proof bowl over a pan of simmering water (don’t let the bowl come in contact with the water) or in a bowl in the microwave in 30 second bursts, stirring after each time.

Step 3: Line a tray with baking paper, and then use the stalk to hold each strawberry as you dip it in the molten chocolate. Use a spoon to help cover then gently shake off any excess and carefully place on the paper. Leave a gap between each one so they don’t stick together. Allow to set in the fridge and store in the fridge until ready to eat!

Sweet and Sour Tofu

  • 14th February 202214th February 2022
  • by thefoodwife

Serves 2-3

It was Valentine’s Day 2022 when the Food Husband asked for seconds of tofu. High praise indeed!

Here is a vegan sweet and sour, which uses tofu in place of the more traditional chicken or pork. Baking the tofu with the five spice really makes a difference. My one year old loved eating the baked pieces when I got them out the oven. He got about three pieces in when I started getting worried about whether there’d be any left for our dinner!

If you’re not fussed about making this vegan then of course you can use chicken or pork. Simply stir fry with the vegetables, but do add a couple of pinches of the five spice still.

N.b. You can of course add pineapple, just add at the same time as the tofu at the end of the cooking.

Ingredients:

500g firm tofu, drained and cut into large pieces (approx 1.5cmx1.5cmx3cm)

Oil

Chinese five spice

1 tbsp Vegetable oil

1/2 tsp Sesame oil

1 white onion, large dice

1 pepper, large dice

1/2 carrot, peeled and cut into thin rounds

1 salad tomato, cut into wedges

1 inch ginger, peeled, grated or finely chopped

250ml apple juice

2 tbsp tomato purée

2 tbsp soy sauce (gluten-free if required)

2 tbsp cider vinegar

3 tbsp soft brown sugar

1 tbsp cornflour

Step 1: Begin by preheating your oven to 180c (fan). Place the pieces of tofu carefully on a baking tray (allow a little space between each piece). Spritz with a little oil and then use a couple of pinches of Chinese five spice to sprinkle over the tofu. Then carefully flip each piece and repeat. Bake in the oven for an hour, turning half way through.

Step 2: In a large frying pan or a wok, add the vegetable oil and sesame oil over a high heat. Stir fry the onion, pepper, carrot, tomato and ginger for a few minutes.

Step 3: Combine the apple juice,tomato purée, soy sauce, vinegar, sugar and corn flour in a jug and mix until smooth. Add to the vegetables and cook out for a few minutes until thickened. Check the seasoning.

Step 4: Transfer the cooked tofu to the sweet and sour sauce. Stir through until all coated and glossy. Serve with rice.

Mince with Crispy Chilli Oil

  • 15th December 202115th December 2021
  • by thefoodwife

Serves 4

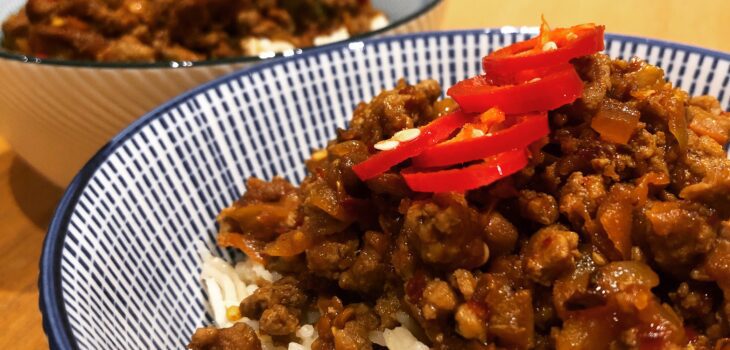
This will work with any mince you like, meat or veggie. You are bulking it out with three types of vegetables that are all made to be the same size as the mince, so it’s a great way to smuggle veg into a meal.

The crispy chilli oil is a magical ingredient. Talk about addictive!! Two heaped tablespoons might sound a lot, but I figure you’re not going to be making this if you don’t like chilli, and although it’s spicy, it’s not that spicy really. I also garnish mine with slices of fresh red chilli for a pop of colour and a spike of extra heat.

Ingredients:

1 tsp coconut oil

1 onion, finely diced

1 large carrot, grated

1 pepper, finely diced

300g mince (turkey, pork, beef, chicken, soya, quorn)

1-2 tbsp soy sauce (gluten-free if required)

1 tbsp oyster sauce (leave out if vegetarian/vegan) (gluten-free if required)

2 heaped tbsp crispy chilli oil (gluten-free/vegan/vegetarian if required)

Step 1: In a wok, or large frying pan, melt the coconut oil over a medium-high, then add the diced onion, cook for a few minutes, stirring often, before adding the carrot and pepper. Continue to stir and cook for a couple more minutes, then add the mince.

Step 2: Cook the mince until it is browned and dry (any water should be cooked until evaporated) then add the seasoning of soya sauce, oyster sauce (if using) and crispy chilli oil. Continue to cook for about five-ten minutes, stirring often until everything is coated, glossy and tastes delicious.

Serve with rice or noodles. I also like it with a crunchy cucumber salad dressed with lime juice and salt.

Sourdough Starter

  • 3rd December 20213rd December 2021
  • by thefoodwife

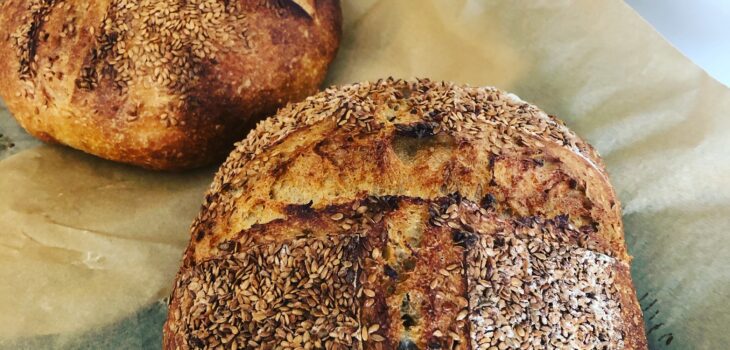
To make a sourdough starter, all you need is a largish jar, flour, water and a little time. Soon you’ll have a bubbly little friend that will help you to make the most delicious creations.

You can use normal white flour, but in my experience, the best, most active results, come from dark rye flour. It makes a thick paste that expands to make a very active mousse-like starter.

Use an elastic band on the outside of jar to mark the starting point of your mix and then you’ll easily be able to see how much it’s grown.

Leaving the jar on the side of your kitchen, should be enough to get it going. Too much heat and you’ll have an explosive disaster; too little and very little will happen. Once you’ve got it going, keep your starter in the fridge between bakes and bring it out to feed and refresh as needed.

So, here’s how to make it!

Start with your clean jar, 50g of flour and 50g of lukewarm water. Mix thoroughly (you don’t want any patches of dry flour) then pop the lid on and leave on the side. The next day you’re going to feed it again. We don’t want too much in the jar, so discard half of the mix, then add another 50g each of the flour and water. Mix, cover and leave. Repeat each day, taking 50g of the starter, 50g fresh flour and the same of water, until your starter starts to grow! Once it’s nice and active (you should see it double in height from your elastic band) it’s good to start baking with!

N.b. This is a 1:1:1 ratio of feeding, if you are struggling with a sluggish starter later on, try a 1:3:3 ratio for instance, 20g of starter, 60g or flour and 60g of water.

Posts pagination

Previous page 1 … 7 8 9 10 11 … 28 Next page

Newsletter

Blog Search

Blog Categories

  • Air fryer 2
  • Alcohol 12
  • Baby Weaning 24
  • Baking 74
  • Beef 18
  • Bread 1
  • Brunch 7
  • Cake 47
  • Chicken 48
  • Christmas 14
  • Cocktails 9
  • Dairy-Free 228
  • Dessert 37
  • Duck 1
  • Fish 12
  • Gluten-Free 254
  • Instant Pot 19
  • Lamb 6
  • Lunch box fillers 2
  • Ostrich 1
  • Pasta 4
  • Pescatarian 13
  • Pork 38
  • Rabbit 1
  • Salad 9
  • Shellfish 10
  • Soup 1
  • Turkey 10
  • Uncategorised 6
  • Vegan 136
  • Vegetarian 243

Socials

  • Facebook
  • Twitter
  • Google
  • Linkedin
  • Instagram
  • Pinterest
  • Youtube
Theme by Colorlib Powered by WordPress
Back to top