Skip to content
The Food Wife logo
  • Home
  • About
  • Blog
  • Contact

Category: Vegetarian

Amaretto Dark Chocolate Truffles

  • 13th December 201813th December 2018
  • by thefoodwife

Makes approx. 45

A dinner party with the girls, and amaretto sours are the cocktail of choice, so I decided that to finish the evening some rich dark chocolate truffles, spiked with amaretto, would be called for!

I chose to coat mine in a mix of milk and dark chocolate and then top them with crushed amaretti biscuits. They are ridiculously rich, so you won’t be eating too many (you can always scale down this recipe) but taste so wonderful that you will want to go back for more!

These can be made in advance and stored in the fridge for a good week.

  • Ingredients:
  • 300ml double cream
  • 325g good quality dark chocolate (at least 70%), broken into pieces
  • 75g butter, cubed
  • 2 tbsp amaretto liqueur
  • Salt
  • For the optional coatings:
  • Cocoa powder
  • 300g good quality milk chocolate (or a mix of milk and dark), melted and then cooled to 31c.
  • Amaretti biscuits, crushed

Step 1: Heat the cream to boiling point and then remove from the heat. Allow to cool for a couple of minutes.

Step 2: Add the butter, dark chocolate, amaretto and a pinch of salt to the cream. Allow to stand for two minutes and then stir until the butter and chocolate are completely melted and combined with the cream to make a smooth and glossy ganache.

Step 3: Cover and leave in the fridge for a couple of hours until set.

Step 4: Line a baking sheet or cooling rack with greaseproof paper.

Step 5: Use a melon baller or a teaspoon and then your hands to roll balls of the set truffle mixture. Lay out on the greaseproof paper and return to the fridge to set.

Step 6: Choose how to coat the truffles: either roll each in sifted cocoa powder for a bitter coating, roll in crushed amaretti biscuits, or dip in the melted chocolate and then use a fork to slide them back onto the grease proof paper, then top with a pinch of crushed amaretti biscuit.

Store in the fridge in a sealed container.

Sweet Potato, Squash and Red Lentil Soup

  • 12th December 201812th December 2018
  • by thefoodwife

Serves 8

This is a big vat of soup which is simple to make but warming on these cold days. It is lightly spiced, packed full of vegetables and pulses and when blended has a lovely and smooth, almost velvety consistency.

The soup is gluten-free, dairy-free and vegan so it is suitable for a range of diets and is also fairly low on calories too (I worked it out to be below 200 calories a portion).

  • Ingredients:
  • 2 tbsp oil
  • 1 white onion, peeled and roughly chopped
  • 1 tbsp ground cumin
  • 1 tsp ground ginger
  • 700g sweet potato, peeled and roughly cut into large dice
  • 400g butternut squash, peeled and roughly cut into large dice
  • 250g red lentils
  • 2 litres vegetable stock
  • Salt and pepper to taste

Step 1: Heat a large pan on a medium heat and add the oil and onion. Cook for about five minutes, stirring frequently.

Step 2: Add the spices and stir, cook for about 30 seconds and then add the vegetables, lentils and stock.

Step 3: Bring to a simmer and then cover with a lid and cook until the vegetables are softened and the lentils are soft (about 25-30 minutes).

Step 4: Blend until smooth and then season to taste.

Tromboncino Pickle

  • 6th December 20189th December 2018
  • by thefoodwife

Makes approximately 2-2.5L

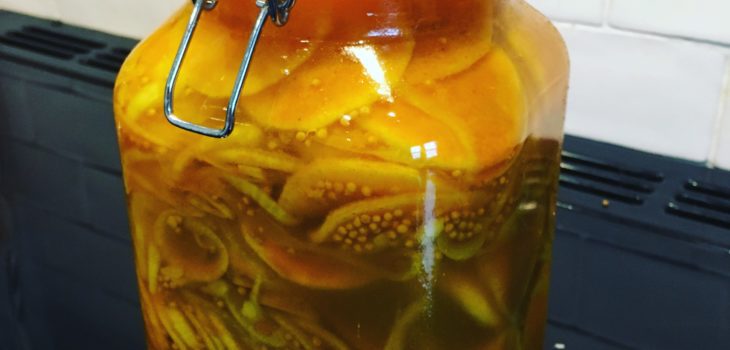
About 15 years ago I tried a pickle made from pumpkin that was simply delicious. Sweet and vinegary with a lovely bite to the flesh. The perfect accompaniment to cold meats and cheese. I was thinking about this pickle (as you do) and wondering if I could make my own version with my hardened tromboncino squash this winter (normally a summer squash, used raw). The neck of a tromboncino lends itself perfectly to being cut into the thin rounds for the pickle, with minimum effort (all it needs is to be peeled and thinly sliced).

If you don’t have a tromboncino squash, then by all means use a butternut squash or pumpkin, it will just take a little extra effort to cut them into the small rounds (about two inches wide is best).

The pickle is made in two stages, each stage taking about half an hour. I would recommend starting stage one (step 1 on the instructions) in the evening and finishing with the pickling the next morning.

Over time the pickle will soften and lose its lovely bite so this is best eaten fresh (I am intending to devour mine over the next couple of months).

  • Ingredients:
  • 1.2kg tromboncino neck, peeled and cut into thin (3mm) slices
  • 400g white onion (about 4 medium), peeled and cut into thin rounds
  • 100g salt
  • 3 cups of cold water
  • For the pickling liquid:
  • 3 cups of cider vinegar
  • 3 cups of caster sugar
  • 2 tbsp yellow mustard seeds
  • 1 tsp ground cinnamon
  • 2 tsp turmeric

Step 1: Place the prepared squash and onion rounds in a large bowl and cover with the salt and water. Cover with a layer of cling film or a plate, and then place a heavy object on top (I used a cast iron cooking pot but a pan filled with water would work) and leave for about 12 hours (or over night).

Step 2: Drain the salted water from the squash and onion and then rinse thoroughly under cold running water to wash off any excess salt.

Step 3: In a large pan heat the vinegar, sugar and spices until the sugar is dissolved and the liquid is just boiling.

Step 4: Add the rinsed squash and onion and bring the whole thing back to a simmer. Switch off immediately and then ladle into sterilised jars.

Celeriac, Leek and Potato Soup

  • 3rd December 20183rd December 2018
  • by thefoodwife

Serves 4

I do try and grow some of my own vegetables and I put some veg trugs in our garden last year. The arrival of our baby rather stopped my propensity to pop out to the garden and see how my vegetables were getting on, and alas my crops went to waste. Or so I thought. At the end of April, as the weather started to turn nice, I did venture out to survey what I needed to do, and lo and behold some of the plants had hung on in and I was able to rescue some leeks and celeriac. I am a big fan of leek and potato soup and decided celeriac would make a good addition to this classic.

I was keen to make this low fat and low calorie (although see my notes at the end if you want to make it naughtier!) and the result is very pleasing. I chose to add just a few shredded celeriac leaves to the soup, as when I tasted the celeriac raw, it wasn’t brimming with flavour. Adding just a few leaves really helped. This may be something to bear in mind, although if your celeriac has a good flavour, it won’t be necessary.

Despite my first making this in April, I’m sharing this now as if you are growing your own it (hopefully) won’t be too long before you will be able to harvest your vegetables. And if you aren’t, then leeks and celeriac are in abundance in the supermarket!

  • Ingredients:
  • 1 tbsp oil
  • 2 small/1 large leek, thoroughly washed and sliced
  • 1 celeriac, peeled and diced
  • 1 large potato, peeled and diced
  • 1l vegetable stock
  • Salt and Pepper to taste

Step 1: Heat the oil in a sauce pan on a medium-low heat and add the leek, allow to soften gently (do not brown).

Step 2: Add the diced celeriac and potato. If you like add a few sliced celeriac leaves. Stir.

Step 3: Add the vegetable stock and bring to a simmer. Put the lid on and cook for 15-20 minutes, until the celeriac and potatoes are soft.

Step 4: Remove from the heat and blend (I used a stick blender) and season to taste.

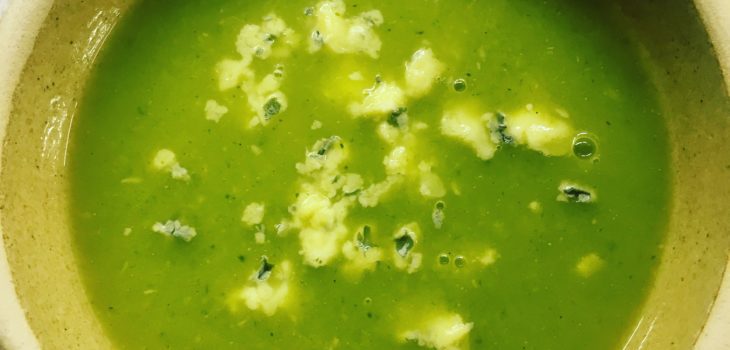
Try serving this with some crumbled blue cheese (we’re big fans of Blue Monday) or grated cheddar or even a swirl of cream. These additions do, of course, remove its dairy-free and vegan status, but it’s very tasty served as it is.

Roasted Spaghetti Squash

  • 27th November 201827th November 2018
  • by thefoodwife

Over the years I’ve seen so many Pinterest pins for spaghetti squash and have wanted to try it for so long. They are so called as their cooked flesh shreds into spaghetti-like strands and so are often used as an alternative to pasta. I’ve never seen one for sale in the UK so decided I would buy some seeds and grow my own (or in this case ask my mum to grow them at her allotment as I didn’t have enough garden space this year!).

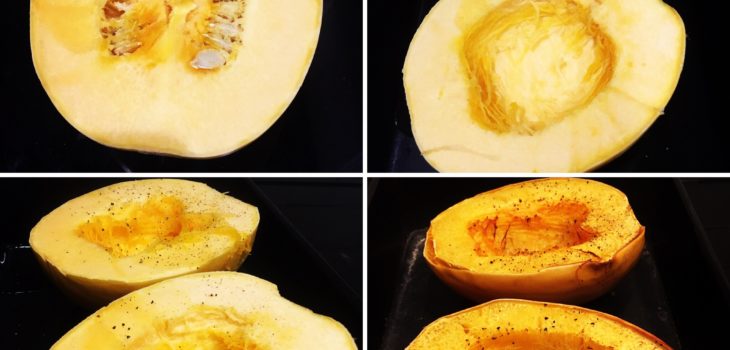
So, the day has come for me to finally cook and eat one! I decided to go for a low carb mac and cheese (where the squash would replace the macaroni). These instructions will tell you how to roast one to achieve perfect stands of spaghetti squash.

Step 1: Preheat your oven to 200c and put a small amount of water (50ml or so) in the base of a large lipped baking tray.

Step 2: Carefully cut the squash in half length ways and use a spoon to scrape out the seedy middle until you have a clean hollow.

Step 3: Place each half in the tray, flesh side up. Season with a little salt and pepper and then transfer to the oven.

Step 4: Cook for 50 minutes and then remove and allow to cool for 10 minutes before you use a spoon to shred the flesh from the skins.

Serve with the accompaniment of your choice, such as a cheese sauce. One spaghetti squash will serve 2-4 people.

Posts pagination

Previous page 1 … 33 34 35 36 37 … 49 Next page

Newsletter

Blog Search

Blog Categories

  • Air fryer 2
  • Alcohol 12
  • Baby Weaning 24
  • Baking 74
  • Beef 18
  • Bread 1
  • Brunch 7
  • Cake 47
  • Chicken 48
  • Christmas 14
  • Cocktails 9
  • Dairy-Free 228
  • Dessert 37
  • Duck 1
  • Fish 12
  • Gluten-Free 254
  • Instant Pot 19
  • Lamb 6
  • Lunch box fillers 2
  • Ostrich 1
  • Pasta 4
  • Pescatarian 13
  • Pork 38
  • Rabbit 1
  • Salad 9
  • Shellfish 10
  • Soup 1
  • Turkey 10
  • Uncategorised 6
  • Vegan 136
  • Vegetarian 243

Socials

  • Facebook
  • Twitter
  • Google
  • Linkedin
  • Instagram
  • Pinterest
  • Youtube
Theme by Colorlib Powered by WordPress
Back to top