Skip to content
The Food Wife logo
  • Home
  • About
  • Blog
  • Contact

Category: Vegetarian

Enchiladas

  • 7th August 20188th August 2018
  • by thefoodwife

Makes 8 (serves 4 adults)

Last week we had friends round for a midweek meal. I wanted something that I could cook fairly easily once The Food Baby was in bed that could then be put in the middle of the table and everyone help themselves. We went Mexican. I marinated the chicken earlier in the day but everything else was done in about 45 minutes. And half an hour of that was it cooking in the oven.

Whilst I have opted for chicken (in my case I go for thigh meat as it stays so moist), but it would also be good with thinly sliced pork or beef. If you wanted to go meat-free then butternut squash would be delicious. Use the same spice mix but roast it in the oven once coated in the marinade (step 1) for 25-30 minutes and then mix with your cooked peppers and onions (step 3).

  • Ingredients:
  • 2x my fajita spice mix (with 2 tsp set to one side)
  • 2 tbsp oil
  • 500g chicken fillets (thighs or breast) cut into thin strips (or a meat or vegetable of your choice)
  • 1 onion, peeled, halved and thinly sliced
  • 1 – 2 peppers, halved, deseeded and thinly sliced
  • 8 corn & wheat tortillas
  • 500g passata
  • 125g mozzarella

Step 1: Combine the spice mix (making sure you’ve taken out two teaspoons’ worth to save for the sauce), one tablespoon of the oil and the chicken (or meat/vegetable of your choice) in a bowl, cover and leave to marinate.

Step 2: Separately combine the reserved spice mix with the passata and leave to one side.

Step 3: Heat a frying pan over a medium high heat and add your remaining tablespoon of oil. Fry the peppers and onions for a few minutes and then add the marinated chicken. Stir frequently until the chicken is just cooked through (if you have cut it thinly this will not take long and you don’t want to over cook it as it is going in the oven too).

Step 4: Lay out your tortillas and spoon equal amounts of the cooked filling down the centre of each tortilla.

Step 5: Carefully tuck in the two ends and then roll each tortilla so it is enclosed.

Step 6: Place the tortillas carefully in a baking dish. You want to pack them in next to each other, but don’t over lap them.

Step 7: Pour your spicy passata over the top and make sure they are all covered.

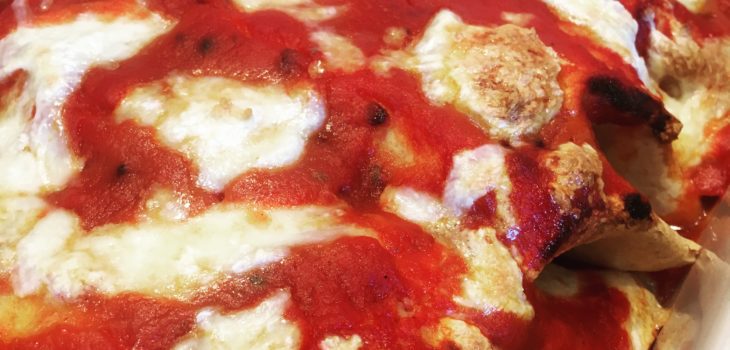
Step 8: Tear your mozzarella (or sprinkle if you are using pre-grated) over the top and place in a preheated oven (180c) for 25-30 minutes until bubbling and the cheese is golden.

This is good served with a salad (why not try my Mexican-style salad) and some crunchy, cheesy nachos. I layered up a dish with salted tortilla chips, a sprinkling of Mexicana cheese, dollops of salsa, sour cream and guacamole and finely chopped jalapeños (repeated until the bag of tortilla chips ran out) and cooked these for 20 minutes in the same oven as the enchiladas.

Butterbean and Rosemary Dip

  • 6th August 20186th August 2018
  • by thefoodwife

If you are looking for an alternative to hummus then I’d recommend giving this a go. Really simple but such wonderful flavours.

  • Ingredients:
  • 4 tbsp good quality extra virgin olive oil
  • 1 sprig of rosemary
  • 2 cloves of garlic
  • 1 tin of butterbeans, drained
  • Salt and pepper

Step 1: Place the olive oil and rosemary in a pan and heat carefully. As soon as it is boiling, remove from the heat and allow to cool. The oil will be infused by the pungent rosemary ready to use in the dip.

Step 2: Blitz the butterbeans, garlic, a pinch each of salt and pepper, along with oil until you have a smooth paste. Check the seasoning and serve.

BLW Veggie Curry Fritters

  • 3rd August 20185th August 2018
  • by thefoodwife

Makes approximately 16 fritters

Perfect for baby led weaning, these vegetable-packed fritters have a nice background spice and a soft texture for your little one to enjoy. I froze these in pairs so that I could grab a portion out the freezer for the Food Baby and reheat when needed. I served these with some full fat Greek yogurt with finely chopped mint stirred through as a cooling dip.

  • Ingredients:
  • 1 medium carrot, grated and excess water squeezed out
  • 1 medium sweet potato, peeled and grated and excess water squeezed out
  • 1 large courgette, grated and excess water squeezed out
  • 1 tsp ground cumin
  • 2 tsp medium curry powder
  • 1 clove of garlic, crushed
  • 2 tbsp chopped coriander leaves
  • Pinch of ground black pepper
  • 200g plain flour
  • 2 eggs, beaten
  • 100ml full fat milk

Step 1: Combine the vegetables with the spices, pepper, coriander and garlic in a large bowl.

Step 2: In a separate bowl or jug beat the flour, egg and milk together to make a thick batter.

Step 3: Add the batter to the vegetables and mix thoroughly.

Step 4: Heat a non-stick frying pan on a medium heat and lightly oil (I used a spray oil) and then use a tablespoon to put dollops of the mixture on to the pan and flatten with the back of the spoon. I cooked four at a time (just make sure to re-oil the pan between each new batch).

Step 5: Fry each fritter for about three minutes on each side until browned and set, and the vegetables are cooked through. Remove from the pan and allow to cool slightly if serving right away or fully if you are portioning and freezing.

I really enjoyed these myself, they would just need a little salt for adult tastes!

Caramelised Onion and Cheese Quiche (with a gluten-free cheese…

  • 30th July 201830th July 2018
  • by thefoodwife

Serves 6-8

Whilst cheese and onion is a classic combination, caramelising the onions with a little balsamic vinegar adds a beautiful sweetness. Enhancing the pastry with cheese and wholegrain mustard gives an extra flavour kick and helps liven up the gluten-free crust.

Now, if you are looking for a quiche recipe and don’t need it to be gluten-free, then by all means make a regular shortcrust pastry by omitting the xanthan gum, replacing the gluten-free plain flour with regular flour, leaving out the eggs and just using a little water to bind it.

I used a vintage gruyere in the pastry and as half of the cheese topping. I used vintage cheddar in the filling and as the other half of the topping. You don’t need to use a mix, but I would recommend using a strong hard cheese to make sure the flavour comes through.

  • Ingredients:
  • For the pastry:
  • 350g gluten-free plain flour
  • 1/2 tsp xanthan gum
  • 125g cold unsalted butter, cut into small cubes
  • 25g gruyere, grated (or other hard cheese of your choice)
  • 1 heaped tsp wholegrain mustard
  • 2 eggs, beaten
  • For the caramelised onions:
  • 2 tbsp olive oil
  • 4 small or 2 medium red onions
  • Pinch salt
  • 1 tbsp balsamic vinegar
  • For the filling:
  • 4 eggs
  • 150ml milk
  • 60g grated vintage cheddar
  • Pinch of salt and white pepper
  • For the topping:
  • 50g grated cheese (I used a mix of gruyere and vintage cheddar)
  • Pinch of thyme

Step 1: Make the pastry. Rub the butter and cheese in to the flour and xanthan gum until it resembles breadcrumbs.

Step 2: Add the mustard to the beaten egg and pour in to the breadcrumbed flour. Mix with your hands until combined and then roll or press out until about 4-5mm thick.

Step 3: Butter a loose-bottomed flan tin (20-25cm) and press the pastry into it; the gluten-free pastry is likely to tear, but patch it up to ensure there are no gaps.

Step 4: Leave to chill in the fridge for 30 minutes. Whilst this is chilling, caramelise your onions.

Step 5: Put the oil in a frying pan on a medium-low heat. Add the sliced onions and cook gently for 15 minutes, stirring occasionally.

Step 6: Add a pinch of salt and continue to cook for another five minutes on a gentle heat.

Step 7: Add the balsamic vinegar and stir for two minutes.

Step 8: Turn off the heat and allow to cool.

Step 9: Preheat the oven to 180c. Place baking parchment on top of the pastry along with baking beads or dry rice and blind bake in the oven for 20 minutes.

Step 10: Whisk the four eggs with 60g of grated cheese, the milk, a few of the thyme leaves, and the salt and pepper.

Step 11: Remove the pastry from the oven and carefully take out the beads and paper.

Step 12: Spread the cooled caramelised onions over the base and sprinkle over a few of the thyme leaves.

Step 13: Carefully pour over the egg mixture and return to the oven for 20 minutes.

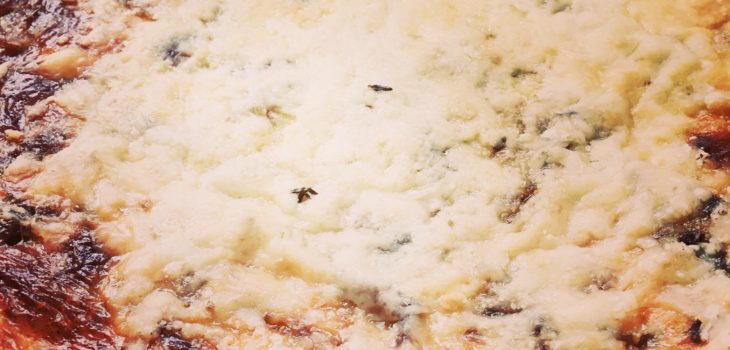
Step 14: Sprinkle over the 50g of grated cheese(s) and the remaining few thyme leaves. Return to the oven for 15 minutes.

This can be served hot, warm or cold. If you make it in advance but would like to serve it hot, reheating it at 160c for 20 minutes should do the trick.

Sweet Potato and Spinach Curry

  • 27th July 201827th July 2018
  • by thefoodwife

Serves 6-8

Creamy, sweet and spicy, this is a lovely curry that is cheap to make and is really satisfying. As well as tasting great, it is rich in iron from the spinach and vitamin C from the sweet potato. Using coconut oil and coconut milk rather than ghee and cream or yogurt keeps this vegan-friendly and is not bad from a diet point of view either as the quantities of these between the portions are small.

As long as your baby likes spices, this is great for them too; just siphon theirs off before seasoning at the end, and you could blend it before serving. You could add a little cooling full fat yogurt stirred into their curry if needed.

  • Ingredients:
  • 2 tsp coriander seeds
  • 2 tsp fennel seeds
  • 4 green cardamom, seeds only (pod removed)
  • 1 dsp coconut oil
  • 2 onions, halved and sliced
  • 2 inch piece of ginger, grated
  • 3 cloves garlic, crushed
  • 1/2 tsp chilli powder
  • 1 heaped tsp garam masala
  • 3 medium sweet potatoes, peeled and cut into 1.5cm cubes
  • 300ml veg stock
  • Large pinch of dried curry leaves
  • 250g spinach, washed
  • 165ml coconut milk
  • Salt and pepper to taste.

Step 1: Toast the coriander, fennel and cardamom spices and then blend in a spice grinder or pestle and mortar.

Step 2: Add the coconut oil to a large pan on a medium heat. Add the onions and cook gently for 10-15 minutes until softened, but not browned.

Step 3: Add the ginger and garlic and cook for a further two minutes, stirring frequently.

Step 4: Add the freshly ground spices and cook for another five minutes, stirring frequently.

Step 5: Add the chilli powder and garam masala and stir, cooking for a couple of minutes.

Step 6: Add the cubed sweet potato along with the stock and curry leaves . Cover with a lid and cook for ten minutes on a gentle simmer.

Step 7: Add the coconut milk, replace the lid and simmer until the sweet potato is softened (about another ten minutes).

Step 8: Add your spinach, stir, and replace the lid for two minutes.

Step 9: Season to taste and serve.

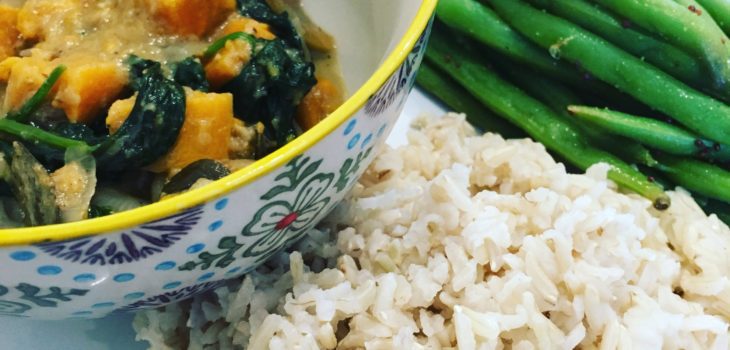
I served this with nutty brown basmati rice and some spiced homegrown green beans. I simply blanched the beans until tender in boiling water and then lightly fried them for a couple of minutes in a little coconut oil, a teaspoon of brown mustard seeds and a teaspoon of ground cumin, and a squeeze of fresh lemon juice at the end.

Posts pagination

Previous page 1 … 39 40 41 42 43 … 49 Next page

Newsletter

Blog Search

Blog Categories

  • Air fryer 2
  • Alcohol 12
  • Baby Weaning 24
  • Baking 74
  • Beef 18
  • Bread 1
  • Brunch 7
  • Cake 47
  • Chicken 48
  • Christmas 14
  • Cocktails 9
  • Dairy-Free 228
  • Dessert 37
  • Duck 1
  • Fish 12
  • Gluten-Free 254
  • Instant Pot 19
  • Lamb 6
  • Lunch box fillers 2
  • Ostrich 1
  • Pasta 4
  • Pescatarian 13
  • Pork 38
  • Rabbit 1
  • Salad 9
  • Shellfish 10
  • Soup 1
  • Turkey 10
  • Uncategorised 6
  • Vegan 136
  • Vegetarian 243

Socials

  • Facebook
  • Twitter
  • Google
  • Linkedin
  • Instagram
  • Pinterest
  • Youtube
Theme by Colorlib Powered by WordPress
Back to top