Skip to content
The Food Wife logo
  • Home
  • About
  • Blog
  • Contact

Category: Vegetarian

Cheeky Biscoff Twists

  • 21st December 202321st December 2023
  • by thefoodwife

Makes 10 twists

These couldn’t be easier and only need 2 ingredients and 20 minutes.

Ingredients:

1 sheet of ready rolled puff pastry

2 heaped tbsp of smooth biscoff spread (I heated it for 30 seconds in the microwave to make it runny)

Optional: Icing sugar to serve

Step 1: Preheat the oven to 200c (fan) and line a large baking tray.

Step 2: Take the sheet of ready rolled puff pastry, spread half of it with the biscoff spread then fold the other half on top.

Step 3: Cut into 10 equal strips, and twist!

Step 4: Spread on the lined baking tray and bake for 18 mins.

Step 5: Dust with icing sugar and serve!

Chocolate Bourbon Tiffin

  • 21st November 202321st November 2023
  • by thefoodwife

Makes 16 squares

I love tiffin. It’s also known as refrigerator cake, as there’s no baking required. Setting the cake in the fridge results in a rich biscuity chocolate concoction, studded with other sweet treats. Adaptations are listed below to make these vegan and/or gluten-free.

Ingredients:

150g butter/vegan baking block

75g caster sugar

75g golden syrup

30g cocoa powder

150g chocolate bourbon biscuits (gluten-free/vegan if required), crushed to a mix of powder and chunks

2 handfuls of sultanas

2 handfuls of mini marshmallows (gluten-free/vegan if required)

100-200g dark and/or milk chocolate (gluten-free/vegan if required), melted.

Optional: I’ve made mine extra special with two tubes of Rolos (these should be gluten-free but unfortunately are not vegan)

Step 1: Line an 8×8 inch baking pan with grease proof paper.

Step 2: Over a medium low heat, melt the butter, sugar, syrup and cocoa together until smooth, remove from the heat and allow to cool slightly.

Step 3: In a bowl combine the crushed bourbon biscuits, sultanas, marshmallows and rolos (if using) and then stir through the cooled molten cocoa mix until fully combined.

Step 4: Tip into the lined pan and press out until it is in one smooth and level layer. Place in a fridge to set for half an hour.

Step 5: Smooth over the molten chocolate (100g will give a thin layer, 200g a thicker) and cover and place in the fridge to set for a couple of hours until everything is firm. Once fully set, cut into 16 squares using a hot knife.

Store in a sealed container in the fridge for up to a week.

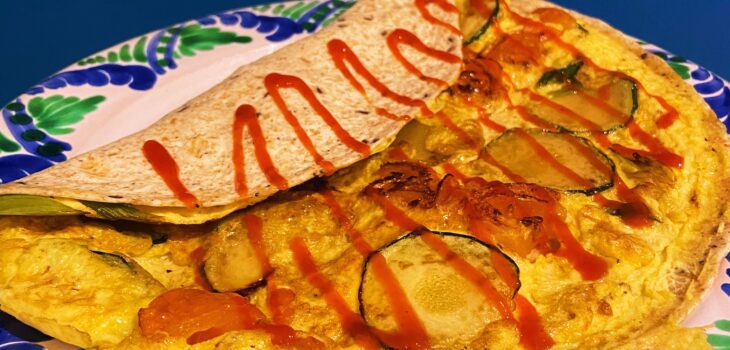
Tortilla Tortilla

  • 18th November 202318th November 2023
  • by thefoodwife

Serves 1

Another savoury breakfast for you, featuring a thin veg-packed omelette and a tortilla wrap. I love this adorned with sriracha but use tomato ketchup or brown sauce if that’s your preference.

Ingredients:

Olive oil

One small courgette (or part of a big one) thinly sliced

1 salad tomato, roughly diced

1 spring onion, sliced

2 eggs, beaten with a grind each of salt and pepper

1 large tortilla wrap (gluten-free if required)

Sriracha to serve (optional)

Step 1: In a non-stick frying pan heat some olive oil, over a medium high heat.

Step 2: Spread the sliced courgette, diced tomato and sliced spring onion in an even layer, and allow to cook, until the courgette is golden on one side. Flip the courgette over, followed by the tomato and allow to cook for a couple more minutes.

Step 3: Pour the seasoned, beaten egg over the vegetables so it covers the pan in a thin layer. After 30 seconds press the tortilla in to the semi-set egg and cook for another minute or two, carefully pressing the tortilla down so that it is in full contact with the egg.

Step 4: Carefully turn the tortilla tortilla out onto a plate, and drizzle with sriracha (or your sauce of choice. Eat immediately.

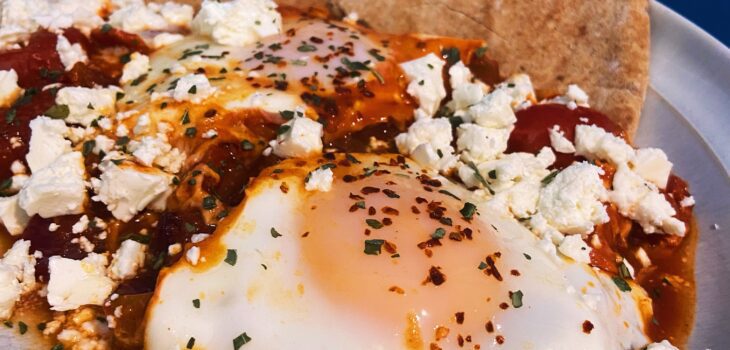
Turkish-style Eggs

  • 17th November 202317th November 2023
  • by thefoodwife

Serves 4

This is my version of Shakshuka. It’s quick and easy to throw together. The quantities make enough of the base to serve four, but you can make it and then store the base in the fridge for individual portions, reheating and adding the eggs when you’re ready to eat. Use one to two eggs per person.

Ingredients:

Olive oil

1 red onion, sliced

4 large red peppers, ready roasted (from a jar), roughly chopped

1 tbsp tomato purée

1 heaped tsp smoked paprika

Pinch of Aleppo pepper (or chilli flakes)

1 tin of chopped tomatoes

1 tin of tinned cherry tomatoes

2 tbsp balsamic vinegar

Pinch of salt

To serve:

Feta

Aleppo pepper

Chopped parsley

Step 1: Heat a large lidded frying pan over a medium high heat. Add a glug of olive oil and the red onion and fry for a few minutes. Then add the peppers, tomato purée and spices and cook for another minute before adding the two tins of tomatoes and balsamic vinegar. Cook down for about 10 minutes, season with salt and taste.

Step 2: If you’re happy with the flavour the base is made! Next is to cook the eggs. Use a spoon to make little hollows in the sauce before cracking the eggs in. Place the lid on the frying pan and let them cook until the eggs are just set.

Step 3: Plate up, topping each plate with crumbled feta and an extra pinch of Aleppo pepper and a little chopped parsley. Serve immediately with your bread of choice in the side – toasted sourdough or pitta work excellently.

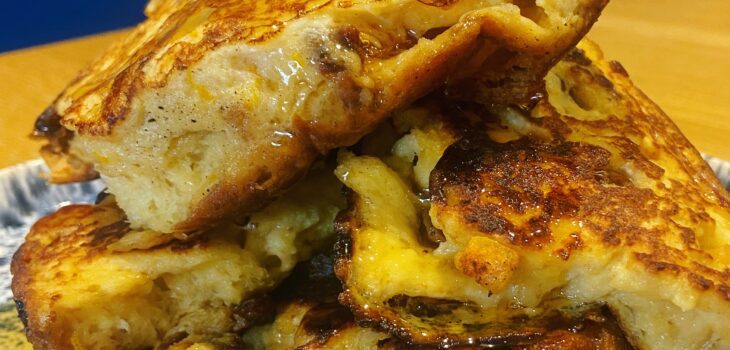
Panettone Family Breakfast Stack

  • 13th November 202313th November 2023
  • by thefoodwife

Serves 2-4

This is an excellent way to use up any leftover panettone. For my family breakfast stack I used a quarter of a 700g panettone that needed using up. Obviously you can increase (or decrease!) these quantities. We had this between four of us – each having a thick slice. Bigger appetites may manage two (or more!) slices. We served ours with maple syrup but you could bulk it up with fresh berries and Greek yogurt.

Ingredients:

1/4 wedge of a large panettone cut from base to top into four even slices.

2 large eggs

Splash of milk

Zest of one orange (optional)

Nob of butter

Vegetable oil

Topping ideas:

Maple syrup (optional)

Fresh berries (optional)

Greek yogurt (optional)

Chocolate sauce (optional)

Step 1: Beat together the eggs, a decent splash of milk and the zest of an orange in a wide dish. It needs to be wide enough to hold the panettone slices without damaging them. You can do these one or two at a time. Nestle them in the dish and allow them to soak up the eggy mixture for a minute until careful turning over for another 30 seconds or so.

Step 2: Heat a non stick pan over a medium high heat with a small amount of vegetable oil and the nob of butter. Once the butter is melted and bubbling it’s ready for the panettone.

Step 3: Add the slices of panettone not crowding them and allow them to cook, lowering the heat as necessary. Cook each side for a few minutes until golden and slightly crispy.

Step 4: Stack the cooked panettone on a serving plate and either dress with your choice of toppings and give everyone a plate and let them dig in, or divide between plates and top as desired before devouring. Enjoy!

Posts pagination

Previous page 1 … 6 7 8 9 10 … 49 Next page

Newsletter

Blog Search

Blog Categories

  • Air fryer 2
  • Alcohol 12
  • Baby Weaning 24
  • Baking 74
  • Beef 18
  • Bread 1
  • Brunch 7
  • Cake 47
  • Chicken 48
  • Christmas 14
  • Cocktails 9
  • Dairy-Free 228
  • Dessert 37
  • Duck 1
  • Fish 12
  • Gluten-Free 254
  • Instant Pot 19
  • Lamb 6
  • Lunch box fillers 2
  • Ostrich 1
  • Pasta 4
  • Pescatarian 13
  • Pork 38
  • Rabbit 1
  • Salad 9
  • Shellfish 10
  • Soup 1
  • Turkey 10
  • Uncategorised 6
  • Vegan 136
  • Vegetarian 243

Socials

  • Facebook
  • Twitter
  • Google
  • Linkedin
  • Instagram
  • Pinterest
  • Youtube
Theme by Colorlib Powered by WordPress
Back to top