Skip to content
The Food Wife logo
  • Home
  • About
  • Blog
  • Contact

Blog

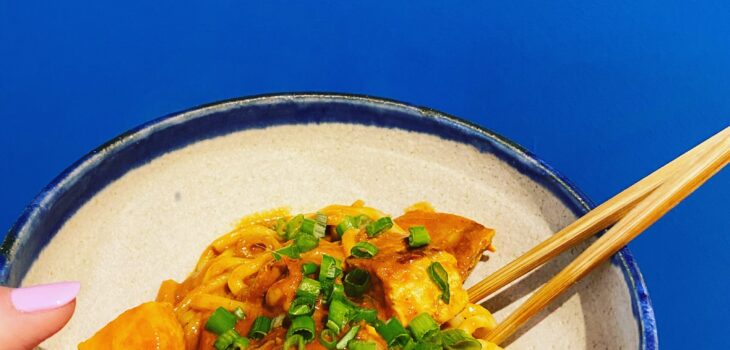
Spicy Salmon Noodles

  • 28th April 2025
  • by thefoodwife

Serves 1

Fast food eat your heart out! This is ready in 10 minutes and hits the spot if you’re after spicy slippery noodles! Who isn’t?!

Ingredients:

1 dsp Thai red curry paste

1 dsp smooth peanut butter

1 tsp soy sauce 

A drop of sesame oil

1 scant tsp sugar

Lime

2 spring onions, sliced

1 salmon fillet, skinned and cut into chunks

150g pre-cooked udon noodles

Step 1: Combine the curry paste, peanut butter, soy sauce, sesame oil and sugar in a bowl. Add a little hot water to help loosen it all. Set to one side.

Step 2: Set a pan of boiling water on the hob, ready to blanche your udon noodles once the salmon is cooking.

Step 3: Cook the salmon chunks in a hot pan with a little oil to stop it from sticking. Add the udon noddles to the pan of boiling water and cook for one minute. Drain and set to one side. Once the salmon is cooked through add it to the bowl of sauce.

Step 4: Add the drained udon noodles and the sliced spring onions and stir thoroughly. Squeeze over some lime juice and serve immediately!

Sausage and Gnocchi Bake

  • 3rd April 2025
  • by thefoodwife

Serves 2-4

This is so easy and can be served with your choice of veg and, if you like, a sauce or gravy. I served ours with green beans and a creamy wholegrain mustard sauce. Delicious!

Ingredients:

480g good quality sausages 

500g gnocchi

Olive oil

Salt and pepper

Step 1: Preheat the oven to 190c (fan) and drizzle some olive oil into a deep baking dish.

Step 2: Toss the gnocchi into the oil and coat, spread the gnocchi across the dish. Sprinkle with salt and pepper.

Step 3: Nestle the sausages amongst the gnocchi so they are in contact with the baking dish.

Step 4: Bake for 20 minutes and then give everything a good shake (use a span or spatula of the gnocchi is sticking). Return to the oven for about 15-20 minutes until the sausages are cooked through and the gnocchi is crisp and golden.

Serve with your choice of sides.

Meatballs

  • 3rd March 2025
  • by thefoodwife

 Serves 6

A plate of comfort! This is a family crowd pleaser. Using a combination of the fatty sausage meat and lean beef mince creates a great tasting meatball. 

The fennel and chilli flakes are optional but do make a great tasting sauce, but leave one or both out if you like.

Ingredients: 

The meatballs:

300g lean beef mince

340g herby pork stuffing mix/sausage meat (ensure this is without gluten if you are making it gluten free)

The sauce:

2 tbsp olive oil

2 red onions, diced

4 cloves garlic, minced

1 red pepper, diced

4 tsp fennel seeds (optional)

2 tsp chilli flakes (optional)

1 litre passatta 

2 tsp balsamic vinegar 

Salt and pepper to taste 

To serve: 500g Pasta (gluten free if necessary) and parmesan

Step 1: Start by making your meatballs by combining the 2 meats in a bowl and mixing well (although messy you’ll get the best results by using your hands, which are going to get messy in the next step anyway!) 

Step 2: Roll small amounts of the mixture between your two hands to make balls (the mix will make about 35 small balls although you can make them bigger if you wish).

Step 3: Place the balls on a baking tray and put in a preheated oven at 200c for 25 minutes (bear in mind if you make bigger balls they’ll take longer).

Step 4: Whilst the meatballs are cooking, make your sauce. On a medium heat, add your oil to a pan and your red onion, garlic and red pepper. Soften for 3-4 minutes, stirring every so often, to make sure the garlic and onion do not burn.  Add your fennel seeds and chilli flakes (if using) and stir for a minute or two, before adding your passatta and balsamic vinegar. Season to taste. Cook the sauce on a low heat for 10-15 minutes.  Whilst this is simmering cook your pasta according to the packet instructions.

Step 5: Remove your meatballs from the oven and add to your sauce.  

Step 6: When you are ready to serve, add cooked pasta to the sauce and coat evenly. Use some of the pasta cooking water to loosen if necessary. Serve with freshly grated Parmesan. 

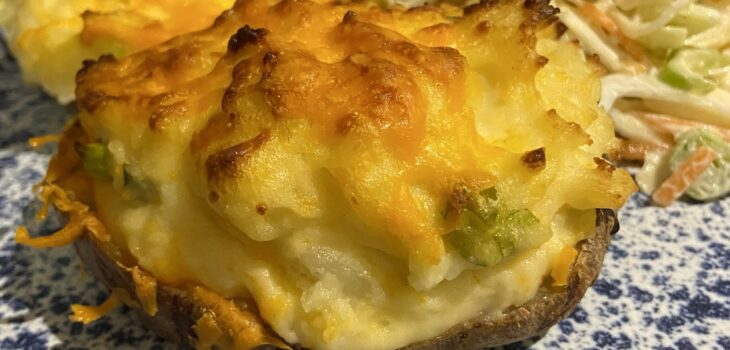
Spring Onion and Cheese Loaded Jackets

  • 3rd March 2025
  • by thefoodwife

Makes 8 halves

Creamy and cheesy with that onion hit, these filled potatoes taste great.

Serve two halves for an adult and one half for a child’s portion. Great with a coleslaw or salad on the side!

Ingredients:

4 baking potatoes 

250g full fat cream cheese/200g crème fraiche 

1 bunch of spring onions, finally sliced

100g Cheddar or Red Leicester, grated

Oil

Salt and pepper

Step 1: Preheat the oven to 180c (fan). Prick the potatoes all over with a fork. Place on a baking tray and drizzle with a little oil and a pinch of salt and pepper. Use your hands to rub the oil and seasoning all over.

Step 2: Bake for an hour and a half.

Step 3: Remove from the oven and slice each potato in half.  Use two spoons to carefully scoop the flesh out of each potato half into a large bowl.  Add a large pinch each of salt and pepper, the cream cheese or crème fraiche, spring onion and half the grated cheese. Mix well until combined and smooth. Taste for seasoning.

Step 4: Load the creamy filling back into the skins on the baking tray. Top with the remaining cheese.

Step 5: Refrigerate until ready to bake or bake straight away. They will need 25-30 minutes at 180c until fully heated through, and the cheese on top is golden. 

Snicker-dates

  • 18th February 2025
  • by thefoodwife

Makes 16

These aren’t new, we’ve probably all seen some version of them, but they are delicious. Chewy dates, crunchy peanut and salty dark chocolate. A winning combo, especially for anyone who loves a sweet treat but wants to cut down on refined sugars. 

Plus they’re so rich you’ll probably only want one or two…

Ingredients:

16 Stoned dates 

Crunchy peanut butter (ideally one made with only peanuts)

100g dark chocolate (I used 74% cocoa), melted

Flaky sea salt

Step 1: Line a tray or tin with grease proof paper, and ensure you have space in the freezer for it to fit.

Step 2: Fill each date with about 1/2 a teaspoon of crunchy peanut butter, bringing the ends of the date back together as best you can (sometimes they won’t meet but make it as neat as possible). 

Step 3: Carefully submerge each filed date into the molten chocolate, using a spoon to turn and coat it. Then transfer each coated date, with a spoon, to the lined tray. Sprinkle a little of the flaky salt on top.

Step 4: Repeat with the remaining dates. Try to make sure they aren’t touching each other on the tray (you can always break them apart after they’ve set if they do touch but their edges will be messier).

Step 5: Transfer the tray carefully to the freezer until the chocolate has set (10 minutes should do it) and then move them carefully to a tub or freezer bag and keep them in the freezer until you eat them to keep them extra chewy!

Posts pagination

Previous page 1 2 3 4 5 6 … 68 Next page

Newsletter

Blog Search

Blog Categories

  • Air fryer 2
  • Alcohol 12
  • Baby Weaning 24
  • Baking 74
  • Beef 18
  • Bread 1
  • Brunch 7
  • Cake 47
  • Chicken 48
  • Christmas 14
  • Cocktails 9
  • Dairy-Free 228
  • Dessert 37
  • Duck 1
  • Fish 12
  • Gluten-Free 254
  • Instant Pot 19
  • Lamb 6
  • Lunch box fillers 2
  • Ostrich 1
  • Pasta 4
  • Pescatarian 13
  • Pork 38
  • Rabbit 1
  • Salad 9
  • Shellfish 10
  • Soup 1
  • Turkey 10
  • Uncategorised 6
  • Vegan 136
  • Vegetarian 243

Socials

  • Facebook
  • Twitter
  • Google
  • Linkedin
  • Instagram
  • Pinterest
  • Youtube
Theme by Colorlib Powered by WordPress
Back to top