Skip to content
The Food Wife logo
  • Home
  • About
  • Blog
  • Contact

Category: Baking

Sourdough Crackers with Smoked Paprika and Nigella Seeds

  • 6th April 20207th April 2020
  • by thefoodwife

With the current lockdown, more people are making bread at home. Many are trying sourdough for the first time. My sourdough starter, Cuthbert, has been going for well over a year now. I’ve used him to make traditional sourdough loaves, hybrid yeasted loaves, hot cross buns but most recently I’ve used the discard to make sourdough crackers.

This is a versatile recipe, I’ve flavoured these with smoked paprika and nigella seeds, but you could use herbs or other spices as you like.

If keeping these vegan or dairy-free , use a vegetable based baking block rather than butter.

These will store for up to a week in an airtight container.

  • Ingredients:
  • 100g strong white bread flour
  • 30g strong wholewheat bread flour
  • 4g salt
  • 2 tsp smoked paprika
  • 2 tsp nigella seeds
  • 150g discarded sourdough starter
  • 60g softened butter (or vegetable baking block if vegan/dairy-free)
  • Olive oil

Step 1: Combine all the ingredients (excluding the olive oil) in a bowl. Use your hands to bring together to make a smooth dough. Divide in two and shape into two equal blocks. Wrap in cling film and chill in the fridge for half an hour.

Step 2: Preheat the oven to 180c (fan) and line two baking sheets with grease proof paper.

Step 3: Flour a work surface and roll each block of dough into a rectangle, about 1 or 2mm thick. Use a knife or the flat edge of a dough scraper to cut the rolled out dough into long strips about 2 inches wide.

Step 4: Carefully transfer each strip onto the lined baking sheets leaving a small gap between each one. Brush each with olive oil and prick all over with a fork. Bake in the oven for 18-20 minutes until golden and crisp. Remove and allow to cool.

Store in an airtight container for up to a week.
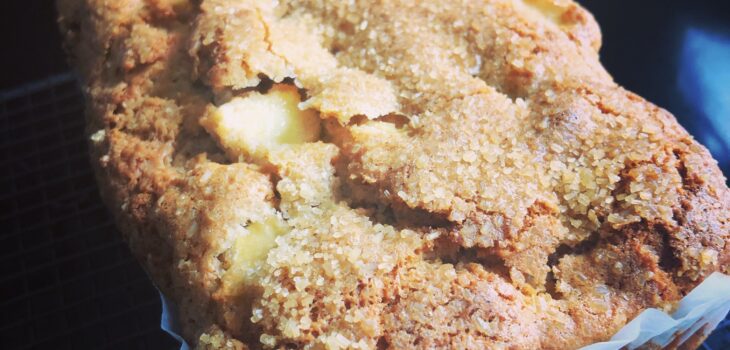
Apple and Cinnamon Loaf Cake

  • 2nd April 20202nd April 2020
  • by thefoodwife

Serves 8-10

A simple loaf cake packed with apples and sultanas and spiced with cinnamon which goes excellently with a cup of tea.

There is no need for butter in this cake as it is made with vegetable oil, and can be kept totally dairy free by using a plant-based milk if required.

Using Demerara sugar as a sprinkle on top makes a delicious crust, but if you don’t have any then simply leave it out.

N.b. You will need a lined 2lb loaf tin.

  • Ingredients:
  • 270g self-raising flour
  • 170g caster sugar
  • 100ml vegetable oil
  • 70ml milk (plant-based if required)
  • 2 large eggs, beaten
  • 1 tsp ground cinnamon
  • 3 eating apples, peeled, cored and cut into 1cm dice
  • 50g sultanas
  • Demerara sugar for sprinkling

Step 1: Preheat the oven to 180c (fan) and line a 2lb loaf tin.

Step 2: Combine all the ingredients (except the Demerara sugar) lightly in a bowl, you want to stir until just mixed to keep a light batter.

Step 3: Pour into the lined loaf tin and level with the back of a spoon. Sprinkle the top with the Demerara (a tablespoon or two is ample).

Step 4: Bake in the oven for 50 minutes.

Step 5: Remove from the oven and allow to cool in the tin.

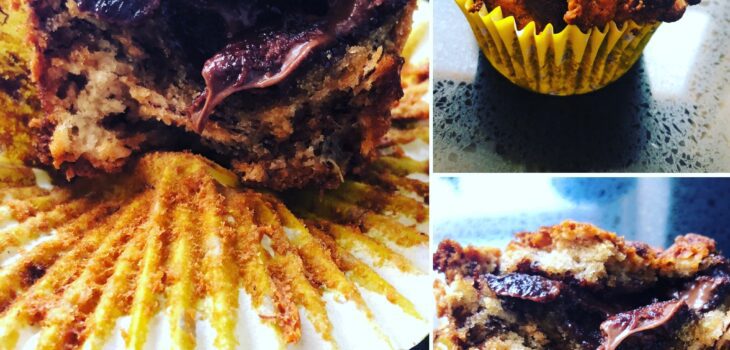
Banana Muffins with a Chocolate Hazelnut Filling

  • 27th March 202027th March 2020
  • by thefoodwife

Makes 12

Here we have a vegan muffin stuffed with a decadent filling of chocolate hazelnut spread. If keeping this totally vegan, use a plant based spread (I noticed one available in M&S). These are really quick to put together and take just 25 minutes to bake.

They are best eaten on the day they are made (not really a hardship!) although could be refreshed in the microwave for a few seconds.

As with all muffin recipes, minimal mixing is required to achieve a light, rather than tough sponge.

  • Ingredients:
  • 3 large very ripe bananas, mashed
  • 60ml vegetable oil
  • 120g light soft brown sugar
  • 1 tsp vanilla extract
  • 300g plain flour
  • 2 tsp baking powder
  • 1 tsp bicarbonate of soda
  • 12 tsp chocolate hazelnut spread (plant based if vegan)

Step 1: Preheat oven to 190c (fan) and line a 12 hole muffin tin with paper cases.

Step 2: Lightly combine the banana, oil, sugar, vanilla, flour, baking powder and bicarbonate of soda in a bowl. For a light muffin minimal mixing is required.

Step 3: Half fill each muffin case with the batter. Top each with a teaspoon of chocolate hazelnut spread and then cover with the remaining muffin batter.

Step 4: Bake for 25 minutes and then remove from the oven and allow to cool on a wire rack.

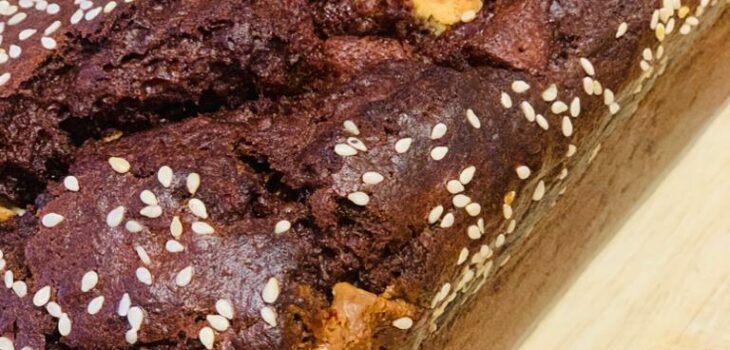
(Gluten and Dairy Free) Chocolate and Tahini Banana Loaf

  • 8th January 202029th February 2020
  • by thefoodwife

Chocolate and tahini seems to be all the rage at the moment.  Here is a recipe for a wonderfully moreish cake that can be made both gluten and dairy free. Tahini is made from sesame seeds and so brings a subtle nutty taste to the cake, which complements the sweetness from the banana and bitterness from the dark chocolate. 

The banana will keep this moist and should last a few days when wrapped and kept in an airtight container.

Ingredients:

  • 110g vegetable oil
  • 70g caster sugar
  • 2 large eggs, beaten
  • 2 large very ripe bananas, mashed
  • 50g tahini 
  • 1 tsp vanilla extract
  • 170g (gluten-free if required ) plain flour with 2 heaped tsp (gluten-free if required) baking powder mixed in (alternatively use 170g (gluten-free if required) self-raising flour)
  • 30g cocoa powder
  • 100g chocolate, buttons, chips or broken into pieces (if keeping this dairy/gluten-free free use a dark free from chocolate)
  • Sesame seeds

Step 1: Combine all the ingredients, minus the chocolate pieces, into a smooth batter.

Step 2: Fold through the chocolate pieces.

Step 3: Pour into a lined 2lb loaf tin and sprinkle the evened top with sesame seeds.

Step 4: Bake in a preheated oven at 180c (fan) for 50 mins, or until risen and springs back to the touch.

Step 5: Remove from the oven and allow to cool for half an hour before transferring (out of the tin) to a wire rack.

Store in an airtight container and it should last a few days. Excellent served with a cup of tea or coffee.

Jaffa Cheesecake

  • 9th October 2019
  • by thefoodwife

Serves 12

Here is a cheesecake recipe inspired by the classic jaffa cake. There are several steps to this and its best to start it the night before you intend to eat it in order to ensure the jelly layer is fully set.  

For an added citrus hit you could stir a tablespoon of marmalade into the jelly when it is still liquid.  And if you want to make it a bit boozy use an orange liqueur to taste, in place of the orange extract.

I’ve included some tips to help you if things don’t quite go to plan (they should save you from any disasters, but if worst comes to worst it’ll still taste good!) 

I made this gluten-free by using appropriate biscuits. 

Ingredients:

For the base:

200g digestive biscuits, crushed to resemble bread crumbs (gluten-free if required)

75g butter, melted 

For the cheesecake filling:

150g best dark chocolate (minimum 60% cocoa solids) 

500g mascarpone (bring out of the fridge 20 minutes before using)

200ml double cream (bring out of the fridge 20 minutes before using)

100g icing sugar

2 tsp orange extract

For the orange jelly:

135g orange flavoured jelly block, cut into small pieces 

Boiling water

For the ganache topping:

100g best dark chocolate (minimum 60% cocoa solids) 

100ml double cream

Step 1: Start the night before by making the jelly disc. Melt the jelly in boiling water (make up to 300ml – although if you want a thinner layer of jelly try 225ml) and then pour in to an 8 inch cake tin lined with clingfilm.  Allow to set, by transferring to the fridge once cooled.

Step 2: The next day, make the base by mixing the digestive biscuits with the butter until combined and then press in to the base of a nine-inch spring release cake tin. Level out with the back of a spoon and put in the fridge for at least 20 minutes to set.

Step 3: Begin to prepare the filling by carefully melting the dark chocolate in a bowl over simmering water. Ensure the base of the bowl does not touch the water, nor should any liquid go in to the chocolate otherwise it will seize up and you will have to start again. Once melted, remove the bowl from the heat and allow to cool.

Step 4: Whist the chocolate is cooling, in a separate bowl, sieve the icing sugar and add the double cream and orange extract. Whisk until it forms stiff peaks.

Step 5: Only once the chocolate has cooled but still liquid (this is very important as you do not want the chocolate to seize up) beat in the mascarpone cheese using a spoon or whisk. Mix until smooth and combined evenly.  If the mix does seize up (it will remain pale coloured and have tiny flecks of solid chocolate through it) sieve in two tablespoons of cocoa powder and beat until smooth.

Step 6: Gently fold in the orange cream mixture until smooth.

Step 7: Spread evenly over the set biscuit base, loosely cover and return to the fridge to set.

Step 8: To make the ganache topping, break the remaining dark chocolate into small pieces and place in a bowl.  Heat the remaining cream until just boiling and then pour over chocolate.  Leave to rest for a couple of minutes and then stir; the chocolate should melt into the cream and begin to thicken as it cools. (If the ganache splits, try adding a little bit of warm milk and whisking until smooth.  You can eat the ganache split it just isn’t as aesthetically pleasing!)

Step 9: Carefully transfer the jelly disk onto the top of the cheesecake.  Once the ganache is cool, spread evenly over the jelly and cheesecake top and return to the fridge to fully set (about an hour).  

Once ready to serve, carefully remove from the tin but allow to be out of the fridge for 20 minutes to soften slightly before serving. 

Posts pagination

Previous page 1 … 8 9 10 11 12 … 15 Next page

Newsletter

Blog Search

Blog Categories

  • Air fryer 2
  • Alcohol 12
  • Baby Weaning 24
  • Baking 74
  • Beef 18
  • Bread 1
  • Brunch 7
  • Cake 47
  • Chicken 48
  • Christmas 14
  • Cocktails 9
  • Dairy-Free 228
  • Dessert 37
  • Duck 1
  • Fish 12
  • Gluten-Free 254
  • Instant Pot 19
  • Lamb 6
  • Lunch box fillers 2
  • Ostrich 1
  • Pasta 4
  • Pescatarian 13
  • Pork 38
  • Rabbit 1
  • Salad 9
  • Shellfish 10
  • Soup 1
  • Turkey 10
  • Uncategorised 6
  • Vegan 136
  • Vegetarian 243

Socials

  • Facebook
  • Twitter
  • Google
  • Linkedin
  • Instagram
  • Pinterest
  • Youtube
Theme by Colorlib Powered by WordPress
Back to top