Skip to content
The Food Wife logo
  • Home
  • About
  • Blog
  • Contact

Category: Baking

Cheese and Vegetable Scones

  • 26th March 201926th March 2019
  • by thefoodwife

Makes approximately 10

Whilst these started as a recipe to get more vegetables into the Food Baby, they are so delicious that I found myself eating just as many as him!

These are easy to make and can be frozen too, making them a super convenient lunch or snack; simply get them out in the morning to defrost and they are good to go in an hour or two.

Despite squeezing the excess water out of the vegetables, they still add extra moisture to the dough, so you will need to have more flour on standby to add to the dough as needed.

  • Ingredients:
  • 225g self raising flour (plus extra)
  • Pinch of salt
  • 55g unsalted butter, cold and cubed
  • 1 small carrot, grated and squeezed of its excess water
  • 1 small courgette, grated and squeezed of its excess water
  • 50g hard cheese, grated
  • 1 tbsp pesto (I used a sundried tomato one, but use whatever type you fancy)
  • Large pinch of smoked paprika
  • 150ml milk

Step 1: In a large bowl combine the flour, salt and butter by rubbing between your fingers (cold hands are best) until it resembles breadcrumbs.

Step 2: Next stir through the grated cheese and squeezed vegetables along with the pesto and paprika.

Step 3: Finally gently stir in the milk (I like to use a table knife for this, and you want to mix the minimum amount to avoid the dough becoming tough). It’s at this stage that you may need to add a little more flour, until the mix is no longer sticky.

Step 4: Roll out until an inch thick and cut out into your shape of choice. Don’t twist the cutter though as this will stop them rising evenly. Transfer to a lined baking sheet (if you want you can brush the top with a little beaten egg or milk for a glaze, or dust with a little flour for a soft finish).

Step 5: Bake in a preheated oven at 220c (fan) for 20 minutes, or until risen and golden.

What’s for dinner?

  • 13th March 201913th March 2019
  • by thefoodwife

This week we’ve been revisiting some recipes from The Food Wife so here are some ideas to help you with some meal planning for the week ahead. All are gluten-free (or easily adaptable).

At the weekend we had some friends round for dinner and I went for the low prep, no fuss chicken and potato tray bake with peppers and artichokes, served with a large green salad. It meant I could minimise my time in the kitchen and maximise my time socialising! We also had some of the marinated olives to nibble on with drinks before hand which I had set marinating the night before so they were full of flavour.

We’ve also had a firm favourite midweek, simply defrosted from the freezer and reheated; the yellow split pea daal. We had it with nutty brown basmati rice and some blanched green beans. So healthy and nutritious but utterly delicious too!

Another freezer staple was ragù; stirred through pasta it makes a really quick and satisfying meal. And also with pasta we’ve had the creamy spinach and pea pasta making a 15 minute meal perfect for a week night.

Lunch times have been soup-focussed and the sweet potato and butternut squash Thai coconut soup has been spicing up lunchtimes.

New to the menu was a Thai-inspired beef and noodle salad. Fresh flavours making the most of leftovers as I used left over roast beef and green beans from a family roast on Sunday.

The Food Baby has not been forgotten. At the start of the week I had a mammoth cooking session making batches of toddler-appropriate food. My main aim has been to try and get as much fruit or vegetables into him without him realising, as he appears to be able to identify and reject anything obvious at 20 paces. A batch of baby oaty ‘carrot cake’ cookies have gone down well with half being popped in the freezer for another time. I also made a big batch of veggie curry fritters, although I split the vegetables and batter and did half with the curry powder, and the other half with a teaspoon of smoked paprika and 100g grated cheese. Each batch made seven good size fritters which have been popped in the freezer for future dinners.

Hopefully our week’s meal plan has offered you some inspiration for all the family, catering for a variety of different diets, including gluten-free, dairy-free, vegetarian and vegan. If you haven’t already, why not sign up to The Food Wife Newsletter at the bottom of the homepage, to ensure you get every recipe each week, direct to your email.

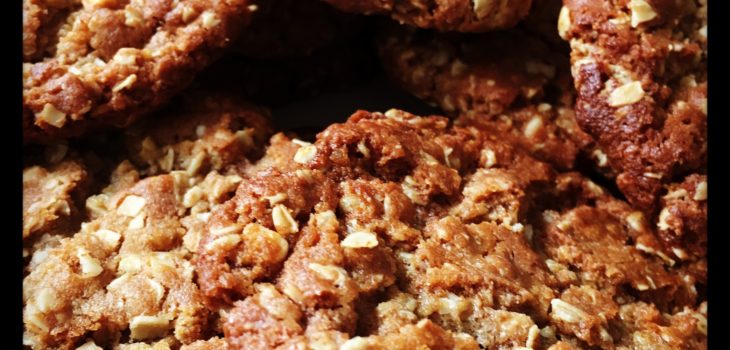
(Gluten-free) Ginger Oat Cookies

  • 23rd February 201923rd February 2019
  • by thefoodwife

Makes 12

Continuing my quest to make tasty gluten-free alternatives for the Food Husband’s new diet, I’ve been experimenting in the kitchen this week.

He’s dutifully eaten a gluten-free loaf (which left a lot to be desired) but I have just made a batch of ginger cookies which have been far more successful.

Admittedly these aren’t all for him; they will be accompanying a lemon posset this evening as the pudding in a meal with friends.

These do not have to be made gluten-free, and can be made using regular flour and oats as you wish. If following a vegan or dairy-free diet, substituting the butter for coconut oil will result in a suitable alternative.

Store these in an airtight container and they will last a few days.

  • Ingredients:
  • 120g butter (or coconut oil if making these vegan/dairy-free)
  • 2 tbsp golden syrup
  • 1 tsp bicarbonate of soda (gluten-free if required)
  • 150g oats (gluten-free if required)
  • 150g plain flour (gluten-free if required)
  • 120g soft light brown sugar
  • 1 tbsp ground ginger

Step 1: Over a low heat, melt the butter and syrup in a heavy bottomed pan, stirring now and again. Once melted, leave to cool slightly.

Step 2: In a large bowl combine the sugar, flour, oats and ginger.

Step 3: Stir the bicarbonate of soda into the cooled liquid mix and then add to the dry ingredients, stirring thoroughly until all combined.

Step 4: Roll into 12 equal balls and spread out on two lined baking sheets.

Step 5: Bake in a preheated oven (180c fan) for 10 minutes, until golden and cracked on top.

Step 6: Remove from the oven and allow to cool (they will firm up as they cool). Leave them for five minutes on their trays and then carefully transfer the cookies, still on their baking parchment (hold diagonal corners taut), onto wire racks to cool completely.

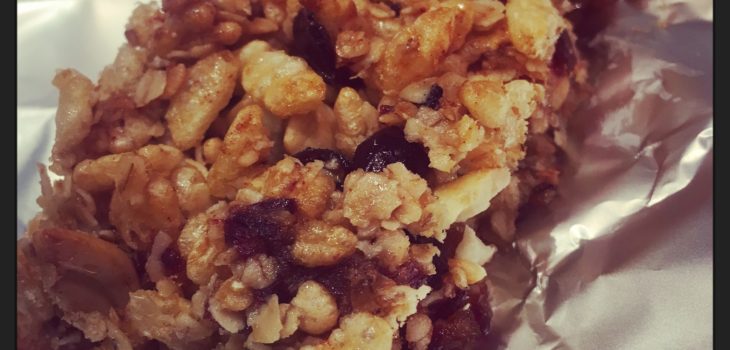
Cereal Bars

  • 17th February 20199th March 2019
  • by thefoodwife

Makes 14

The Food Husband has recently started a gluten-free diet to see if it will improve a chronic illness he suffers from. I’ve had a week to plan and start getting more gluten-free ingredients ready to use.

Evening meals, when we eat together, aren’t an issue, as we often eat gluten-free or they are meals that can be easily adapted. A bigger challenge is finding him breakfast and lunch ideas for when he is at work. So I’ve started with breakfast.

His normal go-to breakfast on a work day is a cereal bar. They are convenient and quick to eat at his desk when he arrives. His usual bars are not certified as suitable for coeliac diets, and shop-bought gluten-free alternatives are pricey, so I’ve made our own.

The oats and Rice Krispies I have used are certified gluten-free versions but if this is not a requirement for you then by all means use regular cereals (it’s definitely cheaper!). I’ve also kept these vegan, but again if this isn’t necessary, honey could be used in place of the syrup.

I have wrapped each one in foil and then stored them in an airtight container. These need to be eaten fairly fresh, but should last the two or so weeks I’m expecting for the Food Husband to make his way through them.

  • Ingredients:
  • 110g oats (1 cup) (gluten-free if required)
  • 90g Rice Krispies (3 cups) (gluten-free if required)
  • 150g (1 cup) cashew nuts
  • 350g (1 cup) golden syrup
  • 3 tbsp coconut oil
  • 120g chopped dates (approx. 1 cup when uncut)

Step 1: In a large bowl, combine the oats, Rice Krispies and cashew nuts.

Step 2: Over a medium heat, melt the coconut oil, syrup and chopped dates together, until little bubbles start to rise to the surface.

Step 3: Carefully pour the hot liquid over the dry ingredients and stir with a spoon until everything is coated.

Step 4: Spread into a lined baking tray (suitable for a tray bake) and press down with the back of a metal spoon.

Step 5: Bake at 170c (fan) for 20 minutes.

Step 6: Remove from the oven and allow to semi-cool in the tin. After about half an hour, whilst still in the tin, use a knife to carefully cut into 14 pieces (cut in half length wise and then divide each into seven). Once fully cool, wrap individually and store in an airtight container.

N.B. you could reduce the amount of syrup to 3/4 of a cup but any less will make it difficult for these to stick together.

Peanut Butter and Chocolate Oat Cookies

  • 1st February 20191st February 2019
  • by thefoodwife

Makes 15

It’s snowing outside and I’ve decided that is excuse enough to do some baking. My husband eagerly suggested brownies but I’ll be making those next week for a coffee morning with friends. So I decided I’d go down the cookie route. I’ve played around a little bit here and used peanut butter and chocolate in an oat cookie that have really hit the spot!

These could be made vegan (use coconut oil in place of butter and ensure you use a dark chocolate with no milk added). You can use smooth and/or chunky peanut butter (I used 50g of each) and any chocolate you like (I was using up left overs from Christmas which were a mix of milk and white).

  • Ingredients:
  • 120g butter (coconut oil if vegan/dairy free)
  • 100g peanut butter (I used half smooth and half chunky)
  • 2 tbsp golden syrup
  • 1 tsp bicarbonate of soda
  • 120g soft light brown sugar
  • 120g plain flour
  • 180g porridge oats
  • 100g chocolate (vegan if required, roughly chopped or chipped)

Step 1: Over a low heat, melt the butter, syrup and peanut butter in a heavy bottomed pan. Stir every now and again. Once melted, leave to cool slightly.

Step 2: In a large bowl combine the sugar, flour and oats. Add the chopped chocolate and stir so everything is evenly mixed.

Step 3: Stir the bicarbonate of soda into the cooled liquid mix and then add to the dry ingredients, stirring thoroughly until all combined.

Step 4: Roll into 15 equal balls and spread out on two lined baking sheets.

Step 5: Bake in a preheated oven (180c fan) for 10-12 minutes, until golden and cracked on top.

Step 6: Remove from the oven and allow to cool (they will firm up as they cool). Leave them for five minutes on their trays and then carefully transfer the cookies, still on their baking parchment (hold diagonal corners taut), onto wire racks to cool completely.

Posts pagination

Previous page 1 … 10 11 12 13 14 15 Next page

Newsletter

Blog Search

Blog Categories

  • Air fryer 2
  • Alcohol 12
  • Baby Weaning 24
  • Baking 74
  • Beef 18
  • Bread 1
  • Brunch 7
  • Cake 47
  • Chicken 48
  • Christmas 14
  • Cocktails 9
  • Dairy-Free 228
  • Dessert 37
  • Duck 1
  • Fish 12
  • Gluten-Free 254
  • Instant Pot 19
  • Lamb 6
  • Lunch box fillers 2
  • Ostrich 1
  • Pasta 4
  • Pescatarian 13
  • Pork 38
  • Rabbit 1
  • Salad 9
  • Shellfish 10
  • Soup 1
  • Turkey 10
  • Uncategorised 6
  • Vegan 136
  • Vegetarian 243

Socials

  • Facebook
  • Twitter
  • Google
  • Linkedin
  • Instagram
  • Pinterest
  • Youtube
Theme by Colorlib Powered by WordPress
Back to top