Skip to content
The Food Wife logo
  • Home
  • About
  • Blog
  • Contact

Category: Baking

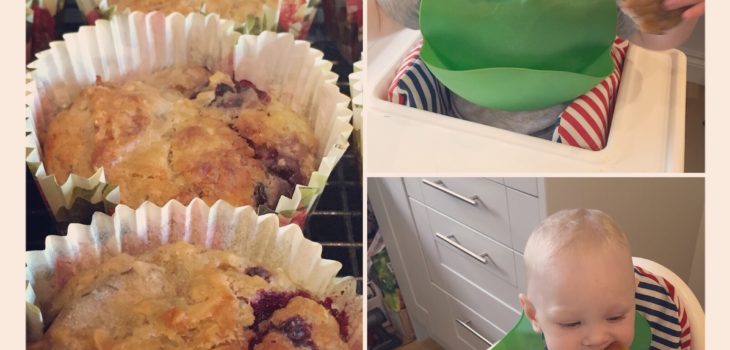
BLW Blackberry, Lime and Coconut Sugar-Free Muffins

  • 1st September 20182nd September 2018
  • by thefoodwife

Makes 12

The carrot and coconut sugar-free muffins were such a hit with the Food Baby and his pals that I’ve been busy coming up with another sugar-free cake for them. Again these are sweetened naturally by the banana and have added texture from the oats and coconut whilst they are kept moist by the blackberries.

These take only a gently stir so can be made quickly and easily and can be frozen once baked.

  • Ingredients:
  • 1 large banana, mashed (you are looking for about 125g)
  • 120g blackberries
  • 25g desiccated coconut
  • 50g oats
  • 100g plain flour
  • 1 lime, zested
  • 1 tsp baking powder
  • 120ml full fat milk
  • 60ml oil
  • 1 egg, beaten

Step 1: Lightly combine the banana, blackberries, coconut, oats, flour, lime zest and baking powder in bowl.

Step 2: In a jug, mix the milk, oil and egg.

Step 3: Add the liquid to the drier ingredients and gently mix. Remember not to over mix it.

Step 4: Fill a muffin tray with 12 cases. Put a dessert spoon of mixture into each case. Then spread any remaining mixture equally between the cases.

Step 5: Bake in a preheated oven (200c) for 20 minutes.

Step 6: Remove from the oven and allow to cool on a wire rack.
BLW Carrot and Coconut Sugar-Free Muffins

  • 29th August 20182nd September 2018
  • by thefoodwife

Makes 12

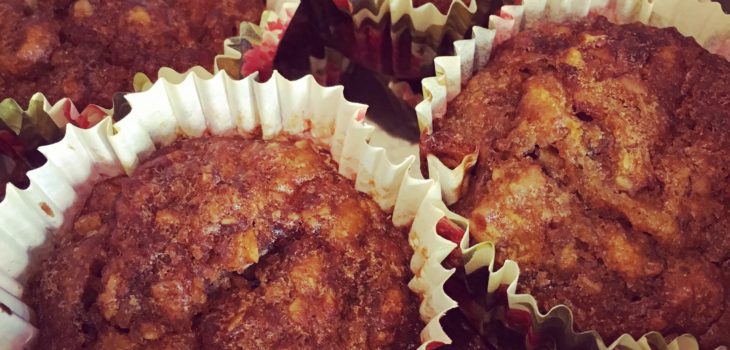
These little cakes have extra texture from the carrot, coconut and oats. They are sweetened naturally by the banana, and the fruit and vegetables help contribute to your little one’s healthy diet.

When peeled from their paper cases these are the perfect size for little hands to hold and so make a great snack.

These take only a gentle stir so can be made quickly and easily and can be frozen once baked.

  • Ingredients:
  • 1 large banana, mashed with a fork
  • 1 medium-large carrot, peeled and grated
  • 25g desiccated coconut
  • 50g oats
  • 100g plain flour
  • 1 tsp ground cinnamon
  • 1 tsp baking powder
  • 120ml full fat milk
  • 60ml oil
  • 1 egg, beaten

Step 1: Lightly combine the banana, carrot, coconut, oats, flour, cinnamon and baking powder in a bowl.

Step 2: In a jug, mix the milk, oil and egg.

Step 3: Add the liquid to the drier ingredients and gently mix. Do not over mix it.

Step 4: Fill a muffin tray with 12 cases. Put a dessert spoon of mixture into each case. Then spread any remaining mixture equally between the cases.

Step 5: Bake in a preheated oven (200c) for 20 minutes.

Step 6: Remove and allow to cool on a wire rack.

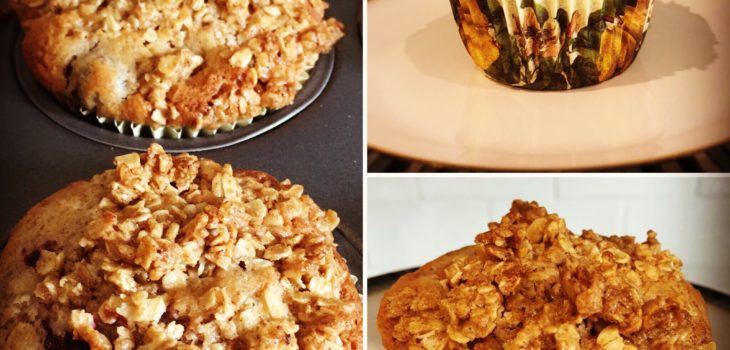
Blackberry and Apple ‘Crumble’ Muffins

  • 24th August 201824th August 2018
  • by thefoodwife

Makes 12

One of my favourite puddings is apple and blackberry crumble. Sweet and a little tart all at the same time, and just a bowl of comfort.

Here is a muffin version which is simple to make and can be eaten for a naughty breakfast, taken as part of a packed lunch, or enjoyed with a cup of tea for the obligatory tea and cake.

These are best eaten on the day, but will be perfectly edible for a few days (if they last that long). I zapped them for 20 seconds in the microwave after the first day but they could also be frozen.

Remember that when making muffins you do the minimum amount of mixing. The batter should only just be combined and will be lumpy – that’s good! It makes for a light muffin.

  • Ingredients:
  • For the muffins:
  • 1 egg, beaten
  • 60ml oil
  • 120ml milk
  • 200g plain flour
  • 100g caster sugar
  • 2 tsp baking powder
  • 1/2 tsp salt
  • 1 tsp ground cinnamon
  • 2 eating apples, peeled and cored then cut in to a medium dice
  • 120g blackberries
  • For the crumble topping:
  • 25g cold butter, cubed
  • 25g sugar
  • 50g oats
  • 1/2 tsp ground cinnamon

Step 1: In a jug, mix together the milk, oil and egg.

Step 2: Lightly combine the apple, blackberries, flour, sugar, salt, cinnamon and baking powder in a bowl.

Step 3: Add the liquid to the dry mix and gently fold into each other. Do not over mix it.

Step 4: Fill a muffin tray with 12 cases. Put a tablespoon of mixture into each case. Then divide any remaining mixture equally between the cases.

Step 5: Use your fingers to rub the crumble topping ingredients together in a bowl.

Step 6: Sprinkle over the top of each muffin.

Step 7: Bake in a preheated oven (200c) for 20-25 minutes (mine were ready at 22 minutes).

Step 8: Leave in the tray for 10 minutes and then transfer to a wire rack to cool.

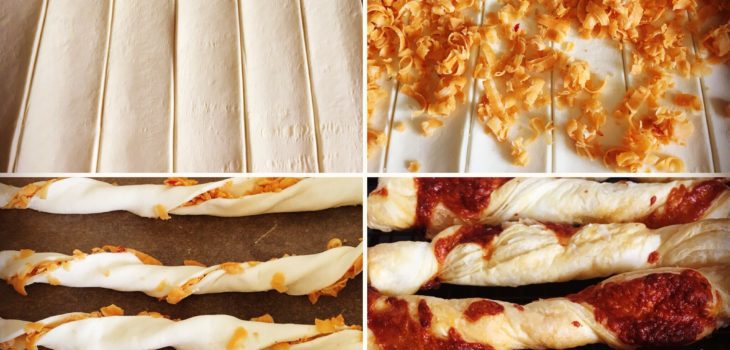
(Chilli) Cheese Straws

  • 17th August 201818th August 2018
  • by thefoodwife

Makes approximately 36

Cheese straws are great as a nibble with drinks, and making your own is easy and you can choose which cheese to flavour them with.

Using a ready-rolled puff pastry makes it super quick to prepare and you don’t have to worry about rolling the pastry out to an exact thickness.

I used Mexicana as I wanted to make a slightly spicy straw. That said, using 100g keeps the heat to a gentle background flavour. Obviously if you want more heat or more cheese just add more. 100g is the minimum amount you’ll want to use.

  • Ingredients:
  • 1 sheet of ready-rolled puff pastry
  • 100g hard/semi-hard cheese, grated (I used Mexicana)

Step 1: Preheat an oven to 180-200c and line one or two baking sheets with baking parchment.

Step 2: Lay out your sheet of puff pastry on a board, but keep it on the grease proof paper.

Step 3: Use a sharp knife to carefully cut in two lengthways, then in to strips roughly 2cm wide.

Step 4: Sprinkle the grated cheese over the pastry and then carefully fold each strip in half lengthways, gently pressing down as you go.

Step 5: Pick up each piece and gently stretch and twist, and lay on the lined baking sheet. Repeat with each piece and ensure there is a couple of centimetres gap between each one.

Step 6: Bake in the oven for 25-30 minutes until risen and golden.

Step 7: Allow to cool on a wire rack.

Keep in an airtight container, best eaten within 24 hours.

For extra oomph try brushing the pastry with a little mustard before sprinkling the cheese. Add thin strips of Parma ham (along with the cheese) for a meaty version.

My Ultimate Rocky Road

  • 25th July 201820th August 2018
  • by thefoodwife

Makes 15 generous pieces

This is chocolate overload, but in a good way. I’ve done away with some of the usual gems in a rocky road and replaced them with the next level of deliciousness, hence the ‘ultimate’ in the title. Maltesers, mini Kitkats and honeycomb (homemade or shop-bought) are present along with the obligatory soft marshmallows (although if you’re going vegetarian leave these out or use a vegetarian alternative).

I’ve topped it with drizzled white chocolate, just in case there wasn’t enough chocolate in the first place.

I probably would have bought pieces of honeycomb, but I couldn’t find any in the shops at the moment, and didn’t want to use crunchie bars as I feared they would just dissolve when the melted chocolate was poured on top. Instead I made my own using this Good Food recipe and put roughly a third into the mix.

This recipe has been taste-tested by Mr Food Wife, plus lots of my yoga-mummies at our get together this week, and it gets their seal of approval.

  • Ingredients:
  • 300g dark chocolate
  • 100g unsalted butter
  • 2 tbsp golden syrup
  • 100g mini marshmallows
  • 100g maltesers
  • 100g kitkat bite-size pieces (or regular ones broken into one-inch pieces)
  • 100g honeycomb, broken in to bite-size pieces
  • 100g white chocolate

Step 1: Melt the dark chocolate, butter and syrup in a bowl over a pan of gently simmering water (ensure the base of the bowl is not in contact with the water).

Step 2: Once melted, remove the bowl and leave to cool for a couple of minutes.

Step 3: In a separate, large bowl, measure out the Maltesers, Kitkats, marshmallows and honeycomb.

Step 4: Pour the molten chocolate mix over the Maltesers and co and stir gently.

Step 5: Pour into a traybake-sized tin and place in the fridge whilst you melt your white chocolate.

Step 6: Place the white chocolate in a clean bowl over simmering water and gently melt.

Step 7: Remove the rocky road from the fridge and use a metal spoon to drizzle the white chocolate over the top.

Step 8: Cover with cling film and leave in the fridge until set.

Step 9: Cut into 15 pieces and try not to eat all at once!

Posts pagination

Previous page 1 … 12 13 14 15 Next page

Newsletter

Blog Search

Blog Categories

  • Air fryer 2
  • Alcohol 12
  • Baby Weaning 24
  • Baking 74
  • Beef 18
  • Bread 1
  • Brunch 7
  • Cake 47
  • Chicken 48
  • Christmas 14
  • Cocktails 9
  • Dairy-Free 228
  • Dessert 37
  • Duck 1
  • Fish 12
  • Gluten-Free 254
  • Instant Pot 19
  • Lamb 6
  • Lunch box fillers 2
  • Ostrich 1
  • Pasta 4
  • Pescatarian 13
  • Pork 38
  • Rabbit 1
  • Salad 9
  • Shellfish 10
  • Soup 1
  • Turkey 10
  • Uncategorised 6
  • Vegan 136
  • Vegetarian 243

Socials

  • Facebook
  • Twitter
  • Google
  • Linkedin
  • Instagram
  • Pinterest
  • Youtube
Theme by Colorlib Powered by WordPress
Back to top