Skip to content
The Food Wife logo
  • Home
  • About
  • Blog
  • Contact

Category: Gluten-Free

Soy and Ginger Roasted Vegetables

  • 12th September 2019
  • by thefoodwife

Serves 3

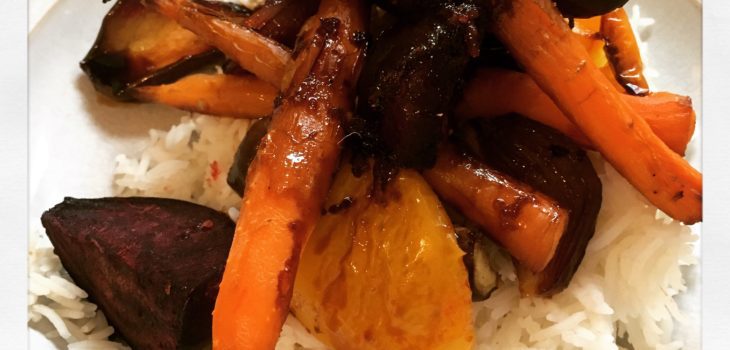
Our allotment is yielding aubergines, beetroot, peppers and carrots at the moment.  They are also in plentiful supply in the supermarkets and so here is a gluten-free, vegan meal using this bounty that even satisfied my meat-loving husband. 

Helpful hint! Once you have tossed the vegetables in the glaze, ensure you lift them out of the bowl and on to your baking tray to keep the left over marinade to turn into your sticky glaze for drizzling at the end.

If I had had them I would have finished the roasted vegetables off by sprinkling over a few sesame seeds.

N.b. We had a portion of the vegetables left over and so I had them for lunch the next day, warmed up in the microwave and then stuffed inside a wrap. 

Ingredients:

For the sticky glaze:

2 inches of root ginger, peeled and grated

3 tbsp soy sauce (gluten-free if required)

3 tbsp maple syrup 

1 tsp sesame oil

Pepper

For the roasted vegetables:

2 red onions, peeled and quartered

1 large pepper, deserted and cut into 2 inch pieces

1 small aubergine, cut into 2 inch strips

3 or 4 small-medium beetroot cleaned and quartered.

10 small carrots, cleaned

To serve: 225g basmati rice, cooked according to the instructions

Step 1: Combine the ginger, soy, syrup, sesame oil and a pinch of ground pepper in a large bowl.

Step 2: Toss the prepared vegetables in the dressing and then spread on a baking sheet.  Keep back the dressing remaining in the bowl and transfer to a small sauce pan.

Step 3: Roast the tray of vegetables in a preheated oven at 170c (fan) for 45 minutes.

Step 4: Five minutes before the vegetables are ready, put  the saucepan of left over marinade on a medium heat and reduce slightly so it becomes sticky.

Step 5: Serve the roasted vegetable on a bed of basmati rice, with the reduced glaze drizzled on top.

Chickpea and Carrot Burgers

Chickpea and Carrot Burgers

  • 26th August 2019
  • by thefoodwife

Makes 4

I love a good veggie burger. Making your own is easy and these are made with ingredients you probably have in your store cupboard or fridge.  Crushing half of the chickpeas provides texture, whilst blitzing the other half creates what you need to bind these together. These contain no flour, egg or dairy and so are suitable for a gluten-free, dairy-free or vegan diet. 

Ingredients:

2 tins of chickpeas, drained (reserve 1 tbsp of liquid)

2 medium/1 large carrot, grated 

2 spring onions, finely sliced

2 heaped tsp ground cumin

1 heaped tsp smoked paprika

1/2 tsp dried oregano

1 tsp garlic powder

Salt and Pepper

Step 1: Take half the chickpeas and use a potato masher to roughly crush them (some will remain practically whole, others will squish a little). This will give the texture in the burgers.

Step 2: With the other half of the chickpeas, along with the tablespoon of reserved liquid, blitz into a smooth paste.

Step 3: Now combine both types of chickpeas along with the grated carrot, sliced spring onions, spices, garlic (use two crushed cloves if you don’t have any powder) and a pinch each of salt and pepper. Taste a little of the mix to check the seasoning. 

Step 4: Use your hands to divide into four and shape in to patties. They should be about an inch thick and about four inches wide. 

Step 5: Place on a non-stick baking sheet and cover before placing in the fridge until needed (this will help them to firm up). 

Step 6: When ready to cook, spray or wipe a little oil in the tops of them (I also put a spritz on their bottoms) and bake in a 200c fan oven for 25 minutes.

Serve one in a fluffy bun with lettuce and slices of tomato, along with a sauce of your choice for a full on burger experience. Or go for a skinny burger by serving without the bun (in which case I serve two patties!) These are lovely with sweet potato wedges and a side salad.

Spiced Halloumi with Pomegranate

  • 30th July 2019
  • by thefoodwife

Serves 2-4

Salty cheese with a lightly spiced coating and a hint of sweetness in the dressing makes a great combination in this summer dish.

This is best served immediately after frying the halloumi although it can afford to sit for 10 minutes or so, but do dress it at the last moment.

The dressing can be made as a larger amount in a jar and used for other salads.  You will only need a tablespoon for this.

This dish is perfect as part of a larger meal with accompanying salads or served with a few salad leaves as a starter. 

Ingredients:

1 tbsp (chilli infused) oil

Ras al hanout 

225g halloumi

To serve:

1 tbsp pomegranate seeds

1 tbsp balsamic & oil dressing (3 parts oil, 1 part vinegar)

Step 1: Begin by slicing the block of halloumi into eight roughly even slices (go from the short end).  Place them on a piece of kitchen paper, and another on top, and gently press to remove excess moisture.

Step 2: Sprinkle each side of the halloumi with a tiny pinch of ras al hanout.

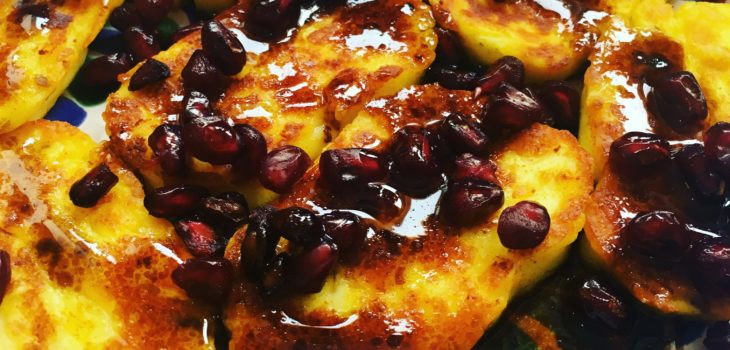
Step 3: Heat the oil in a non stick frying pan over a medium heat. Carefully lie each piece of halloumi into the pan, ensuring none are overlapping.  Fry for a few minutes on each side, until golden.  Transfer to a serving plate.

Step 4: When ready to serve sprinkle over the pomegranate seeds and drizzle with the balsamic dressing.

Puttanesca

  • 23rd July 2019
  • by thefoodwife

Serves 2

Puttanesca, a Neapolitan pasta dish that originates from the last century, means lady of the night. Why? There are various theories, one is said that because it is so quick to make it can be eaten between customers. It has become a classic dish, and here it is made with store cupboard ingredients, making it perfect for a weeknight meal.  

It is a quickly made sauce, packed with punchy flavours, which can pretty much be cooked in the time it takes to cook your pasta. 

It can easily be adapted to be gluten-free and suitable for vegetarian or vegan diets (by omitting the anchovies).  

Ingredients:

2 tbsp olive oil

4 anchovy fillets (leave out if making this vegetarian or vegan)

3 cloves of garlic, finely chopped 

1/2 tsp dried chilli flakes 

1 tin of cherry tomatoes

160g pitted black olives (half kept whole the other half sliced)

2 tbsp capers

Pepper

To serve: 150g dried pasta, cooked according to the packet instructions (gluten-free if required)

Step 1: Heat the oil in a frying pan over a medium high heat.  Add the anchovies and cook for one minute, moving around the pan so they break up.  Add the garlic and lower the heat slightly. Continue to stir. After another minute add the chilli.

Step 2: Add the tinned tomatoes, along with the olives and a pinch of ground black pepper.  Cook out for five minutes. Add the capers and cook for another couple of minutes. Check the seasoning and serve, tossed through freshly cooked pasta.

Roasted Peppers

  • 10th July 2019
  • by thefoodwife

Make 8

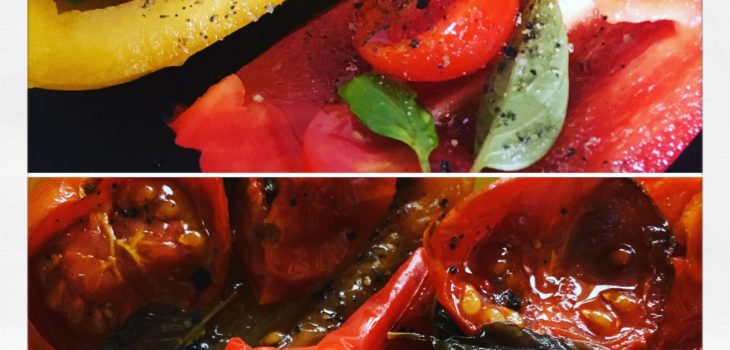
These are such a joy to eat in the summer, they are great as part of a lunch with salads and also make an excellent filling for a sandwich (although don’t make it too far in advance as it can go soggy, and no-one likes a soggy sandwich). 

I quarter the peppers and would suggest this quantity would serve 2-4 people.  They’ll keep a few days in the fridge too so perfect to make in advance.  These are both vegan and gluten-free.  

Ingredients:

2 large bell peppers (any colour but green) 

8 cherry tomatoes, halved

16 small basil leaves 

(Garlic-infused) oil

Salt and pepper 

Step 1: Preheat your oven to 175c fan.

Step2: Prepare the peppers by slicing each in half down the stalk. Carefully remove the stalk and seeds. With a knife carefully cut out any fleshy white pith. Slice each half in half again (top to bottom) and lie on a baking tray.

Step 3: Put two tomato halves in each piece of pepper along with two basil leaves.

Step 4: Drizzle a tiny amount of (garlic) oil over each pepper and a little salt and pepper.

Step 5: Carefully transfer the baking tray to the oven (make sure nothing falls off the peppers!) and roast for 45-55 minutes.  They should be soft with a slight char at the edges.  Delicious hot or cold. 

Posts pagination

Previous page 1 … 28 29 30 31 32 … 51 Next page

Newsletter

Blog Search

Blog Categories

  • Air fryer 2
  • Alcohol 12
  • Baby Weaning 24
  • Baking 74
  • Beef 18
  • Bread 1
  • Brunch 7
  • Cake 47
  • Chicken 48
  • Christmas 14
  • Cocktails 9
  • Dairy-Free 228
  • Dessert 37
  • Duck 1
  • Fish 12
  • Gluten-Free 254
  • Instant Pot 19
  • Lamb 6
  • Lunch box fillers 2
  • Ostrich 1
  • Pasta 4
  • Pescatarian 13
  • Pork 38
  • Rabbit 1
  • Salad 9
  • Shellfish 10
  • Soup 1
  • Turkey 10
  • Uncategorised 6
  • Vegan 136
  • Vegetarian 243

Socials

  • Facebook
  • Twitter
  • Google
  • Linkedin
  • Instagram
  • Pinterest
  • Youtube
Theme by Colorlib Powered by WordPress
Back to top