Skip to content
The Food Wife logo
  • Home
  • About
  • Blog
  • Contact

Category: Vegetarian

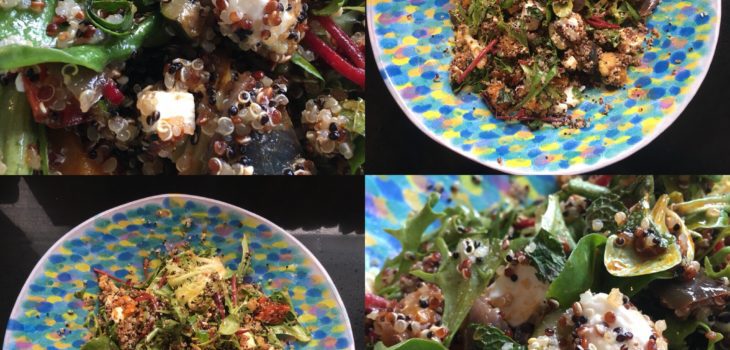
Roasted Vegetable and Feta Quinoa Salad

  • 8th June 20188th June 2018
  • by thefoodwife

Serves 4

This is a more substantial salad that provides a spicy smoky hit from the dressing. It makes a good lunch served with some flat breads or some fried halloumi (use the method in my recipe here).

The dressing makes enough for two salads (so by all means halve the quantities) but it will keep in the fridge in a jar for a week or two.

It’s quite convenient to use left over roasted vegetables in this dish; I made a big batch the day before and then kept back the amount I needed for the salad. I used a mix of pepper, red onion, butternut squash, tomatoes, cauliflower, courgette and aubergine, all cut into roughly one inch pieces, tossed in oil and some seasoning, and roasted for 30-40 minutes at 190c.

  • Ingredients:
  • For the salad:
  • 200g mixed roasted vegetables
  • 120g quinoa (I used a mixed variety)
  • 100g feta, cubed
  • 50g mixed salad leaves
  • 3 sprigs of mint, leaves chopped or torn
  • For the dressing:
  • 6 tbsp olive oil
  • 2 tbsp red wine vinegar
  • 2 tbsp pomegranate molasses
  • 2 heaped tsp harissa paste

Step 1: Put all the dressing ingredients in a jar (with a lid) and shake until combined, or whisk in a bowl.

Step 2: Place the salad ingredients in a large bowl and toss. When ready to serve, drizzle over half of the dressing and toss again.
Bibimbap

  • 6th June 20186th June 2018
  • by thefoodwife

Serves 2

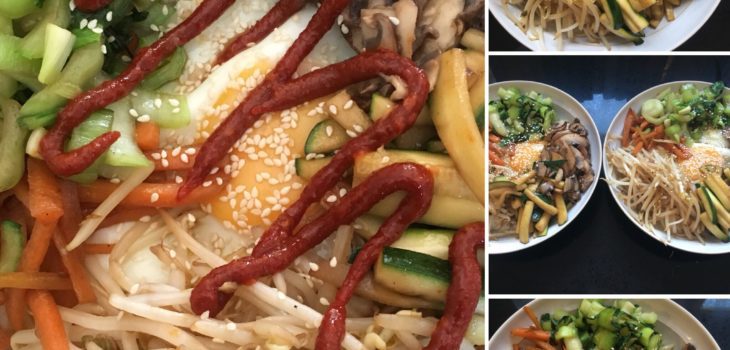
Following on my Asian theme, we also enjoyed a vegetarian bibimbap last weekend. For those who have not experienced this dish, it is Korean and means ‘mixed rice’. Essentially it consists of white rice, egg, vegetables and if you like, some meat, often beef. And of course the spicy gochujang (my favourite!)

This weekend we stuck to a veggie version and I’ve included exactly what we had, but don’t be afraid to try a different combination of vegetables. Whatever you fancy really!

  • Ingredients:
  • 150g rice (I used sushi rice)
  • 1 carrot, peeled and cut into matchsticks
  • 1/2 courgette, cut into matchsticks
  • 2 handfuls of beansprouts
  • 6 mushrooms, thinly sliced (I used chestnut mushrooms)
  • 2 pak choi, finely shredded
  • 2 large eggs
  • Sesame oil
  • Soy sauce (gluten-free if required)
  • To serve:
  • 1 tsp sesame seeds
  • Squeezable gochujang for bibimbap (if you are making this gluten-free you will need ensure you are using a gluten-free version)

Step 1: Cook your rice according to the packet instructions.

Step 2: Heat your wok to a medium high heat and add a small amount of sesame oil and one of your prepared vegetables and stir fry for a minute or two, until cooked but still having a little bite. Add a splash of soy sauce 20 seconds before removing from the heat. Remove the vegetables from the wok, and keep separately. Repeat with your other vegetables. I’d recommend leaving the mushrooms till last as they release a lot of natural juice.

Step 3: When your vegetables are all cooked and kept separately, fry each of your eggs.

Step 4: Assemble your bibimbap bowls by first putting your cooked rice at the bottom of the bowl. Top the rice in the middle with your fried egg, then arrange each of the vegetables around the bowl, keeping the yolk of the egg visible.

Step 5: Sprinkle with a few sesame seeds and as much gochujang as you would like and tuck in!

Any vegetables can be used in this dish, all cooked in the same way. This dish is also amazing with a meat accompaniment such as minced beef. Again, you would cook the meat in the same way as the vegetables, and arrange it in the bowl as you do the vegetables.

Chinese Mushroom and Chilli Stir Fry with Tofu

  • 4th June 201810th June 2018
  • by thefoodwife

Serves 3

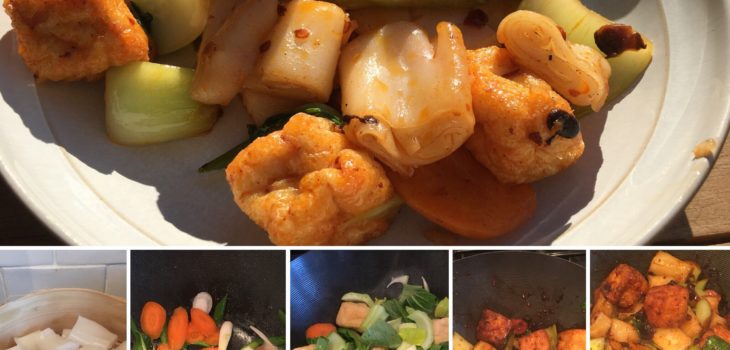
I love exploring the Chinese supermarket, Wai Yee Hong, in Bristol. About a year ago I came across some fresh noodles called Cheong Fun which are sheets of rice noodles (plain or some come with tiny shrimp and flecks of spring onion embedded in them) that are then tightly rolled up. To cook them they are steamed for about 10 minutes by which point they are soft and ready to be added to your dish. I cut my rolled up noodles into roughly one inch pieces pre-steaming so I can tumble them straight into my stir fry from my bamboo steamer.

The Cheong Fun noodles are a perfect accompaniment to this dish, as the bundles of rice noodle pair well with the light pillowy cubes of ready-deep-fried tofu; another purchase from the Chinese supermarket, I find these are one of the best ways to enjoy tofu (the other being tofu katsu curry!)

And finally the stir fry sauce, another supermarket product that packs a punch of flavour, enhanced by the addition of soy and sugar.

This is a really quick meal to cook, just make sure everything is prepped and ready to go!

  • Ingredients:
  • 400g Cheong Fun Noodles (or rice noodles of your choice)
  • 150g deep fried tofu pieces
  • 2 pak choi, cut width-ways in to one-inch slices
  • 3 spring onions, sliced diagonally
  • 1 carrot, peeled and sliced diagonally
  • 1 1/2 tbsp Chinese mushroom in chilli oil
  • 1 tbsp dark soy sauce
  • 1 tbsp caster sugar

Step 1: Cook your noodles, according to the packet. Whilst these are part way through cooking (steaming in the case of the Cheong Fun), get on with your stir fry.

Step 2: Heat your wok over a medium high heat. Add a spritz of spray oil (you won’t need more as the sauce comes in chilli oil).

Step 3: Add the carrot and spring onion and stir fry for one minute.

Step 4: Add the pak choi and ready-fried tofu pieces and stir fry for another minute.

Step 5: Add the Chinese mushroom and chilli oil, along with the soy sauce and sugar. Stir fry for two minutes.

Step 6: Add your cooked noodles and toss everything together so the sauce coats all components. Serve.

Homemade Pizza

  • 1st June 201815th September 2018
  • by thefoodwife

Makes 8 medium pizzas (dough and sauce)

I’ve written before that pizza is my husband’s favourite. I am much more likely to agree to have it for dinner if it is homemade. I find it easier to make a big batch of dough, divide it up in to portions and freeze the spares, along with the portions of pizza sauce, and then it becomes a quick meal to throw together, perfect for a Friday night! I simply get the dough and sauce out of the freezer in the morning to defrost. Both the dough and sauce are dairy free, vegan and vegetarian.

  • Ingredients:
  • For the dough:
  • 800g strong white bread flour
  • 200g strong wholemeal bread flour
  • 14g fast action yeast
  • 1 tbsp caster sugar
  • 4 tbsp olive oil
  • 1 tsp salt
  • 650ml lukewarm water
  • For the pizza sauce:
  • 2 tbsp olive oil
  • 1 onion, finely diced
  • 2 cloves of garlic, finely diced
  • 1/2 tsp chilli flakes
  • 1/2 tsp dried oregano
  • 500g passata
  • 1 dsp caster sugar
  • 1 dsp balsamic vinegar
  • Salt and pepper

Step 1: Make the dough by mixing the yeast, sugar and oil in the water and setting it aside for a couple of minutes to activate the yeast (it will begin to froth).

Step 2: In a large bowl combine the flours and the salt, make a well in the centre and then add the liquid ingredients. Using either a wooden spoon or an electric mixer, combine the ingredients and mix until they have formed a ball, then knead until you have a soft dough (I did all of this in my electric mixer using the dough hook).

Step 3: Leave the dough to rise in the bowl, covered with cling film or a damp tea towel, until it has doubled in size. This will take up to an hour.

Step 4: Knock back the dough by kneading it on a floured surface.

Step 5: Divide in to portions (this recipe makes eight medium-sized pizzas) and either use immediately, or wrap in clingfilm and keep in the fridge or freezer until needed.

Step 6: Make the pizza sauce; on a medium heat, soften the onion in the oil for five-10 minutes and then add the garlic and soften for a further two minutes.

Step 7: Stir in the chilli and oregano, then add the passatta, sugar and balsamic vinegar and cook for 10-15 minutes on a medium-low heat. Season to taste. Allow to cool.

Step 8: When you are ready to assemble the pizza, roll the portion of dough out on a floured surface and place either on a preheated pizza stone or on a greased baking sheet (I also sprinkle the baking sheet with a little semolina). Spread an 1/8 of the pizza sauce over the surface (leaving a 1 cm border) and any additional toppings and cook at 220c for approximately 12 minutes.

I find that half a ball of mozzarella is enough per pizza (my husband would disagree!) and one of our favourite toppings is jalapeños (from a jar), some slices of salami and some halved cherry tomatoes. Once out of the oven I top it with freshly torn basil leaves.

Another suggestion, which we had tonight and really enjoyed, was mixing a table spoon of mango chutney in to the pizza sauce before spreading it on the base, then using some left over chicken curry (!) as a topping along with some sliced fresh red chilli. And mozzarella. Don’t judge us, just try it! It was lush!

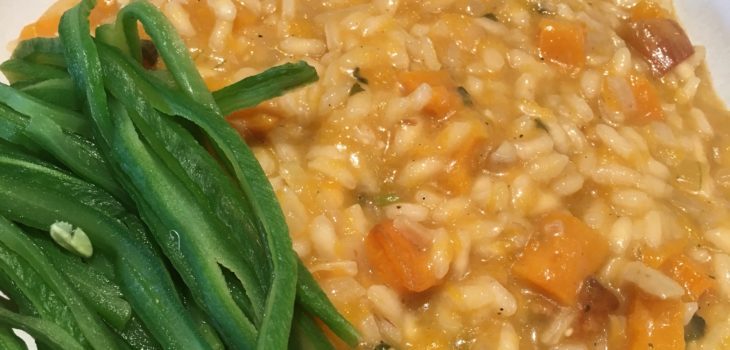
Butternut Squash Risotto

  • 25th May 201825th May 2018
  • by thefoodwife

Serves 2

Risotto is a dish that can be a midweek meal or can be jazzed up to serve for guests.

This version celebrates the humble butternut squash. By roasting the flesh and also separately creating a purée to stir through the rice, this creates a creamy dish, without the fat!

By simply omitting the parmesan you can turn this into a dairy-free/vegan meal too.

  • Ingredients:
  • For the roasted squash:
  • 1/2 a butternut squash, peeled and cut into 1cm dice
  • 1 clove of garlic, finely chopped
  • 1 tbsp oil
  • Salt and pepper (a pinch of each)
  • For the risotto:
  • 1 tbsp oil
  • 1 onion, finely diced
  • 1 clove of garlic, finely minced
  • 6 sage leaves, finely chopped
  • 100g arborio rice
  • 50ml of white wine or vermouth
  • 400-500ml hot vegetable stock
  • 1/4 butternut squash, peeled and cut roughly into 2cm dice
  • 2 tbsp grated parmesan (optional)
  • Salt and pepper to taste
  • To serve:
  • Grated parmesan (optional)
  • Fried sage leaves (optional)

Step 1: Combine the ingredients for the roasted squash and spread on a roasting tray. Roast the squash in a 200c oven for 20-30 minutes until soft and lightly browned. Set aside (this can be done in advance or whilst the risotto is cooking).

Step 2: Make the purée by simmering the remaining squash in water until soft. Drain and then mash or purée and set to one side.

Step 3: Make the risotto; heat the oil in a heavy bottomed pan on a medium heat and soften the onion for five minutes. Add the garlic and chopped sage and stir, cooking for a couple of minutes.

Step 4: Add the rice and stir to coat in the oil. Add the white wine/vermouth and stir.

Step 5: Gradually add small amounts of the vegetable stock, stirring all the time, and only adding more once the stock has been absorbed. It will take about 30 minutes for the rice to cook, but taste it every now and again to check if it is cooked through.

Step 6: When the rice is cooked, stir through the puréed and roasted squash, along with the parmesan (if using) and season to taste.

Serve with more parmesan to sprinkle on top at the table (if using), and if you like, some fried sage leaves. This is perfect with green beans or runner beans.

If you are making this for more people add 50g of rice per person and 200-250ml of stock and 25ml of wine/vermouth along with 1 tbsp parmesan. Use the rest of the squash to increase the amount of purée.

Posts pagination

Previous page 1 … 43 44 45 46 47 … 49 Next page

Newsletter

Blog Search

Blog Categories

  • Air fryer 2
  • Alcohol 12
  • Baby Weaning 24
  • Baking 74
  • Beef 18
  • Bread 1
  • Brunch 7
  • Cake 47
  • Chicken 48
  • Christmas 14
  • Cocktails 9
  • Dairy-Free 228
  • Dessert 37
  • Duck 1
  • Fish 12
  • Gluten-Free 254
  • Instant Pot 19
  • Lamb 6
  • Lunch box fillers 2
  • Ostrich 1
  • Pasta 4
  • Pescatarian 13
  • Pork 38
  • Rabbit 1
  • Salad 9
  • Shellfish 10
  • Soup 1
  • Turkey 10
  • Uncategorised 6
  • Vegan 136
  • Vegetarian 243

Socials

  • Facebook
  • Twitter
  • Google
  • Linkedin
  • Instagram
  • Pinterest
  • Youtube
Theme by Colorlib Powered by WordPress
Back to top