Skip to content
The Food Wife logo
  • Home
  • About
  • Blog
  • Contact

Blog

Sugar Mice

  • 2nd July 20242nd July 2024
  • by thefoodwife

These are the cutest little mice and are hardly a recipe at all, rather instructions for little (or big!) hands to make using ready made icing.

Whilst these aren’t the crystally sugar mice (which have the sort of texture of Kendal mint cake) that you can still buy in old fashioned sweet shops, they are perfect to make at home.

Ingredients:

Ready made icing

Strawberry laces sweets (or similar)

Edible shimmer (optional)

Step 1: For each mouse measure out 30g of ready made icing, in the colour of your choice. Knead with your hands until smooth and pliable and then roll it in to a small sausage shape, then smooth one end into a round little bottom and the other in to a slight point for the nose.

Step 2: Use a cocktail stick (or similar) to make a hole in the rear end about 3/4 cm deep and insert a piece of the sweetie laces, cut to about 5cm long. Push it in as far as your hole goes and then use your fingers to gently pinch the icing around the tail and smooth it so it’s neat.

Step 3: Take a small piece of icing and make two small balls for the ears. Press each ball flat between your finger and thumb to make a little circle and then carefully smooth these onto the top of the head of the mouse, again use your finger to gently smooth the icing.

Step 4: Use the cocktail stick to poke two little eyes beneath the ears and then set each mouse to one side.

Step 5: If you like you can decorate the mice. I used an edible shimmer to lightly colour the mice.

Store in a sealed container until ready to eat!
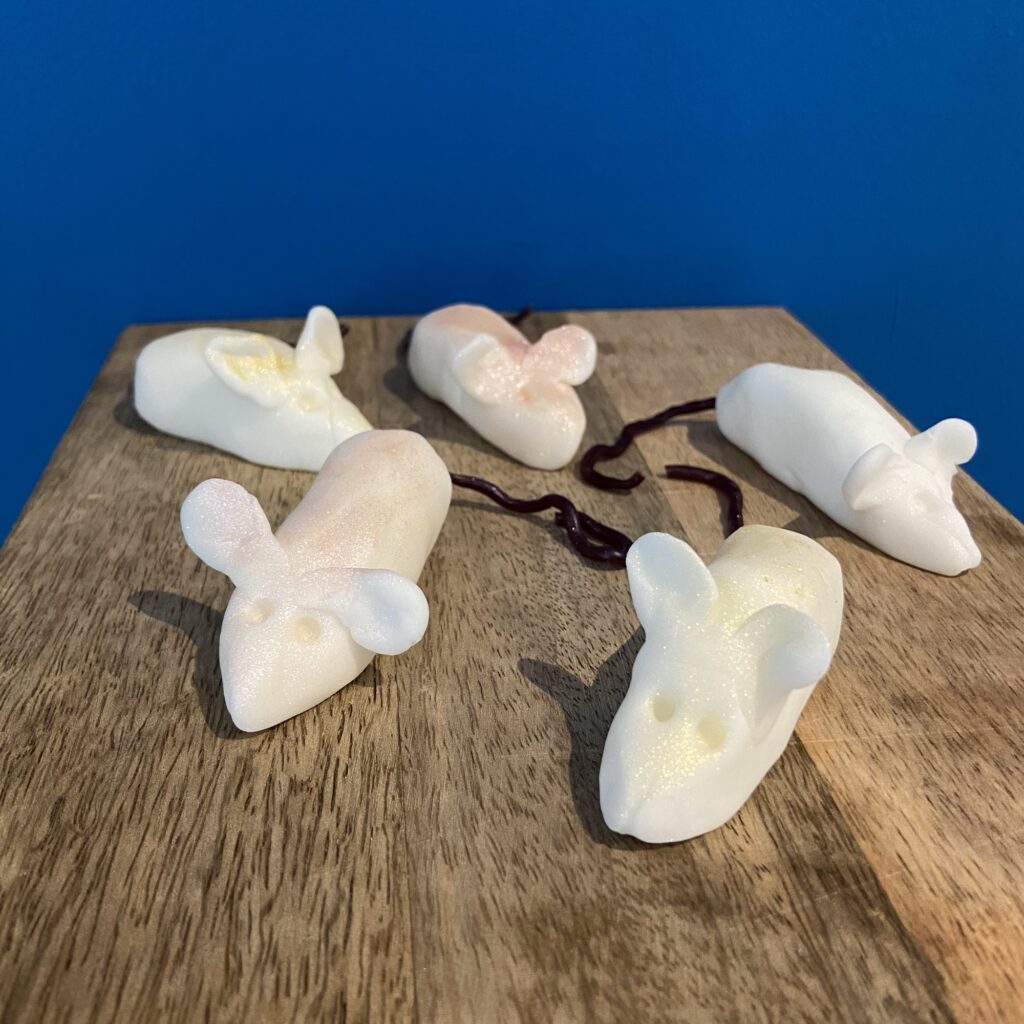
The cutest little mice

Korean-Style Chicken Wings

  • 6th June 20246th June 2024
  • by thefoodwife

Serves 2-4

Tonight’s dinner all started with a jar of near-empty strawberry jam. I remembered a great recipe by Eric Kim I’d made last year with chickpeas in this amazing Korean style sauce, which used a tablespoon of strawberry jam. So here we have my version with chicken wings. It’s sweet, spicy and sticky. Enjoy!

Ingredients:

750g-1kg chicken wings

1 tbsp strawberry jam

1 tbsp honey

1 tbsp soy sauce (gluten-free if required)

1 tbsp gochujang (gluten-free if required)

1 tbsp sesame seeds

3 tbsp tomato ketchup

Step 1: Preheat the oven to 190c (fan).

Step 2: Use a sharp knife to cut the wings on their joint to create two pieces from each wing. Spread these on a baking tray and cook for 30-35 minutes until cooked through but not too crispy.

Step 3: Meanwhile combine the remaining ingredients to a smooth sauce.

Step 4: Once the wings are out of the oven, heat a wok over a medium high heat, transfer the wings to the wok, and add the sauce, stir frying them until the sauce coats all the wings and it has reduced to a glorious sticky glaze (this should take five minutes or so).

Serve hot but try not to eat them all on your own…

Rosé Sangría

  • 5th June 20245th June 2024
  • by thefoodwife

Makes 1 pitcher

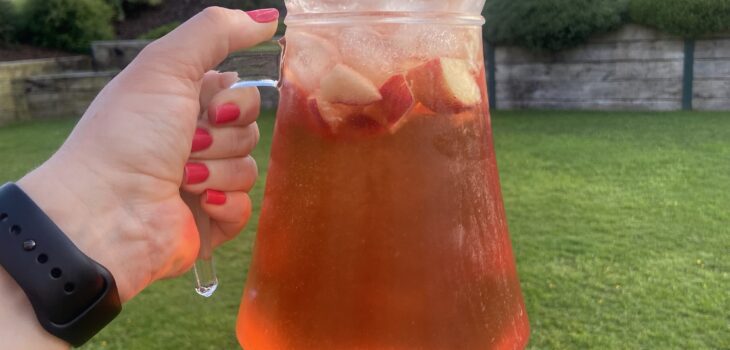
Rosé Sangria! Summery and refreshing and a great way to use up the odd bottle of rosé and make it go a little further…

You can garnish it with strawberries, orange, peach and nectarines and mint leaves. I’ve just used peaches as that’s what I had.

Mix 75ml of Grand Marnier or Cointreau, 10g sugar, a chilled bottle of rosé, 300ml of soda water and if you like 100ml of cranberry juice. Lots of ice and your fruit garnish.

Give it all a stir and serve, ideally in sunshine!

Chocolate-Banana Yogurt Lollies

  • 5th June 20245th June 2024
  • by thefoodwife

Make 6

These three ingredient ice lollies are “super yummy” according to my six-year old. This makes enough for six rocket ice lollies (if you have the moulds). If you don’t, 6 disposable cups with a lolly stick stuck in the middle will work well too!

Ingredients:

3 large ripe bananas

3 tbsp chocolate hazelnut spread

3 heaped tbsp full fat Greek Yogurt

Step 1: Using a hand blender or processor, blitz all ingredients into a smooth mixture.

Step 2: Carefully pour the mixture into the ice lolly moulds and transfer to the freezer carefully.

Step 3: Freeze overnight and enjoy!

Air-fryer “Pizza” Crumpets

  • 8th May 20248th May 2024
  • by thefoodwife

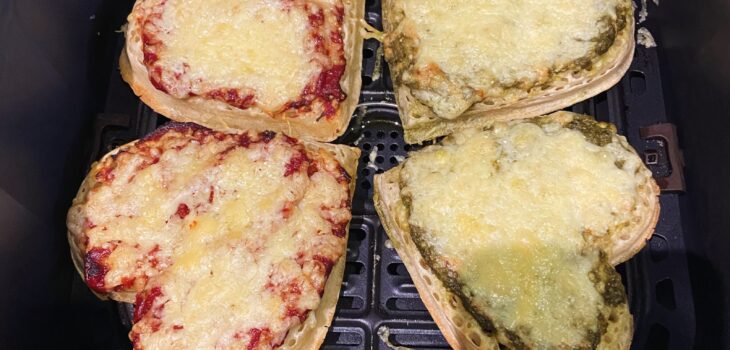
The photos don’t really do these justice, so don’t let them put you off! These are ready after ten minutes in the air-fryer. The perfect substantial snack, quick lunch or kids tea!

We used some funky heart shaped crumpets but regular ones will be perfect too. These went down very well with my two boys. Here’s two different toppings to play with…

Ingredients:

Crumpets

Pesto

Tomato purée

Tomato ketchup

Grated cheese

Step 1: If going for a tomato base, combine a tablespoon each of tomato purée and ketchup into a smooth paste. Next spread this over the holey surface of your crumpets (this is enough for two or three crumpets). If opting for pesto then spread a teaspoon of pesto over the holey top of each crumpet.

Step 2: Sprinkle each liberally with grated cheese. We went for an extra mature cheddar.

Step 3: Pre-heat your air-fryer to 180c. When ready, carefully transfer the crumpets, cheese side up, and cook for ten minutes. Serve immediately.

Posts pagination

Previous page 1 … 7 8 9 10 11 … 68 Next page

Newsletter

Blog Search

Blog Categories

  • Air fryer 2
  • Alcohol 12
  • Baby Weaning 24
  • Baking 74
  • Beef 18
  • Bread 1
  • Brunch 7
  • Cake 47
  • Chicken 48
  • Christmas 14
  • Cocktails 9
  • Dairy-Free 228
  • Dessert 37
  • Duck 1
  • Fish 12
  • Gluten-Free 254
  • Instant Pot 19
  • Lamb 6
  • Lunch box fillers 2
  • Ostrich 1
  • Pasta 4
  • Pescatarian 13
  • Pork 38
  • Rabbit 1
  • Salad 9
  • Shellfish 10
  • Soup 1
  • Turkey 10
  • Uncategorised 6
  • Vegan 136
  • Vegetarian 243

Socials

  • Facebook
  • Twitter
  • Google
  • Linkedin
  • Instagram
  • Pinterest
  • Youtube
Theme by Colorlib Powered by WordPress
Back to top