Skip to content
The Food Wife logo
  • Home
  • About
  • Blog
  • Contact
Site Search

Jaffa Cheesecake

  • 9th October 2019
  • by thefoodwife

Serves 12

Here is a cheesecake recipe inspired by the classic jaffa cake. There are several steps to this and its best to start it the night before you intend to eat it in order to ensure the jelly layer is fully set.  

For an added citrus hit you could stir a tablespoon of marmalade into the jelly when it is still liquid.  And if you want to make it a bit boozy use an orange liqueur to taste, in place of the orange extract.

I’ve included some tips to help you if things don’t quite go to plan (they should save you from any disasters, but if worst comes to worst it’ll still taste good!) 

I made this gluten-free by using appropriate biscuits. 

Ingredients:

For the base:

200g digestive biscuits, crushed to resemble bread crumbs (gluten-free if required)

75g butter, melted 

For the cheesecake filling:

150g best dark chocolate (minimum 60% cocoa solids) 

500g mascarpone (bring out of the fridge 20 minutes before using)

200ml double cream (bring out of the fridge 20 minutes before using)

100g icing sugar

2 tsp orange extract

For the orange jelly:

135g orange flavoured jelly block, cut into small pieces 

Boiling water

For the ganache topping:

100g best dark chocolate (minimum 60% cocoa solids) 

100ml double cream

Step 1: Start the night before by making the jelly disc. Melt the jelly in boiling water (make up to 300ml – although if you want a thinner layer of jelly try 225ml) and then pour in to an 8 inch cake tin lined with clingfilm.  Allow to set, by transferring to the fridge once cooled.

Step 2: The next day, make the base by mixing the digestive biscuits with the butter until combined and then press in to the base of a nine-inch spring release cake tin. Level out with the back of a spoon and put in the fridge for at least 20 minutes to set.

Step 3: Begin to prepare the filling by carefully melting the dark chocolate in a bowl over simmering water. Ensure the base of the bowl does not touch the water, nor should any liquid go in to the chocolate otherwise it will seize up and you will have to start again. Once melted, remove the bowl from the heat and allow to cool.

Step 4: Whist the chocolate is cooling, in a separate bowl, sieve the icing sugar and add the double cream and orange extract. Whisk until it forms stiff peaks.

Step 5: Only once the chocolate has cooled but still liquid (this is very important as you do not want the chocolate to seize up) beat in the mascarpone cheese using a spoon or whisk. Mix until smooth and combined evenly.  If the mix does seize up (it will remain pale coloured and have tiny flecks of solid chocolate through it) sieve in two tablespoons of cocoa powder and beat until smooth.

Step 6: Gently fold in the orange cream mixture until smooth.

Step 7: Spread evenly over the set biscuit base, loosely cover and return to the fridge to set.

Step 8: To make the ganache topping, break the remaining dark chocolate into small pieces and place in a bowl.  Heat the remaining cream until just boiling and then pour over chocolate.  Leave to rest for a couple of minutes and then stir; the chocolate should melt into the cream and begin to thicken as it cools. (If the ganache splits, try adding a little bit of warm milk and whisking until smooth.  You can eat the ganache split it just isn’t as aesthetically pleasing!)

Step 9: Carefully transfer the jelly disk onto the top of the cheesecake.  Once the ganache is cool, spread evenly over the jelly and cheesecake top and return to the fridge to fully set (about an hour).  

Once ready to serve, carefully remove from the tin but allow to be out of the fridge for 20 minutes to soften slightly before serving. 

What’s Cooking?

  • 21st May 201923rd May 2019
  • by thefoodwife

If you’re looking for some culinary inspiration here’s a round up of some of the recipes from The Food Wife that we’re having this week. 

Pizza, The Food Husband’s favourite, has been off the menu for a while as he’s eliminating gluten from his diet, but I made up a batch of sourdough pizza bases with the addition of two teaspoons each of garlic powder and dried oregano to the dough. I had a go at a potato base for a gluten-free version, which was a big hit (think giant gnocchi base). Watch this space for the recipe as I try to recreate it next time pizza is on the menu.  

We’re still working our way through the jars of wild garlic pesto I made recently, and tomorrow we’ll be enjoying it simply with pasta and green beans for a light and summery meal.  I’ll also be adding it as a topping to a salmon fillet before roasting it in the oven another evening this week.

The Food Baby has not been forgotten either. Still in the quest to smuggle more vegetables into his diet (he can spot a pea from the other side of the room) I’ve batch-cooked a tomato and carrot pasta sauce and a three bean chilli along with a double batch of cheese and vegetable scones for the freezer. This time using grated parsnip, carrot and broccoli along with chopped spinach and sundried tomatoes, he devours them without the knowledge that I’m getting sneaky veg inside him!

And finally if, like me, you love rhubarb, then you’ll be loving the abundance of it at the moment. Why not give my rhubarb crumble traybake a go, or if you can wait a while, have a go at my rhubarb gin. It’s worth the wait!

Banana and Chocolate Loaf

  • 9th April 20199th April 2019
  • by thefoodwife

Serves up to 12

Many fruit bowls will gather a collection of over-ripe bananas from time to time and making a loaf cake with them is a great way of using them up, especially if, like me, you will only eat a banana when it’s slightly green; a hint of brown and I can no longer palate them raw.

Using the bananas makes for a wet batter, but allows you to use less fat and sugar than a standard cake. I have chosen to pair the sweet banana with chunks of bitter dark chocolate. Not only a great combination but it also gives you delicious pools of chocolate throughout the cake.

Today is the Food Husband’s birthday, and so this was one of the cakes he took into work, along with a Lemon and Blueberry Polenta Cake.

  • Ingredients:
  • 110g softened butter
  • 60g caster sugar
  • 2 large eggs, beaten
  • 2 large/3 medium/4 small very ripe bananas, mashed
  • 1 tsp vanilla extract
  • 170g self raising flour
  • 100g dark chocolate, chips or broken into pieces

Step 1: Cream together the butter and sugar.

Step 2: Add the eggs, one at a time, beating the mix after each addition. Add the vanilla extract.

Step 3: Fold in half of the mashed banana, followed by half of the flour. Repeat with the remaining banana and flour.

Step 4: Fold through the chocolate pieces.

Step 5: Pour into a lined 2lb loaf tin and bake in a preheated oven at 180c (fan) for 50 mins, or until golden, risen and springs back to the touch.

Step 6: Remove from the oven and allow to cool for half an hour before transferring (out of the tin) to a wire rack.

Store in an airtight container and it should last a few days. Excellent served with a cup of tea or coffee.

(BLW) Sugar-free Blueberry Muffins

  • 30th January 201930th January 2019
  • by thefoodwife

Makes 12

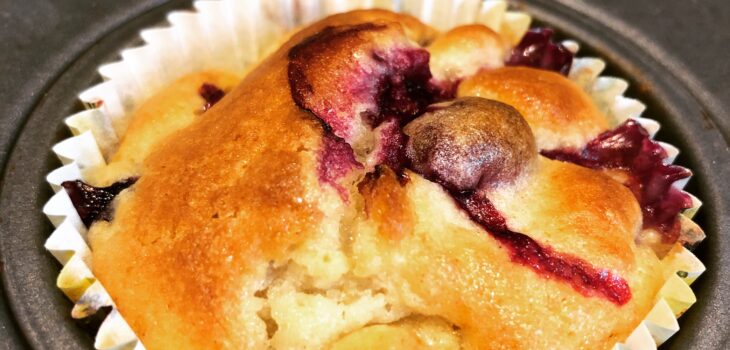
Recently, trying to get the Food Baby to eat any fruit has been quite a mission. Quite a change from just a few weeks ago. In fact, his recent teething has sometimes made him not want to eat anything much. These however went down very well, he devoured three in about 10 minutes and I was comforted to think he’d had both banana and blueberries.

All the sweetness here comes from the fruit, with no added sugar (although if you are making these for yourself then you may well want to add some; try 50g in step 1). There is some nice texture from the addition of oats and if you want to make these dairy free, simply use a suitable milk replacement.

  • Ingredients:
  • 1 large ripe banana, mashed with a fork
  • 50g rolled oats
  • 125g self-raising flour
  • 60g blueberries, dusted in a little flour
  • 120ml milk
  • 60ml vegetable oil
  • 1 large egg, beaten
  • 1 tsp vanilla extract

Step 1: Combine the banana, oats and flour in a bowl. Add the blueberries.

Step 2: Separately mix together the wet ingredients and then fold gently into the dry ingredients.

Step 3: Spread equally between a 12-hole muffin tin, lined with cases.

Step 4: Bake at 200c for 20 minutes and leave to cool on a wire rack.

Whilst still warm these will stick to the cases, but should peel off cleanly once cool.

Once cool, store in an airtight container for a couple of days (or pop in the freezer).

New Year Rocky Road

  • 1st January 20191st January 2019
  • by thefoodwife

Makes approximately 30 pieces

I’ve posted a recipe for rocky road before, and called it my ultimate rocky road. It is seriously good but this new year I went down a different path. Inspired by a strangely moreish delicacy of chocolate covered gummy bears I discovered in New York five years ago, this rocky road features a layer of gummy bears that make a more fruity, chewy hit in each piece.

These were taste-tested at a party between Christmas and New Year (hence their name) and went down very well, at least I assume they did as every piece disappeared!

  • Ingredients:
  • 200g dark chocolate, melted
  • 200g milk chocolate, melted
  • 100g white chocolate, melted
  • 100g butter
  • 2 tbsp golden syrup
  • 100g gummy bears
  • 100g maltesers
  • 100g munchies
  • 50g mini marshmallows
  • 10 rich tea biscuits, roughly crushed

Step 1: Have your three molten chocolates in separate bowls.

Step 2: Melt together the butter and syrup (I did this in the microwave, but you could do this on the hob) and then split between the dark and milk chocolate and stir until smooth.

Step 3: Line a shallow baking tray (such as a brownie pan or swiss roll tray) with greaseproof paper.

Step 4: Spread the gummy bears across the lined tray. Pour half the dark and half the milk chocolates over the gummy bears.

Step 5: In a bowl combine the crushed biscuits, maltesers, munchies and marshmallows with the remaining dark and milk chocolate. Pour over the gummy bears and chocolate and spread out until even.

Step 6: Use a spoon to drizzle the white chocolate over everything and allow to set (in a cool room or fridge) and then slice into squares (this is best done when not fully set).

I keep these in the fridge, wrapped either in tin foil or in an air tight container.

Posts navigation

1 2 3 4 5

Newsletter

Follow The Food Wife

Facebook
Twitter
Instagram

Blog Search

Blog Categories

  • Alcohol 7
  • Baby Weaning 24
  • Baking 43
  • Beef 14
  • Cake 25
  • Chicken 24
  • Christmas 1
  • Cocktails 4
  • Dairy-Free 130
  • Dessert 10
  • Fish 4
  • Gluten-Free 136
  • Instant Pot 10
  • Lamb 4
  • Ostrich 1
  • Pescatarian 5
  • Pork 19
  • Rabbit 1
  • Shellfish 6
  • Turkey 4
  • Uncategorised 4
  • Vegan 80
  • Vegetarian 141
Theme by Colorlib Powered by WordPress